

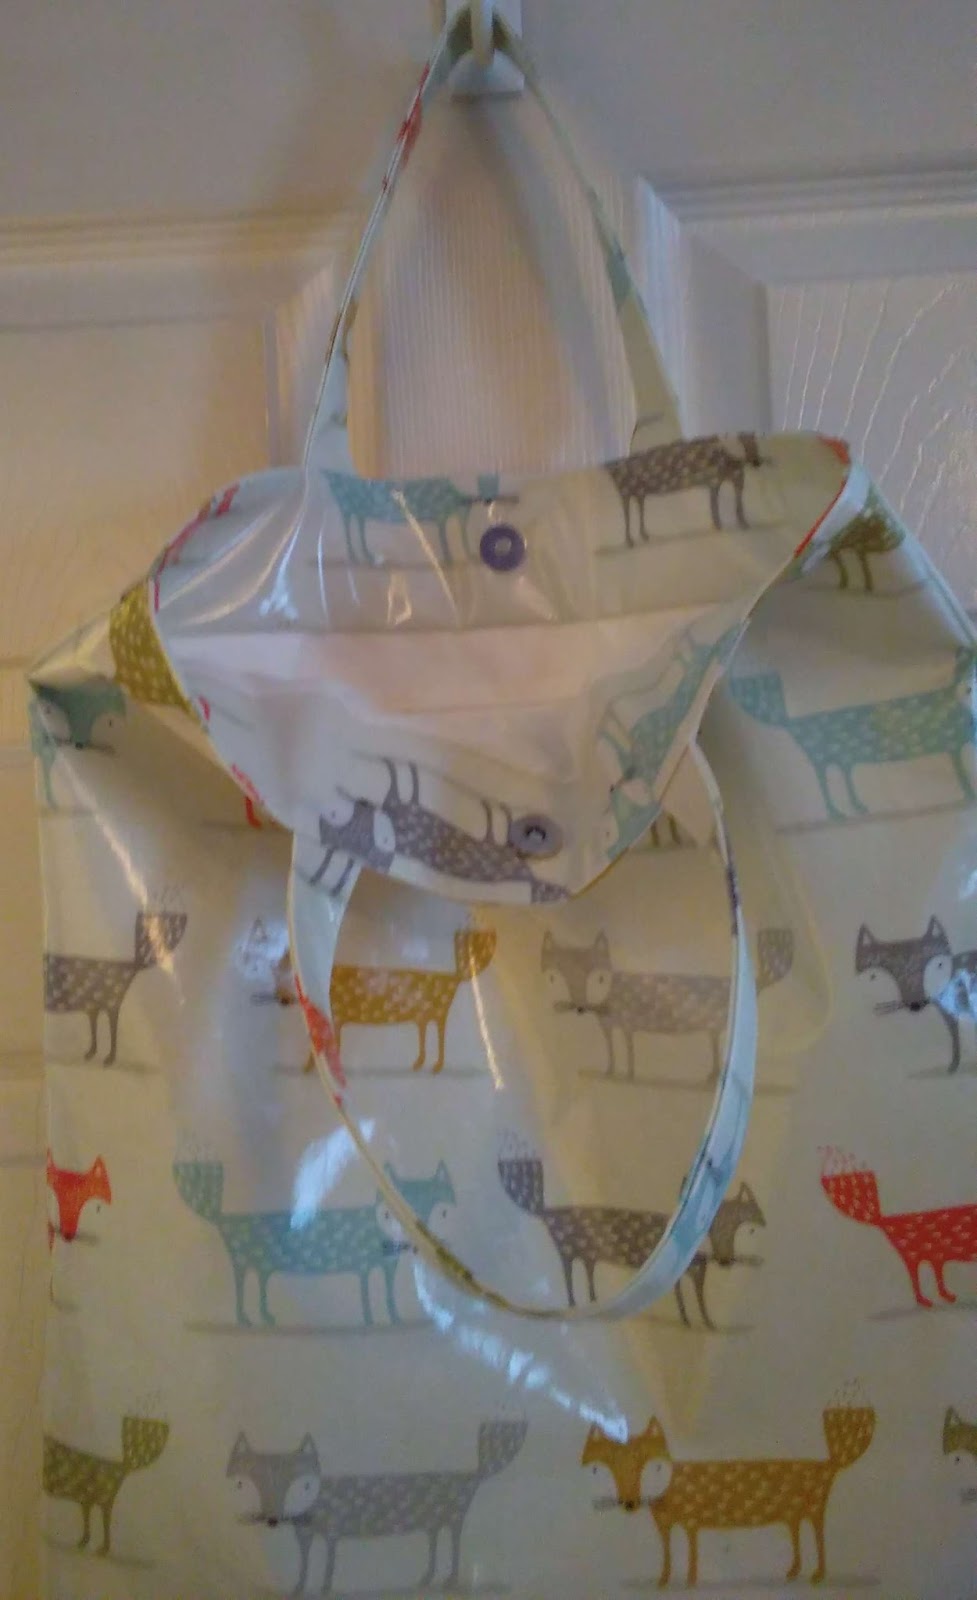
This is my 52nd and last bag of 2016. I started the year with a shopping bag and developed a liking for PVC right at the start, so I decided to end with a bag which combines both. This PVC bag is quite straightforward in design – just a couple of rectangles joined together with handles. For a really quick version, it could be made unlined. I added a lining, an internal zip pocket and a magnetic clasp. As it’s made of PVC, it can just be wiped clean, so there’s no excuse for a mucky bag.
The PVC was
a remnant from my local home furnishing store.
I can often get bargain remnants there because they find it hard it to
sell small quantities of PVC (this was half a metre). I think PVC is sturdy
enough not to need any wadding or interfacing, but I added a medium weight
interfacing around the zip and on the pocket to give the lining extra
stability. I used a polyester lining.
You would
need half a metre of PVC and lining and a 7”/18 cm strip of interfacing to make this bag.
The finished
size is approximately 17”/43 cm high (plus handles) and 14”/35.5 cm wide.
Skill level: Intermediate
as PVC isn’t the easiest fabric to work with.
I used my
normal stitch length (2.5) for the seams and 5 for top stitching. I used ½”/12 mm seams for the outer bag and
slighter wider seams for the lining.
I have
included metric and imperial measurements but they are not exactly
interchangeable, so you should stick to either one or the other.
Skills used in this project:
- Using PVC
Step 1: Cutting out
Cut out the
following:
15” x 18”/38 cm
x 46 cm Outer bag sides (cut 2 PVC)

16” x 4”/40.5
cm x 10 cm Handles (cut 2 PVC)
15” x 3”/38
cm x 7.5 cm Upper internal bag (cut 2 PVC)
15” x 15¾”/38
cm x 40 cm Lower internal bag (cut 2 lining)
10” x 7”/25.5
cm x 18 cm Internal pocket (cut 2 lining, 2 interfacing)
10” x 3“/25.5
cm x 7.5 cm Lining stabiliser (cut 1 interfacing)
9”/23 cm zip (I used an N3 zip from a continuous roll)
Magnetic
clasp & small off cut of bag foam/wadding for reinforcement
Step 2: Making the outer bag

Place the 2
PVC outer bag pieces right sides together and sew round the sides and
bottom. Don’t forget to check that the
pattern is the right way up.
There is no
need to turn it right side out until later.
Step 3: Making the handles


Fold the handles in half lengthways to find the centre. Fold each side in so that the edge is against
the fold line. It will now look like
bias binding. Fold in half and top
stitch close to the edge along each long side of the handle. This will hold it together and make it look
professional.

Sew each end of the handles to the top of the outer bag about 4”/10 cm
from the nearest side seam, making sure the handle isn't twisted. It should curve downwards as shown in the
photo.
Step 4: Sewing the internal pocket
 |
| Interfacing attached to bag lining along one of the shorter sides |
Attach the interfacing to the wrong side (if there is one) of the pocket
pieces and bag lining.
Pin one pocket piece to one of the bag linings, right sides together,
with the long side of the pocket along the top edge of the lining, to match the
position of the interfacing on the bag lining.

Draw a ½” x 8”/12 mm x 20 cm rectangle along the centre of the pocket interfacing about 1½"/4 cm from the top edge.
Sew around this rectangle through all the
layers that you have just pinned together.

Cut a slit in this rectangle (as shown in the photo) making sure not to
cut the stitches.

Push the pocket through this ‘letterbox’, shape in the lining
so that it sits flat and press. You will now have a neat opening to attach the
zip.

Pin the zip to the pocket so that the right side shows through the
aperture in the bag lining. Sew all
round the zip.

Pin the remaining pocket piece to this one, right sides together and
sew around the sides and bottom, keeping the bag lining out of the way as you
do not want to sew through this.
Sew along the top of the pocket and the bag lining to hold the pocket
firmly in place.
Step 5: Attaching the magnetic clasps

One side of the magnetic fastener needs to be attached to one of the
upper internal bag PVC strips.
Fold the
fabric in half horizontally and then vertically to find the centre and
mark. Using the washer, mark where the prongs
will go through the fabric, then carefully make a small slit along each of
these marks using a stitch unpicker.
Cut a small piece of foam to roughly the same size as the washer and
make a slit for each of the prongs.

Push the ‘legs’ through from the right side of the PVC, through the
foam and the washer and open them outwards to secure.
Do the same with the other part of the magnetic clasp and PVC strip.
Step 6: Making the inner bag

Sew one PVC
upper internal bag to one lining piece, right sides together. Make sure that any pattern will be the right
way up.
Do the same
for the other PVC strip and lining.

With right
sides together, sew the side seams. Do
not sew the bottom seam at this stage.
Step 7: Assembling the bag

With the PVC
outer bag wrong side out, place the lining inside, right side out – the inner
and outer bags will now be right sides together with only the handles between
them.
Keeping the
handles between the fabric sew around the top of both parts of the bag to join them.
Turn through
so that the lining is inside and the PVC outer bag has its right side facing
out.
Top stitch around the top edge.
Sew the
bottom edges of the lining together.

Well done,
you’ve finished the bag. Time to go sale
shopping to test it out!
In this project I learnt:
- This PVC was harder to work with than others I have used. PVC seems to vary enormously in thickness and workability. My sewing machine hated this one. I tried the general purpose foot, zip foot and roller foot and none of them worked. As a last resort, I tried the walking foot which worked brilliantly. One of the things I’ve learnt this year is that there is usually a solution – it’s trial and error until you find it. Over the year, I’ve learnt that a really long stitch works best when top stitching PVC.
- When sewing up the lining, I usually partially sew the bottom seam and then sew up the gap when the bag is almost finished. However, I have found that polyester lining often frays when I try to push the PVC through a too-small gap. I decided this time to leave the whole bottom seam open and sew it up afterwards. This was much better – no fraying and the finish was much neater than usual.
No comments:
Post a Comment