About this blog

I make bags and post tutorials on how to make them. I'll tell you what went well and warn you about any disasters.

Monday 29 February 2016

Bag #9: Hands Free Bag


I wanted to make a small pouch for essentials which I could hang across my body and forget about.  I made it in this glamorous faux leather to make it more like an evening bag.  This is what I would take out for the evening if dancing or alcohol were involved - no more dancing round my handbag!  I wouldn’t have to worry about my valuables as I would be wearing them. The finished size is 6" across by 7".

This was very simple to make because the bag was made in one piece.  The only tricky part was topstitching along the second side of the zip.  It took a lot of concentration to make sure that I didn’t catch any other part of the lining as I sewed.  I love this bag so much that as soon as I have time, I'm going to make another in an everyday colour for daytime use.

I used ¼” seams throughout and my normal stitch length of 2.5 for seams and 3 for topstitching.


Skills used in this project:
  • Working with faux leather
  • Keeping it simple
  • Using eyelets
  • Using rivets


Step 1: Cutting out

From the faux leather, cut out:

6 ½” x 14 ½” Bag body (cut 1)
1 ½” x 2 ½” Zip tabs (cut 2)
2” x 48” strap (cut 1)

From the lining, cut out:

6 ½” x 14 ½” Bag body (cut 1)

From medium weight sew-in interfacing:

6 ½” x 14 ½” Bag body (cut 1)


Trimmings

2 rivets (I used 6 x 5 mm - about ¼" nickel rivets)
2 eyelets (I used a 14mm kit - about ⅝")
5” zip (I used an N5 zip cut to size but it was really a bit bulky for this small bag – N3 would be better)
½” x 15" binding or ribbon (this does not need to be cut on the bias)


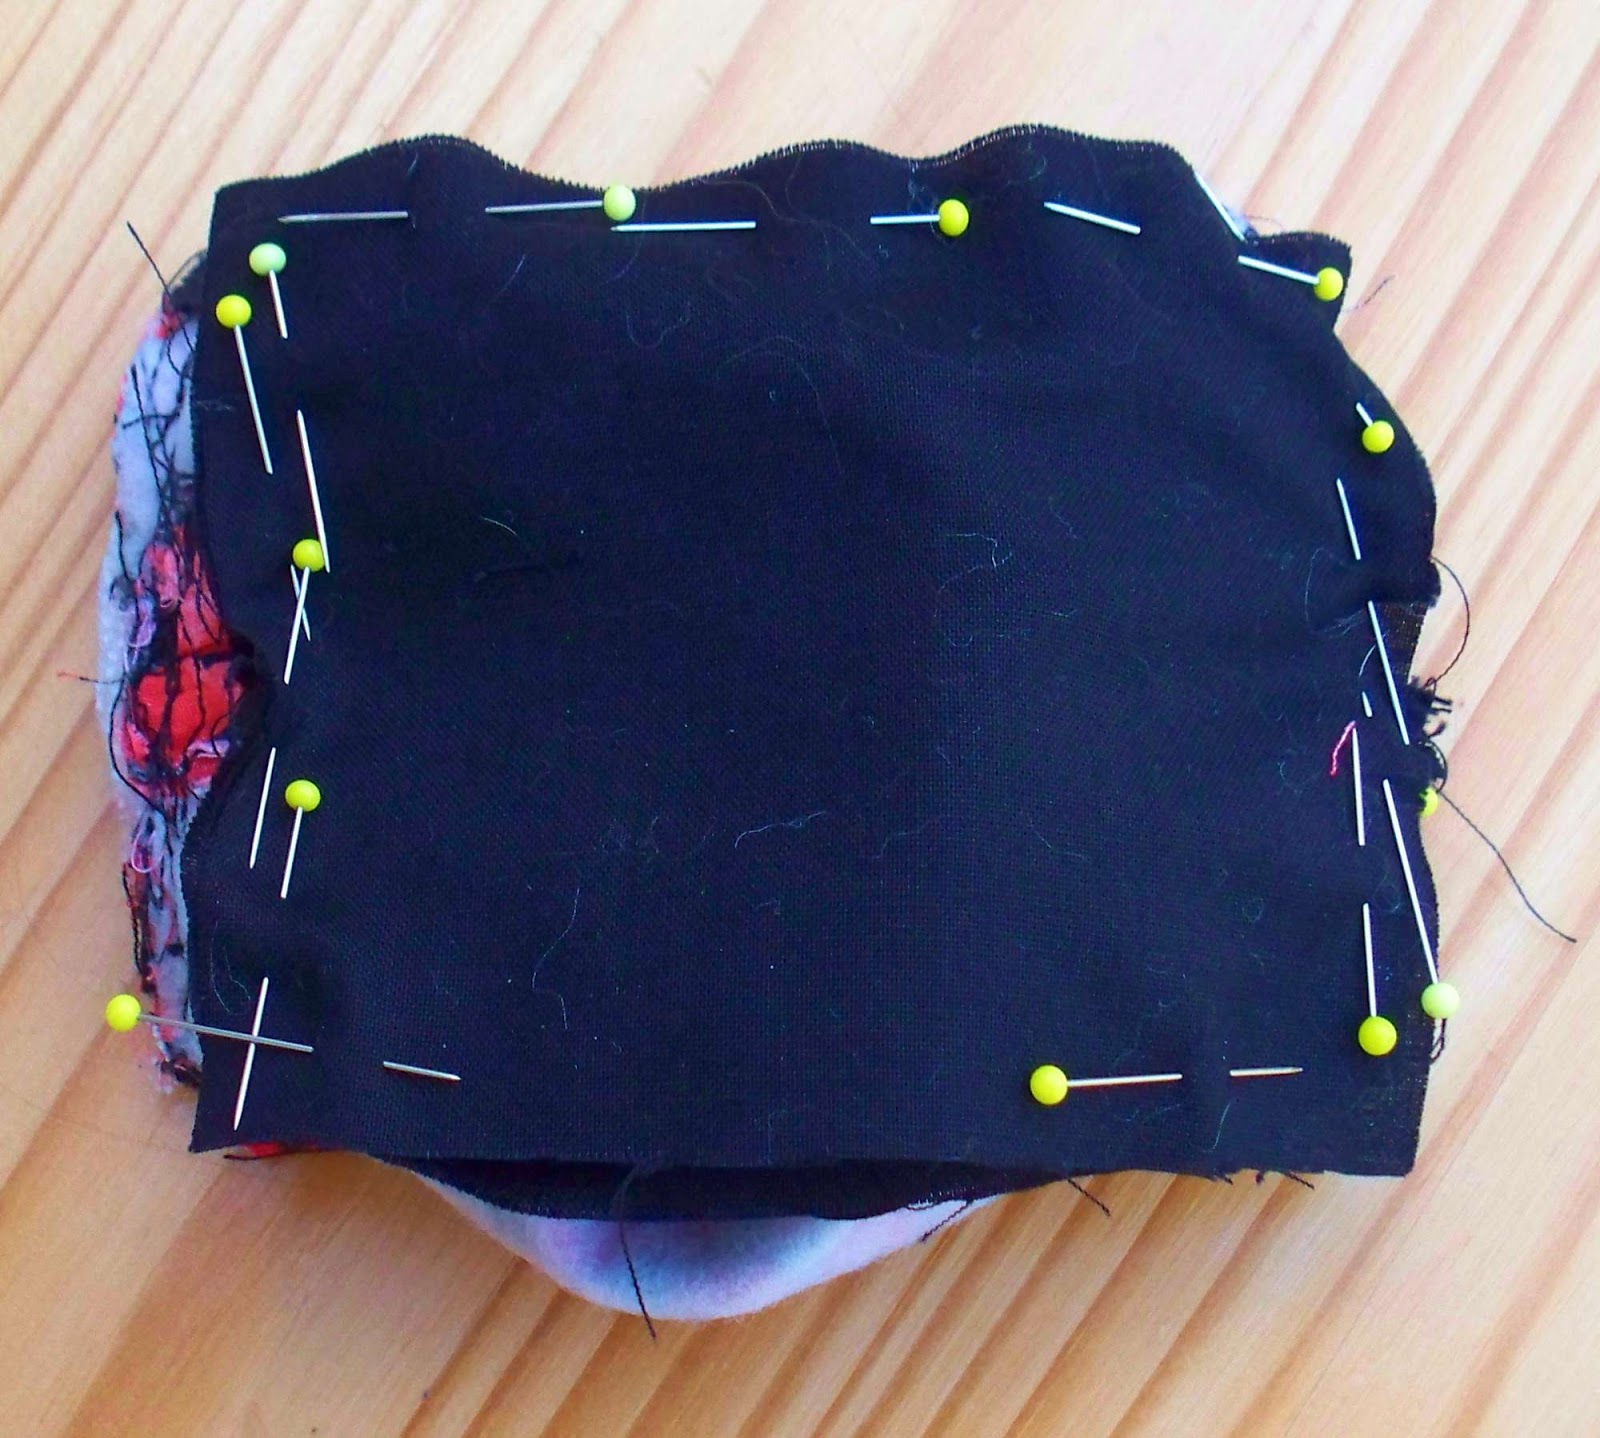
Step 2: Inserting the zip


 Make the zip tabs by folding the tab fabric in half (narrow end to narrow end) and turning under the raw edges at the ends by ¼”.  Place a tab at each end of the zip, overlapping it by ½” and top stitch across making sure that both top and bottom of the tab are sewn.  The will make the zip really secure.  Do not pin the faux leather as this will leave visible marks – it is better to use clips to hold the fabric in place while sewing.  I use Clover Wonder Clips but any clip would do, even a hair clip.


Clip the interfacing to the wrong side of the faux leather bag body.  Clip one short end of the bag body/interfacing to the zip, right side of zip to right side of faux leather.  Place the lining on the other side of the zip and sew the zip in place along one edge. Top stitch along the right side of the fabric, through all layers to create a crisp edge along the side of the zip.

Sew the other end of the bag body to the zip in the same way, making sure that the fabric is not twisted. Top stitch along the edge of the zip making sure not to sew over any other part of the bag while doing so.


Step 3: Creating the bag


With right sides facing inwards, fold the bag so that the top edge of the zip is approximately 1½” from the top.  Make sure that the zip is partly open so that the bag can be turned through.  Sew along both side seams.  Sew binding or ribbon over the side seams to neaten. As these are straight seams rather than curved, it does not need to be bias binding – any strip of co-ordinating fabric or ribbon will do.  I used ribbon-type bias binding as I already had some in my stash that co-ordinated with the lining. Turn bag so that right side is facing out.


Step 4: Making the eyelets


Large eyelets need to be created in both corners at the top of the bag for attaching the strap.  Follow the instructions on the eyelet packaging.  I used a kit which contained a cutting tool to cut holes the right size for the eyelets.  This easily cut through all the layers of the bag, but as there were several layers, I had to do a fair bit of hammering. I then put the eyelet in the tool which came with the kit and hammered it until it was secure.


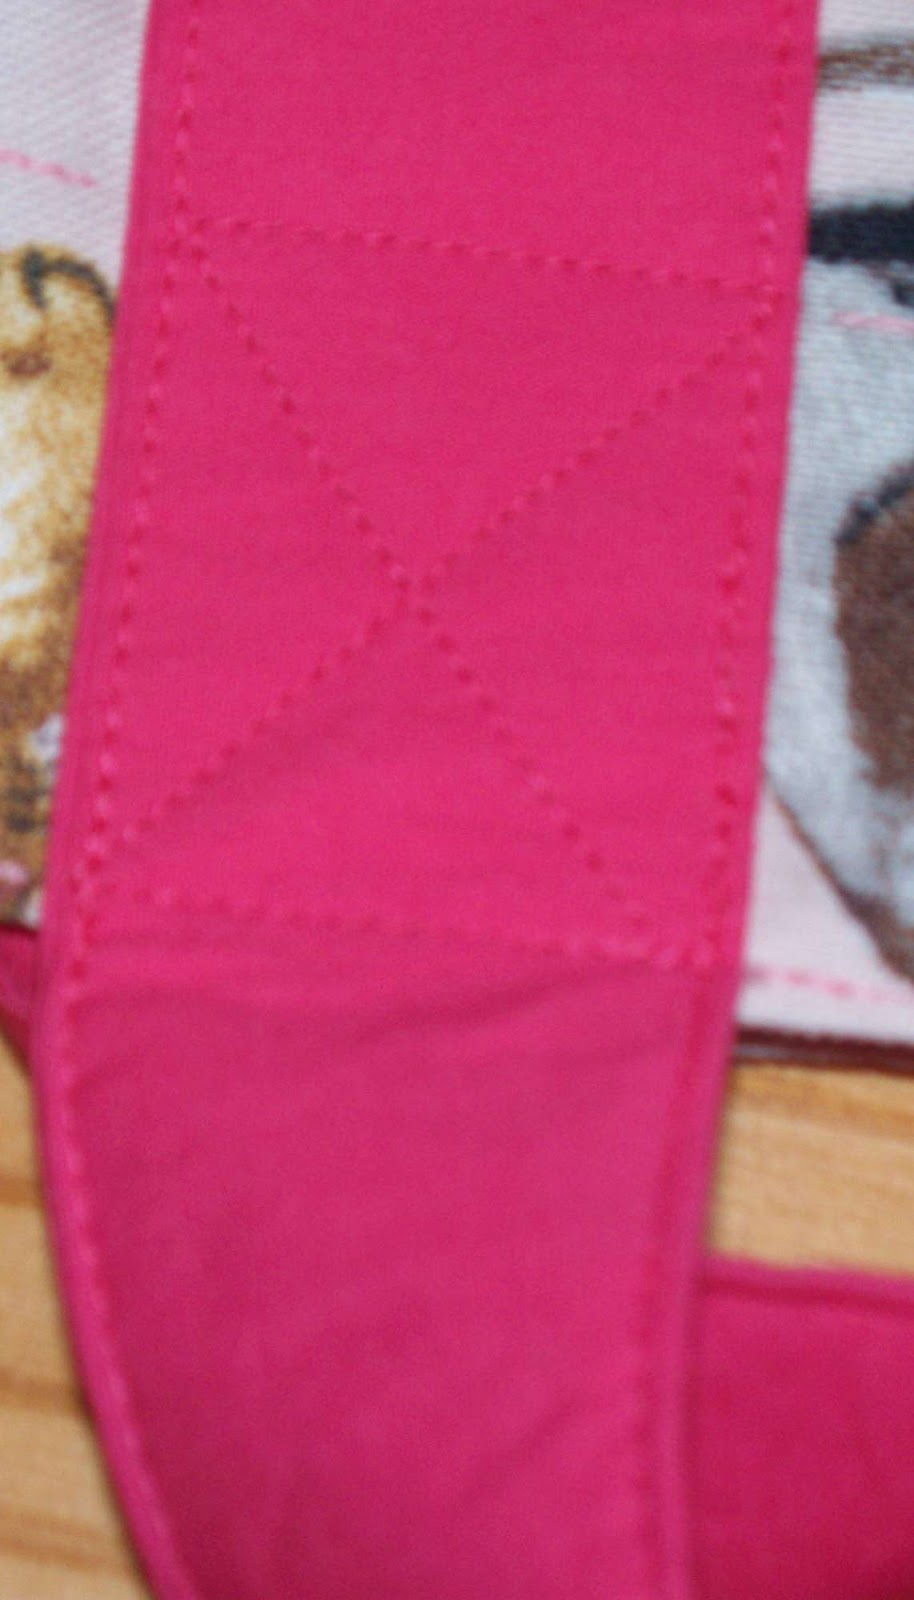
Step 5: Making the strap


Fold the faux leather strap fabric in half lengthways and then fold each side inwards so that it looks like bias binding. Sew along the long open edge so that the raw edges are hidden inside the strap. 

Pass one end of the strap through one of the eyelets, fold the raw edge at the end over and secure it with a rivet about 2” above the eyelet.  If you do not want to use rivets, sew the end of the strap securely in place.


I bought a rivet kit which contained a round anvil, cylindrical setter tool and rivets. Rivets come in various shapes and sizes. . I used double sided rivets but that isn't essential. 


You need to choose a rivet with a shank which is about the same length as the thickness of all the layers of the fabric it will have to go through.  I choose the smallest I could get as this fabric was quite thin despite the number of layers it had to go through.   First of all, you need to decide where you want the rivet to be and make a hole using a fabric punch or awl.  Rivets are in 2 parts.  Poke the part with the long shank through the hole you have just made from the right side of the strap. The end of the shank needs to be long enough to pass all the way through but only just otherwise it won't fit tight. Fit the other part over the shank.  Place the 'good' end on the anvil and, using the setting tool over the other end, hammer the two parts of the rivet together.  It is recommended that you use a special hammer but I used a normal hammer and was happy with the results.

At the other end of the strap, insert a slider so that the strap length can be adjusted.  A slider isn’t essential, but without it, the strap will not be adjustable so you will have to try it on and decide how long you want it to be. 

To attach the slider, make sure the strap isn't twisted and then attach the slider so that the bar across the middle is on the rear of the strap.  Pass the end of the strap through the eyelet, over the top of the bar and down so that the raw edge will be hidden between the two parts of the strap.  


Secure the end with a rivet which will only go through the back and turned under end of the strap (not through the front part) or by sewing. 


In this project I learnt:

  • Faux leather is a description that can be applied to a wide variety of fabrics which vary enormously.  When buying online, it can be very hard to know what you will actually be getting. I originally planned to use wadding because the faux leather seemed quite thin, but it was too bulky and I swapped it for interfacing.  The faux leather had a woven backing and was quite thin and flexible, making it easy to sew.  The eyelet cutter easily cut through all the layers at the same time, but faux leathers vary enormously.  A thicker one would have to be cut in stages and wouldn’t really need an interfacing. The faux leather was easy to work with, the only problem being that I couldn’t use pins as these would have left permanent holes.  Instead I used my Clover wonder clips which always do a magnificent job.
  • Using large eyelets through several layers of fabric requires practise. The trick with the eyelets was making sure that the eyelet hole was cut cleanly.  I practised on some scraps of fabric and didn’t use enough pressure. I tried again and the second cut wasn’t in exactly the same position.  I ended up with an oval shape and when I inserted the eyelet, part of the hole was visible at the edge.  I made sure that, when I made the bag, I didn’t make this mistake again.
  • Rivets come in lots of different shapes and sizes. I tried to use a fabric hole punch to make holes for the rivets but I hadn’t realised that they don’t work on woven fabrics and this had a woven backing.  Instead, I used a fabric awl to pierce a hole through all the layers of the strap and then fitted the rivet and hammered it in place. I didn’t realise that rivets come in many sizes.  The most important thing is to choose rivets with a shank depth that matches the thickness of the fabric.  If they are too small, then they won’t lock into place and if they are too big, they will be loose and wobble around. 
  • Keeping it simple and uncomplicated is worth the effort and I think I'm improving at this (and improving is the whole point of this year's challenge).  This was another attempt at making a simple bag.  I thought about putting in several zips and creating pockets on both sides, but it was more of a challenge to keep the clean lines and instructions to minimum.  I'm very happy with the way it turned out.  Now I'd like to make one is a less dramatic colour for everyday use.  

Sunday 28 February 2016

Your suggestions for an Easter bag


I found this lovely Easter fabric in my stash and wondered whether anyone had any suggestions for a bag using it?  Please comment and let me know if you have any ideas.  The print is quite large, so it wouldn't be suitable for a small bag.

Monday 22 February 2016

Bag #8: Mini Clutch Bag


After spending most of the last week in bed with a virus, I wanted to make something fairly straightforward which still gave me the chance to develop my skills and experience.

Having never worked with faux suede, I wasn't sure what to expect. I thought it might be heavy like denim, but actually it felt like a medium woven fabric and sewed beautifully. 

I decided it was time to try making a handbag as this was something I had never done. A clutch bag was a good place to start as it is the simplest type of handbag and doesn’t even need a strap (although I was tempted).


I don’t like large handbags despite the recent trend for enormous bags.  How much does a person really need to carry?  This clutch bag is very small (finished size 8” x 6”) – just big enough for a small purse, credit cards, phone and not much more.  However the shape would work just as well for a larger size.

I used ¼” seams throughout and, as usual, my sewing machine's normal stitch length which is 2.5, increasing to 3 for top stitching.


Skills used in this project:
  • Working with faux suede
  • Using foam stabiliser
  • Keeping it simple
  • A hidden pocket


Step 1: Cutting out


From the faux suede, cut out:
8 ½” x 12” (cut a triangle shape from the top 3”)  Front (cut 1)
8 ½” x 6” Back (cut 1)

From the foam stabiliser, cut out:
Front (cut 1) as above
Back (cut 1) as above

From the lining (I used a polyester dress lining), cut out:
Front (cut 1) as above
Back (cut 1) as above
6” x 9” Pocket (cut 1)

6” Zip (I used N3 size)
6” x 2” medium weight sew-in interfacing (cut 2)
Magnetic clasp  and small circle of foam slightly larger than the clasp


Step 2: Making the pocket


Pin the top (6” side) of the pocket to the back lining, right sides together, 5” from the bottom.
I put mine about 4" from the bottom and this was too low, so I have changed it to 5" for this tutorial.


Pin the interfacing to the wrong side of the back lining and wrong side of the pocket, matching the top of the pocket with the top of the interfacing. The interfacing goes across the bag.  You will have a sandwich with interfacing, back lining, pocket lining and then the final piece of interfacing.

Draw a rectangle ½” deep and 5” wide on the interfacing where the zip will go. This should start about 1” below the top of the pocket.

Sew around the edges of the rectangle.  

Cut a slit along the length of the rectangle and snip into the corners. Do not cut the stitches. 

Post the pocket through the slit and press the fabric flat.


Pin the zip through all these layers so that the right side of the zip will be visible on the right side of the back lining. Sew.  Press.

Fold the pocket in half by bringing the bottom edge up and pinning it to the top and sides of the pocket. Sew around the sides and top making sure not to sew the bag lining to any of these pocket edges.


Step 3: Attaching the smaller part of the magnetic clasp


Measure 1½” from the tip of the triangle at the top of the back lining.  Fold the fabric in half to find the middle.  This is where the centre of the lighter part of the magnetic clasp will go. 
The clasp goes on the right side of the lining. Mark where the 2 prongs for the clasp will go and snip the fabric.  Make sure not to make the snip holes bigger than the prongs or the clasp will be too loose.  Push the prongs through the lining and snip and push them through the foam circle. Press the prongs tightly outwards so that the clasp is secure.


Step 4: Creating the bag back


Pin the back foam to the wrong side of the back faux suede and pin the right side of the back lining to the right side of the faux suede.  Sew all around (through all 3 fabrics) leaving a gap along one side of about 4” for turning. Trim the foam back to the seam. Turn out and hand sew the gap.


Step 5: Attaching the larger part of the magnetic clasp


Pin the front foam to the wrong side of the front faux suede.  Find the centre widthways and measure 3” from the top of the front.  Mark and snip the faux suede and foam where the prongs will go through. Push the prongs through and press them firmly outwards.


Step 6: Creating the bag front

Pin the right side of the front lining to the right side of the faux suede.  Sew all around (through all 3 fabrics, including the foam) leaving a gap along one side of about 4” for turning. Trim the foam back to the seam. Turn out and hand sew the gap.


Step 7: Assembling the Bag

Top stitch along the top of the front through all layers.


Place the front over the bottom of the back, lining sides together and match them up so that the lining does not show.  Top stitch all the way round, joining the 2 bag pieces together as you go and continuing to top stitch around the triangle shape back to where you started. 


You are now ready for an evening out with your sophisticated clutch bag.


In this project I learnt:    
  • Faux suede is easy to work with – just like any other woven fabric.  I wasn’t sure if the pins would leave holes, but no, it was just like working with cotton and the sewing machine loved it. I shall definitely use it again because it makes the bag look so professional – no one would know I hadn’t bought it unless they looked closely.
  • Foam stabiliser is much better for shaping a bag than wadding or interfacing.  I also used it when attaching the metal clasps and it held them firmly in place. I have seen a lot of patterns and tutorials that use bag foam but I’ve never been able to get it locally, then just after Christmas, my local branch of Hobbycraft had it in stock and I snapped it up.  It is much firmer than wadding and would enable a bag to stand up by itself and retain its shape while still feeling soft. It was fusible but it needs higher temperatures that I dared use to fuse successfully – I didn’t want to risk any hotter in case I ruined the faux suede.  The foam was very bulky around the seams, so I cut it back as close to the stitch line as I could and that prevented too much bulk.  Top stitching around the seams also kept them fairly flat.  If I can continue to get it, I shall certainly use it as my first choice stabiliser.  The only drawback is that it is more expensive than wadding or interfacing.

  • I used a hidden vent pocket in an earlier bag but didn’t attach interfacing to both parts of the lining and it puckered.  This time I remembered the interfacing and there was no puckering.  In my prototype bag, the pocket was too low, so for this tutorial, I changed the instructions to make it about an inch higher, which I think would work better.
  • This would have been really simple if I hadn’t included the pocket.  The basic pattern is so easy to make and it took less than an hour.  I wanted to add a wrist strap but was conscious of the fact that I often over complicate bags, so I held back and I’m glad I did.  This bag’s simplicity is what makes it so streamlined and sophisticated.  Less is definitely more and it’s something I need to take on board more often if I'm to develop as a bag maker.

Wednesday 17 February 2016

Bag #7: Make up Bag


I wanted a heart theme for this week’s bag as it was Valentine’s weekend.  I found this fabric in my local fabric store and thought it would make a pretty make up bag. 

It was originally planned to be a simple bag and started making it, then I succumbed to a virus and had to abandon it for a week.  When I resumed, I got carried away, adapting the shape, adding piping, until it became a more challenging task.  I don’t like making small bags (too fiddly) and I don’t like using piping, so I felt that they would make it into a suitable challenge.

I used the narrowest piping cord I could get which was no.3.  I find it quite hard buying piping cord because sometimes it’s sold by numbers and other times its sold by millimetre width, so I’m never really sure what I’m buying. I just asked for the narrowest they had, but I have seen narrower in other stores.

This bag is just the right size for a couple of lipsticks and a small compact and easily fits in a handbag or tote bag. I have some job interviews lined up so this will be perfect for making sure that I look presentable!


Skills used in this project:
  • Using piping cord
  • Working on a small scale


Step 1: Cutting out


Cut out the following pieces from the outer fabric:

3” x 1 ½” zip tabs (cut 2)
7 ¼" x  (2" wide at ends, tapering to 1½" wide at middle) bag top (cut 2)
Half a 4” diameter circle with extra ¼” seam allowance all around for the bag sides (cut 2)
4 ½” x 3 ½” bag base (cut 1)

Lining and Wadding
Cut out top, side and base pieces, the same as for the outer fabric.  I used iron-on wadding and cotton lining from my stash.

6” Zip
31” Piping cord (I used no.3 width)
31” x ½” Bias binding or 1” wide fabric strips cut on the bias

Bag #7: Make Up Bag Pattern
Here's a link to the PDF pattern for this bag. I haven't included the zip tabs on this pattern, as they are straight forward rectangles, but the sides, top and base are all there.

Step 2: Sewing the zip end tabs


Fold zip tabs in half lengthways and place them over each end of the zip.  They will enclose approximately ½” of the zip at each end. This makes the zip very secure when sewn in place.  Fold under the raw edges where they cross the zip by ¼” and top stitch across the fold, making sure that both sides of the tab are sewn.  Trim the sides of the tab so that they are the same width as the zip. 


Step 3: Attaching the zip

Iron wadding to wrong side of outer fabric pattern pieces. Sew-in wadding will work just as well.

Pin the outer fabric bag top and lining to the zip making a zip sandwich, right sides of fabric together.  I used a cotton lining which doesn’t have a right or wrong side. The right side of the outer fabric needs to be attached to the right side of the zip. Sew but stop ¼” from each end (for ease of attaching the bag base later). Fold the fabric back so that the right sides are facing outwards.

Attach the lining, wadding and fabric to the other side of the zip in the same way, then top stitch along the fabric on both sides of the zip, close to the edge – this gives a professional appearance. Again, stop about ¼” from each end. 

If the zip tab is a little longer than the fabrics on either side, trim it to size.


Step 4: Making the piping

It is quicker to make all the piping in one go.

Open up the bias binding and press it so that it forms a flat strip. 

Fold it in half lengthways right sides facing out, inserting the piping cord as you fold. 

Sew along the strips close to the piping. It is easier to get close to the piping cord if you use the zip foot on your machine.


Step 5: Attaching the piping

Cut 2 8” lengths of the covered piping.

Pin one to the right side of one top outer fabric piece so that the raw edges of the bias binding face in the same direction as the raw edges of the main fabric.  Sew using the zip foot.  Do not sew it to the lining.  

Do the same on the other side of the zip.


Step 6: Attaching the semi-circular sides


Pin then sew the outer fabric sides to the bag top ensuring that the piping is sandwiched between the 2 pieces of fabric. Ease the fabrics together and pin at regular intervals.  Sew close to the piping, using the zip foot.  

Do the same for the other semi-circle on the other side of the bag.

Pin and sew the lining bag sides to the bag top, right sides together in the same way.


Step 7: Attaching the piping at the base

Trim the remaining piping cord at one end so that it is about ¼” shorter than the bias binding.  Turn the end of the bias binding inwards so that the raw edge will not be visible. Pin the piping around the base of the bag.  When you have gone all the way round, tuck the end of the piping into the gap created at the beginning so that the join is barely visible. You may need to trim the piping to ensure just a small overlap.

Using the zip foot, sew the piping all round the base of the bag.  Only sew it to the outer fabric – make sure the lining is pinned out of the way.


Step 8: Attaching the bag base

Pin then sew the bag base to the sides, right sides together, so that the piping will be visible when sewn.
 

Step 9: Attaching the lining

Make sure the zip is open or you will not be able to turn it through when the sewing is complete.

Pin and sew the lining base to the bag sides, right sides together, leaving a gap along one long side for turning.  Turn the bag through and sew up the gap.


In this project I learnt:

  • How much better it is to finish a project in one go.  I usually start and keep going until a bag is finished, only stopping for work, food, etc.  I was forced to take a break when making this bag due to illness and found it hard to approach it with the same enthusiasm when I resumed.  By then my mind was on the next project and I wanted to move on.
  • Small doesn’t have to be fiddly – it depends on the pattern   With small bags, it always seems like a lot of effort for not much reward but this bag made me think about ways in which I could make a small bag without it being too fiddly.  Although it has spurred me on to do a small but even less fiddly bag soon.
  • I don’t like using piping.  Unless it’s for something big like a cushion or a large bag, I don’t like it.  Piping on small items just isn’t for me.  I can do it, I just don’t enjoy it.  No one enjoys everything.  No more piping unless the bag absolutely demands it.
  • To put my health before my sewing projects.  I wanted to get this bag finished so as not to delay my blog, but I kept making mistakes and the stitch unpicker became my new best friend.  It would have been better to wait until I was well enough to concentrate because all I was doing was taking one step forward and two steps back.  Sometimes we have to give ourselves permission to take time out and relax, especially when external factors beyond our control intervene. After this week’s post, I’m going to have good rest before starting the next bag.  I’ve earnt it!!  

Monday 8 February 2016

Bag # 6 Tote Bag


I had this gorgeous curtain fabric in my stash and have been looking for a project for it.  I decided a tote bag would be ideal.  I love using furnishing fabrics when bag making – they are sturdy, durable and can be very reasonably priced.  This is a cotton canvas with a co-ordinating polyester lining.

I wanted 1 ½” – 2” webbing for the handles but couldn’t find a suitable colour in any local haberdashery store.  Even the wrong colours were outrageously expensive, so I bought a cheap piece of contrasting cotton.  I had envisaged longer handles (50" in length), but I thought a join in the fabric would look ugly, so I just made the handles the width of the fabric (45").

I absolutely love this bag.  With the lining and all the pockets, it looks so professional and it has a place for everything.  I can think of several people who would like this for their birthday. There’s nothing as nice as a handmade gift to show you really care.

As the fabric was fairly thick, I used ½” seams.  I used the regular stitch length (2.5 on my machine) for all the sewing except the top stitching which was increased to 3.


Skills used in this project:
  • Inserting a magnetic clasp
  • Inserting a zipped pocket


Step 1: Cutting out


Cut out the following pieces from the main fabric:

17” x 17” bag sides (cut 2)
9” x 10” bag base (cut 1)
7” x 11” outside pockets (cut 2) (if using a directional fabric, 7” is the width and 11” is the height)
3” x 3” D ring tab (cut 1)

Cut out the following pieces from the lining fabric:

17” x 14“ bag sides (cut 2)
9” x 10” bag base (cut 1)
7” x 9” outside pockets (cut 2) 
11” x 8” zip pocket (cut 2)
11” x 8” Mobile phone pocket (cut 1)

Handles
45” x 6” contrasting fabric (cut 2) or 1 ½”-2” webbing (my handles were each 45" but I would have preferred them 50")

Interfacing
45” x 3” medium iron on interfacing for strap (cut 2)
5 ½” x 8” lightweight iron-on or sew-in interfacing for mobile phone pocket (cut 1)
11” x 8” lightweight iron-on or sew-in interfacing for zip pocket (cut 1)
11" x 4" lightweight iron-on or sew-in interfacing for bag lining to go around zip (cut 1)

You will also need:
11” Zip (I used an N5 zip)
1” D ring
Magnetic clasp


Step 2: Making the zip pocket

 Attach the wrong side of one piece of pocket lining to the interfacing by pinning or ironing depending on the type of interfacing you are using.


On the interfacing, mark a rectangle where the zip will go.  I made the rectangle 8“ x ¾ “.  This made quite a wide opening for the zip.  If you wanted to sew closer to the zip and you are using a fairly thin lining fabric (as I was), I would recommend an opening ½” deep.  This is what I will do next time.

Pin the right side of this pocket  lining piece to the right side of one of the bag lining pieces so that the tops meet, with the pocket positioned centrally along the top. Pin the small rectangle of interfacing to the wrong side of the bag lining (I didn't do this and you can see from the pictures that I ended up with some puckering around the zip). I also didn't change my machine needle to a finer one as I should have done which contributed to the puckering.

Sew around the rectangle you have marked. This will sew the pocket lining to the bag lining and form the 'vent' for the zip.  Cut along the centre of the sewn rectangle through both lining pieces and interfacings.  Also snip into the corners as shown in the photo, being careful not to cut into the stitching.  Post the pocket piece through the gap so that the pocket lining/interfacing are now on the other side of the bag lining. Press.  Pin the zip through all these layers so that the right side of the zip will be visible on the right side (outer, visible side) of the lining. Sew.  Press.

Pin the other pocket lining piece to the pocket lining in which you inserted the zip, right sides together.  Sew around all the sides making sure not to sew the bag lining to any of these pocket edges except the top.


Step 3: Make the bag lining and D ring tab


Make the D ring tab by folding the fabric in half (wrong sides together and folding the long edges in so that the tab will be 1” wide.  Top stitch along both sides of the tab.  Wrap the tab around the D ring and sew a few stitches at the end to keep it in place. 

Decide where you want the tab to be.  I put it about 2½”  ” from the top of the lining.   Pin it so that the D ring is between the 2 right sides of the lining. Sew the 2 bag side lining pieces together, right sides together. Press the side seams open.


Step 4: Make the mobile phone pocket

Fold the mobile phone pocket lining in half, short side to short side, right sides together and place the interfacing against one of the wrong sides.  Sew around the top and 2 sides of the pocket, turn it inside out and press. There is no need to sew the bottom because this will not be visible because it will be sewn to the bag base.  Top stitch along the top edge.   

Place the pocket centrally over the side seam at the opposite side to the D ring.  Make sure that the bottom edges match.  The pocket should not be completely flat.  I placed my mobile phone on the lining and pinned the pocket round it to make sure that it was a good fit.  Sew down each side.  

Step 5: Make the outer pockets

Sew the outer pocket fabric to the outer pocket lining, right sides together, along one of the shorter edges (this will be the top).  Turn the fabric so that the right sides face outwards and match the other shorter raw edge (which will later be joined to the bag base).  As the outer fabric piece is longer, the lining will not be visible unless you peer inside the pocket.  Press and top stitch along the top for a sharp edge. Make 2 of these.


Step 6: Make the bag and attach the outer pockets.


Right sides together, sew along each side seam.  Press the side seams open and turn the fabric so that right sides are facing out.  Pin the outer pockets in place so that they cover the side seam with bottom raw edges matching.  To make sure that the middle of the pocket matches the seam line, fold the pocket in half and mark the centre of the top and bottom.  Sew down each side seam. 


Step 7: Make the handles

Place the interfacing along the centre of the handle fabric (shiny side of interfacing to wrong side of fabric) and iron it in place.  I folded them both to find the centre line and matched them up. Fold the sides in so that it looks like bias binding.  Press.  Fold it in half along the length and press.  Mark 14 ½” from each end and top stitch both sides of this central part of the handle.  There is no need to top stitch the top and bottom 14½ ” at this stage because you will sew along this part later on to attach the handles to the bag.


If using webbing, skip this step.


Step 8: Attach the handles to the bag

Pin the first handle to the outer bag fabric so that it covers one of the outer pocket edges and seam.  The raw edge at the end of the handle should match the raw edge at the base of the bag.  Making sure that the handle isn’t twisted, attach the other end to the nearest side of the other pocket.  Attach the other handle to the opposite side of the bag. Mark 12 ½” from the end of the strap.  Sew along both sides of the handles from the end up to the 12½” mark to attach it to the bag.  Part of the handle will still be unsewn.  You will do this last.

If using webbing, cut to size and attach to the outer bag as above.


Step 9: Attaching the base


Pin the outer fabric base to the bag body, right sides together.  The centre of the slightly shorter sides will be joined to the side seams/outer pocket.  Ease the base into place and pin all round.  Trim any excess fabric from the corners once the base has been sewn.

Attach the lining base in the same way.


Step 10: Fitting the magnetic clasp

The magnetic clasp goes in the centre of the top of the bag. Please read through all of this step to choose the method which suits you best.

Find the centre point along the top of the outer bag body by folding it in half.  Measure 1¼” down.  This where the clasp will go.  Pin the 2” square of interfacing to the wrong side of the fabric at this point.  On the right side of the fabric, mark where the 2 prongs will go.  Using a seam ripper, make a small hole through the outer fabric and interfacing and push the prongs of the clasp through the outer fabric and then the interfacing and press them firmly so that they point outwards.  Be careful not to make the hole too big or your clasp will not be firm – if it’s too small, you can always make it bigger, but if it’s too big, you’re in trouble).

Do the same on the other side.


I actually fitted the clasps after joining the outer and lining fabrics (step 11).  I left gaps on both sides when joining the fabrics and did it at this stage to be sure that the clasps were in exactly the right place.  If you have altered any of the measurements, this might be a safer option.


Step 11: Joining the outer and lining fabrics

With right sides together and lining inside the outer fabric, pin and sew around the top edge leaving a gap of approximately 6” at the centre of one side of the bag.  Make sure you don’t sew over the handles – keep them tucked well out of the way.


Turn the bag through these gaps so that the right side of the outer fabric is on the outside of the bag.  The lining is shorter than the outer fabric.  Push the lining in so that 1½” of the outer fabric is on the inside of the bag. The magnetic clasp should be about 1” from the new top of the bag.  Press. 

Top stitch around the top edge of the bag but don’t sew over the handles.  Top stitch around the bottom edge of the outer fabric near where it meets the lining, sewing up the gap as you go. Again, do not sew over the handles.  I used a zip foot to do this as the normal foot would be too wide to sew past the clasp. 

Step 12: Finishing the handles

Sew an X at the top of each handle through all layers of fabric (regardless of whether it is a fabric or webbing handle) to make them secure.

Give the bag a final press and it is ready to use.


In this project I learnt:

  • Magnetic clasps are really easy to fit.  I have only tried it once before and I wasn’t very happy with the result.  This time I used a heavy interfacing as a stabiliser to give the clasp something solid to hold on to.  I’ve never known whether the prongs should be bent in or out.  I tried bending them in and the clasp seemed a bit wobbly, so I bent them outwards and it was magically firm.  Trial and error!  Last time, I also make the prong holes too big and the clasp wasn’t as firm as I would have liked.
  • I found the zip pocket quite difficult to do because I had never done anything like this before. When I pushed the fabric through the ‘letterbox’ to the other side, it was hard to get it to lay flat, but when I sewed the zip in, it began to look better.  I used interfacing on the pocket but not on the lining.  This didn't work because the lining needed a stabiliser to give it the strength to hold the zip.  I have amended the instructions accordingly.  I usually like only the teeth of the zip to be visible and I was initially disappointed that I had made the ‘letterbox’ too deep. Using a zip foot when sewing the zip in, I didn’t even have to move the slider out of the way as there was plenty of room for the zip foot to get past.  I’m happy with the way it looks but I would make it smaller if I made the bag again.
  • I used the same sewing machine needle throughout because I was too lazy to change it.  However, when I was sewing the lining, I really needed a much finer needle and possible an adjustment to the tension.  Using an unsuitable needle resulted in puckering of the seams.  Although they are inside the bag and barely visible, I wish I had taken a little bit longer and done it properly.
  • When I attached the handles, I sewed them right to the top of the bag and wasn’t able to top stitch all round.  As a result, I changed the instructions so that the top of the handles are the last stage and top stitching is done earlier in the process.