
I chose this
as my first bag for this year’s challenge because I often call in at a
supermarket on the way home from work and begrudge paying 5p for a plastic
bag. This is small enough to fold up in
my handbag but big enough to hold a few groceries. I chose long handles because I prefer a
shoulder bag, but the handles could easily be shortened for a hand held
version. I used a plain fabric for one
side of the bag and a patterned fabric for the other side, the handles and the
appliqué design which I supplemented with scraps of other fabric from my stash.


I could have
attached a pocket/pouch either in the middle of the patterned side or at the
top edge or made a separate pouch to put the bag in. I bought a metre of this fabric so there is
plenty left if I decide to add this at a later stage.
Skills used in this project:
·
French
seam
·
Needle
turn appliqué
·
Suffolk
puff
Step 1: Cutting out
For the bag, cut
out the following:
18 ½” x 15”
(1 plain and 1 patterned)
30” x 4” (2 patterned
for the handles)
30” x 2” (2
medium iron-on interfacing for the handles)
For the
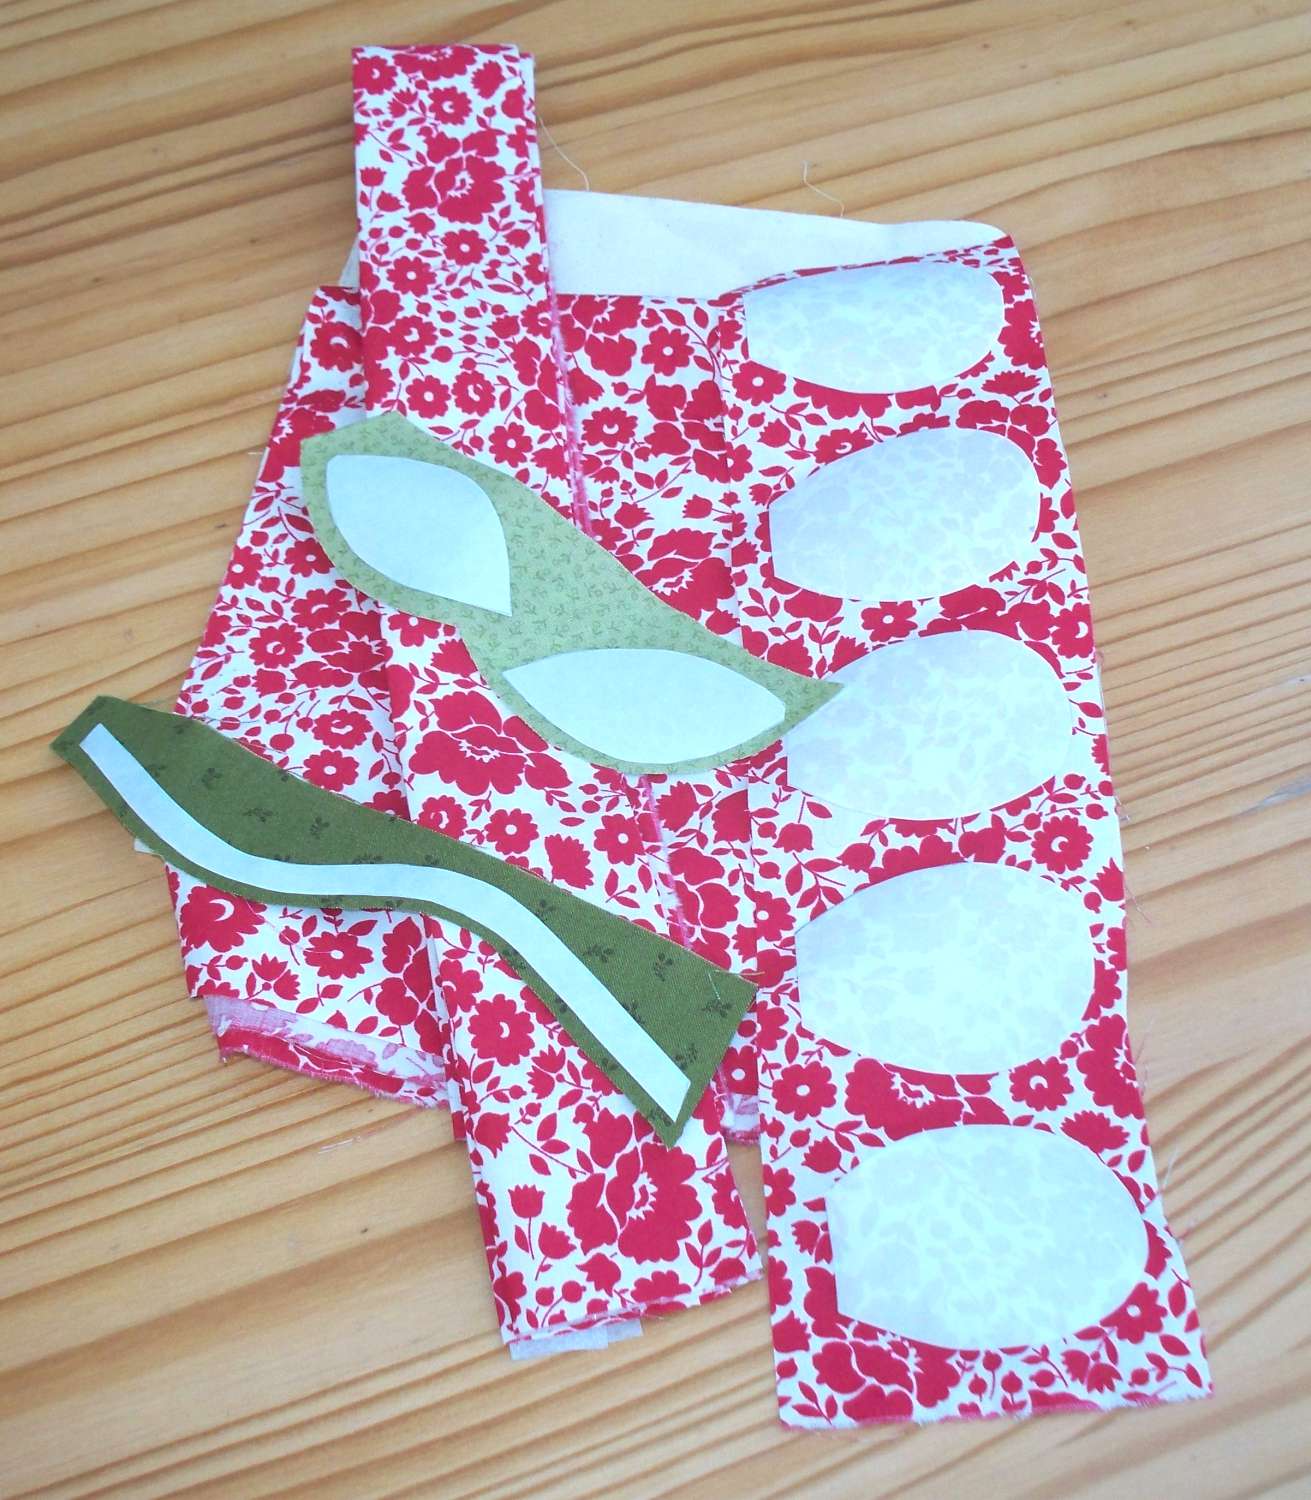
appliqué flower, cut out:
5 petals
(same patterned fabric as bag)
1 flower stem }
2 leaves } Scraps of any suitable fabric
1 circle for
the centre of the flower }
Step 2: Needle turn appliqué
The plain
side of the bag needs something to liven it up.
I decided to add an appliqué flower as I thought this would work well
with the patterned fabric I used for the bag.
I decided how large I wanted the flower to be and then drew the stem,
leaf and flower on a piece of paper. I
made sure my drawings were the actual size I wanted the parts to be when
completed. You could do this for any
drawing of your choice e.g. animal, car, boat, etc.
Transfer your
designs onto freezer paper and then cut them out. Freezer paper is available from most craft
stores – I got mine from Hobbycraft.
Chose the
fabrics you want to use and then iron the freezer paper pattern pieces onto the
right side of the fabric with the waxy side against the fabric. This makes the freezer paper stick
temporarily to the fabric but it can easily be removed leaving no residue.
Cut the
fabric about ⅛ “- ¼” larger than the freezer paper template and pin the pieces
to the plain side of the bag with the freezer paper still attached to the
fabric. The freezer paper is there as a
guide to the finished size of the appliqué.
Turn the
fabric under using very small stitches which just catch the edge of the fabric
to form a narrow hem, sewing it to the plain side of the bag and following the
line of the freezer paper.
Once the stem
has been sewn all round, remove the freezer paper, then sew on the leaves and
finally the petals. Press.

The centre of
the flower is a Suffolk puff (also known as a yo-yo). Cut a circle of a fabric twice the desired
finished size plus ¼ “. Turn over a ¼”
hem using a large running stitch all the way round in a matching thread. Pull
the thread to gather the circle with the hem on the inside and shape it so that
it forms a ‘shower cap’ shape. Sew a
couple of stitches on the inside to fix the shape. Attach it to the bag by
sewing all round the outside edge of the puff.


Step 3: Sewing the bag
I used a
French seam to sew the back and front of the bag together because it adds
strength and looks more ‘finished’.
Put the two
bag pieces together WRONG sides together and sew a narrow hem – about ¼” around
the sides and bottom (but not the top) and then trim it back nearer to the line
of sewing so that no whiskers of fabric show through the final seam. Press.


Turn the bag
right sides in and press again (making sure that the corners are fully turned
out) before sewing the side and bottom seams again using a slightly wider seam
(⅜”) which encases the original seam, hiding the raw edges. Press.
Step 4: Making the handles
Fold the
handles and interfacing in half along the entire length to find the middle and
then iron the interfacing to the patterned fabric (shiny side of interfacing to
wrong side of fabric) matching the fold line.


To finish the
handles fold them in half along the original fold line and sew down both long
sides of each handle to encase the interfacing. You only need to sew down one side as the
other side is a fold, but the symmetry of two lines of stitches looks more
professional.
Step 5: Finishing the top of the bag
and attaching the handles
With the
wrong sides out, fold the top of the bag over to the outside to form a 1” hem
and sew all round the hem Press.

Turn the hem
over again by another inch and pin in place to hold. Pin the handles to the top of the bag by
placing them under the hem and pushing them up so that the end of the handle is
placed against the fold of the hem. They
will be upside down at this stage and hang down towards the bottom of the
bag. Measure 3 ½ “ from the edge of the
bag – that is where the outside edge of the handle will go and do the same for
the other end of the handle by measuring from the other edge, making sure that
the handle isn’t twisted. Sew around the hem, sewing over the handles as you
go. Press. Flip the handles up so that
they are facing the right way and sew a cross to hold each handle in place.


In this project I learnt:


- Not to choose fabric for needle turn appliqué based solely on the colour of the fabric. I should have considered how quickly the fabric frays. The stem was a nightmare to sew because the fabric frayed as soon as I looked at it. The other fabrics were lovely to work with.
- The stitches need to be very small and close together for needle turn appliqué. I started off doing stitches that were too big and too far apart. They looked much better as got used to the technique.
- French seams look very professional and are so easy to do – I don’t know why I haven’t used them in other projects.
- Suffolk puffs are an effective way to add texture and interest and look much more complicated than they really are.
- You can never press too often - I should remember to do it at every stage because it looks really crumpled in the photos.
I have just finished making your shopping bag. The instructions were very clear and I am very pleased with the way it has turned out.
ReplyDeleteI am now starting the baguette bag and really enjoying it. Please keep it up.
June