About this blog

I make bags and post tutorials on how to make them. I'll tell you what went well and warn you about any disasters.
Showing posts with label PVC. Show all posts

Sunday, 4 September 2016

Bag #35: Laminated make up bag


I love making PVC bags but the choice of fabric design is very limited.  When I heard that you could laminate any cotton fabric, I was really excited and ordered some laminate online.  I bought Vilene Lamifix and couldn’t wait to try it. It comes in glossy and matt – I used the glossy version. I read various reports about it, some good, some bad, and kept an open mind.  You can read the pros and cons at the end of this post. If you have used it, I would love to know how you got on.

I chose to make a small bag with the laminate for practical reasons – I didn’t want to waste a lot of fabric if it all went wrong (and it was quite expensive – I can get PVC much cheaper).  This bag is a cute size for carrying bottles of liquids on a plane or for use as a make-up bag. It can be wiped clean but the laminate does not appear to be washable, so not suitable for anything too mucky.  Or perhaps better with a wipe clean interior instead of the cotton lining I used.

The finished size is 4” high x 6” wide x 1½” deep (10 cm x 15 cm x 3.8 cm).

Difficulty level: intermediate because you need to make your own adjustments when sewing the corners.

I used my normal stitch length (2.5) throughout but increased it to 3.5 for top stitching either side of the zip (slightly longer than my usual top stitch).  I used ¼”/6mm seams for the outer bag and slighter wider seams for the lining.

I have included metric and imperial measurements but they are not exactly interchangeable, so you should stick to either one or the other.


Skills used in this project:
  • Making and using laminated cotton


Step 1: Cutting out


Cut out the following:

10” x 5½” (25cm x 14 cm) Bag Body (cut 2 outer, 2 lining, 2 lightweight iron-on interfacing, 2 laminate).  Not suitable for a directional fabric.  

10”/25 cm zip


Step 2: Laminating the fabric

Attach the interfacing to the wrong side of the outer fabric.

Greaseproof paper over the laminate protects the iron and the laminate

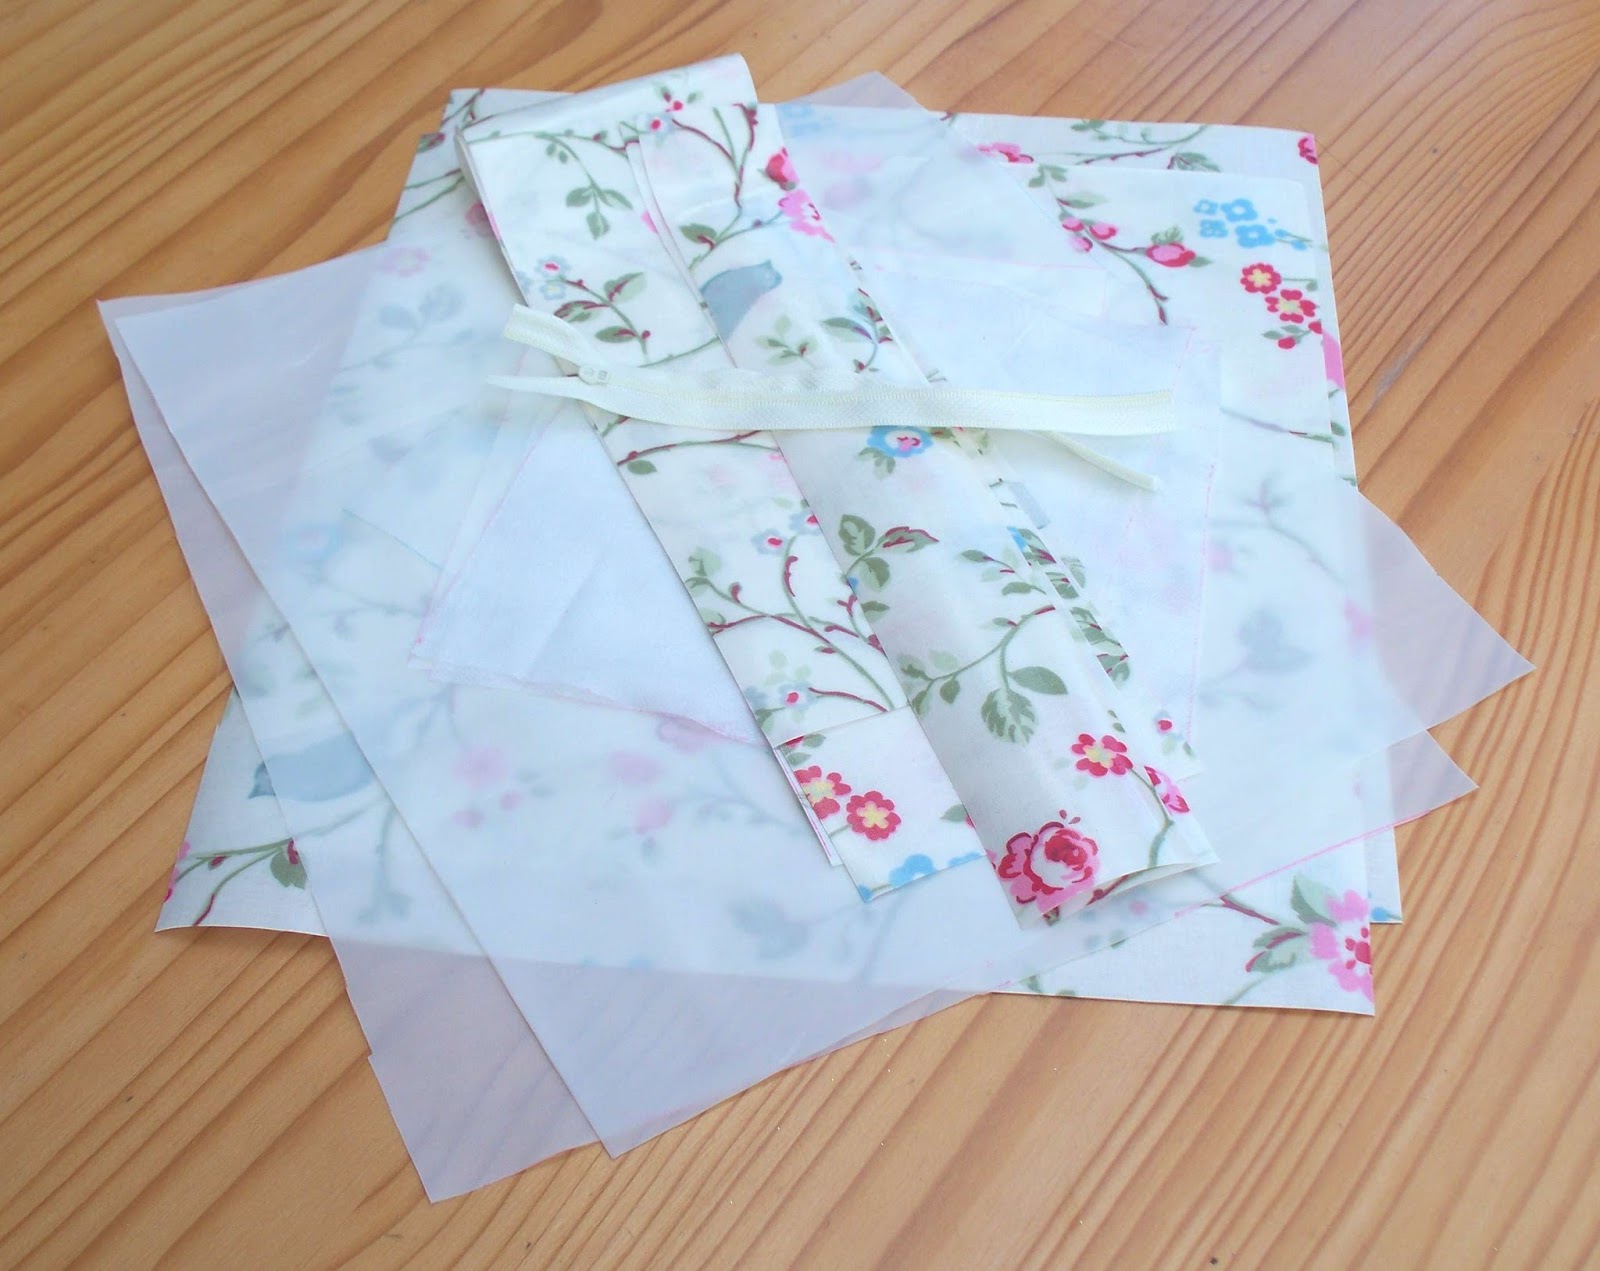
Attach the laminate to the right side of the outer fabric. If using glossy laminate, the non-glossy side is the adhesive side which needs to be placed against the right side of the fabric. Before you do this, place greaseproof paper under the fabric/laminate bundle and on top; this will prevent the laminate from melting onto your iron or ironing board. 

Start by ironing the centre and move out to the sides using a medium heat - this pushes any air bubbles out. 

Once you are happy that there are no air bubbles, press all over,  through a layer of greaseproof paper, to ensure a permanent fix. Instead of greaseproof paper you could use a cotton cloth such as a tea towel.  

I have read that you should allow 24 hours before stitching.  I didn’t do this, I just let it cool and didn’t have any problems (although was that why it creased so much???).


Step 3: Attach the zip

Be sure not to pin the laminate (except in the seam allowance) as the pin holes will remain visible. I find clips hold all the fabric in place fairly well.

If using a continuous zip, loosely sew the ends closed so that the slider does not slip off during sewing and assembly (I speak from experience! I couldn’t get the slider back on and ended up having to unpick the zip and start again).


Make a zip sandwich along one of the longer sides by placing the right side of one of the outer laminated fabric pieces against one edge of the zip, slider facing the outer fabric.  Place the lining the other side of the zip (along the same edge) and sew through all layers. The lining and outer fabric will be sewn separately when sewing up the bag, so leave just over ¼”/6mm unsewn at each end of the zip.

Do the same with the other laminated fabric piece and lining.


Top stitch along this edge for a neat and professional finish and to hold the layers in place.


Step 4: Creating the bag’s shape

Position the fabric so that the right sides of both laminate pieces are together and the right sides of both lining pieces are together.  Make sure that the zip is at least half open.


Sew along the bottom edge of the laminated pieces.

Sew along the bottom edge of the lining pieces leaving a gap of about 4”/10 cm for turning.


Working on the laminate side of the bag, flatten the fabric so that the zip is in the centre and the fabric is right sides together.  Sew across each end.


Now push the ends in to create the box shape as shown in the photo.  I wanted a very slim bag, so I used the edges of the zip as my guide, drew and then sewed along that line.

Do this for both ends of the laminated fabric.

Do the same for both ends of the lining side of the bag.

Turn through.  Sew up the opening in the lining.

Press on low heat.


Obviously, you need to put this bag through its paces and test it.  That will mean a night out at the very least or even a weekend away.  It's your reward for making this sweet little bag.


In this project I learnt:

It was very easy to laminate the cotton – just iron on.  I was disappointed that it didn’t feel like PVC. Instead it felt more like a polythene bag on the laminate side and I thought it looked cheap. For some reason, I had expected it to be thicker. I wasn’t sure whether I would still need interfacing - I don’t need it when making a PVC bag.  As it turned out, you do need to use interfacing with it as it doesn’t really stiffen the cotton enough.  It creased really badly during the sewing process so would probably be best suited for projects which don’t need to be turned through after sewing or need that 'lived in' look.  The laminate stuck firmly to the cotton all over and looked very glossy and, of course, I was able to use it on a fabric of my choice. 

It was easy to sew – I just used a normal sewing machine needle.  Most of the time for this bag I was sewing the wrong side of the laminate.  However when top stitching either side of the zip, the foot stuck a bit more than it usually does for PVC and the stitches became really small.  I changed the general purpose foot for a roller foot and increased the stitch length, then had no problems at all.  It was the first time I had used the roller foot but I shall certainly use it again.  It made the fabric feed through so smoothly, with minimal effort.

Would I use laminate again?  Well, I prefer the look of PVC, but if I wanted to make a special fabric wipe cleanable then I would use it.  It will be interesting to see how durable it is. And I shall certainly give the matt version a try.

Sunday, 26 June 2016

Bag 25: Easy Peg Bag


I saw a peg bag like this on a recent shopping trip and immediately knew I could make it for a fraction of the price.  I’ve made a peg bag before but this is so simple and streamlined that I couldn’t resist it.  The PVC fabric can be wiped clean and the dowelling rod across the top helps the bag to keep its shape and bear the weight of the pegs.  I used a PVC with a polyester backing which is really only meant for something like table covering, but it had been in my stash for some time waiting for an opportunity in the limelight.  It won’t be as strong and durable as cotton backed PVC (which I would recommend you use) but the bag cost about £1.50 to make, so it was a bargain.  Unusually, I didn't neaten the seams inside the bag, but if you want to, please read right through to the end because you would need to do some of the steps in a different order.

You will need about half a metre/yard of PVC but it is not suitable for a directional fabric as either the back or front would end up with an upside down design.

The finished size is 10” high x  9¾” wide (25 cm x 24.5 cm).  The strap can be as long or short as you want it to be - measure before you cut it out. The joy of making your own bags is that you can make them the right size for you.  Before attaching the shoulder strap, drape a tape measure across your shoulder and body as if wearing a messenger bag and decide on the right strap length for you, then cut the strap to size. It’s almost couture!

I bought the dowelling from my local hobby store but DIY stores sell it too.

I used my general purpose foot and a woven fabric needle (although a leather needle works well on stronger cotton-backed PVC). The seams were sewn with my normal stitch length (2.5) but for the top stitching, I increased the stitch length to 3.

Using pins will leave visible holes in the fabric, so clips are essential instead.

I have included metric and imperial measurements but they are not exactly interchangeable, so you should stick to either one or the other.


Skills used in this project:
  • Using PVC
  • Keeping it simple


Step 1: Cutting out

Cut the following pieces from PVC (the 10½”/26.5 cm ends will be the top and bottom):

19” x 10½” (48 cm x 26.5 cm) Bag Body (Cut 1)

7” x 10½” (18 cm x 26.5 cm) Upper front bag (Cut 1)

4” x 50” (10 cm x 127 cm) Strap (Cut 1)

5/16” diameter x 9” (6 mm x 22.7 cm) wooden dowelling 


Step 2: Making the strap

Fold the strap in half lengthways and clip.  Fold the raw edges in towards the fold line so that it looks like bias binding.


Top stitch along both sides of the strap to create a professional finish.


Step 3: Neatening the raw edges


Hem one of the short 10½”/26.5 cm edges of the bag body by turning the edge under once and then again so that the raw edge is not visible.  Sew.

Hem one of the 10½”/26.5 cm of the upper front bag.  It is only necessary to turn this under once.  Sew.


Step 4: Attaching the strap


Position the strap on the right side of the bag body so that the raw edge at the end of the strap matches the raw edge at the top of the bag fabric  This will be one of the short edges of the bag body (10½”/26.5 cm) – the one without the hem. It should be about ¼”/6 mm from the side edge so that it will be right at the edge when the side seam will be sewn.  Sew across one end of the strap, close to the edge to attach the strap to the bag body.  Making sure that the strap is not twisted, sew the other end the same distance from the other side edge.


Place the upper front, right sides together, over the strap ends and bag body matching the top raw edge and sew along the side and top seams of the upper front.

Turn right sides out and top stitch around the upper front.


Step 5: Inserting the dowelling


Cut the dowelling to size and sand the ends to make sure that there are no sharp edges which will eventually make holes in the PVC.

Insert the dowelling between the upper front and the top of the bag body so that it is as close to the top seam as possible.  Sew a line of top stitching under the dowelling, as close to it as you can get, to keep it in place. Using a zip foot will enable you to get closer to the dowelling.

Sew along the bottom of the upper front to attach it firmly to the back of the bag body.


Step 6: Assembling the bag

Fold the other short end of the bag body up so that the right sides are facing out and the hem is 2”/5 cm from the top. Fold the sides under by ¼”/6 mm.   Top stitch along these side seams.


Now fill your bag with pegs, fling it across your body messenger style and you will be able to hang out your washing with panache.


In this project I learnt:
  • I love using PVC.  The matte versions (like this one) are easier to sew than the shiny ones which can stick to the sewing machine foot and needle plate. I bought a roller foot but haven’t needed to use it yet as my ordinary machine foot worked perfectly adequately. I’m much more confident than I first was when using this potentially difficult fabric and I’m always pleased with the results as it is so forgiving.
  • This was a simple bag with just 2 pattern pieces for the bag and one for the strap. I didn’t line it or neaten the internal seams as the inside is barely visible (it’s the first bag I’ve made with un-neatened seams) and PVC doesn’t fray.  This was quick to make as I didn’t have to add a zip or hardware – the only thing that made it bit awkward was the wooden dowelling and that’s why I left it as late as possible before inserting it. If I was making it again, I’d use a better quality fabric, but that’s the only thing I would change. 
  • If I decided to make this as a gift or to sell, I would neaten the seams. This would require a re-think of the order in which the bag is made. I couldn't sew the final seams from the wrong side of the PVC because the dowelling made it impossible to turn the fabric through.  Instead of inserting the dowelling early on, I would  leave a gap at the top of one side through which it could be inserted last of all.  Then I would be able to sew all the seams with the right sides of the fabric together (in the same order as above).  I would then sew binding over the raw edges to enclose them, turn the bag right sides out, slip in the dowelling and then sew up the small gap in the side seam.


Sunday, 19 June 2016

Bag #24: Wash Bag


I absolutely love making PVC bags.  Although it can be tricky, it is my absolute favourite fabric.  I will be going away for several crafting weekends this summer and I need a wash bag.  A waterproof or water resistant fabric isn't essential but it makes it easier to keep the bag clean.  I wasn't sure whether to go for the budget option and use a bit of shower curtain for the lining (£3 for 180 cm x 180 cm) or go for luxury option and use PUL (£10 for 100 cm x 145 cm) as I had both.  The PVC I used was a really good quality one so I decided to use the PUL and was very pleased with the result - definitely worth the extra expense.  If anyone has tried using a piece of shower curtain as lining, I'd love to hear you comments about whether it was successful or not.

When using PVC, sewing needs to be accurate.  If you have to undo any stitching, you will be left with the needle holes.  For the same reason, I used clips rather than pins to hold the seams together when stitching.  The PVC looks really creased in the photo because I had just finished it but the creases had gone by the next day.

I chose not to use any interfacing/fleece/wadding for the bag body because the PVC was really robust and didn't need it.

For the zip tabs, I used a contrasting light cotton fabric.  It wasn't waterproof as that would have made the zip ends too bulky.

You will need a slightly more than a fat quarter of both PVC and lining, but if you only have a fat quarter, the pattern could easily be shrunk slightly and then it would fit.  The exact amount depends on whether you have a directional print - a 13" or 32 cm length would be plenty regardless of the direction of the print.  The finished size of the bag is 7" high x 8½" wide x 4" deep at the base (approx 16 cm x 21.5 cm x 10 cm).

The PUL was slightly stretchy and I had read that it would need a ball point needed but as I was sewing it in the same seam as the PVC, that wasn't realistic.  I used a normal machine needle for woven fabric and had no problems at all.  My normal stitch length (2.5) was used for the seams and increased it to 3 for the top stitching.  My machine's general purpose foot managed easily and I didn't need a special foot. I used ¼" (6 mm) seams throughout.

I have included metric and imperial measurements but they are not exactly interchangeable, so you should stick to either one or the other.


Skills used in this project:
  • Using PVC
  • Using waterproof lining


Step 1: Cutting out

Cut out the following pieces:

12½" (31.2 cm) across x 9½" (24.2 cm) for the height (Cut 2 PVC and 2 lining)


2" x 3" (5 cm x 7.5 cm) zip tabs (2 contrast fabric/ 2 iron-on light interfacing)

8½" (21 cm) zip (I used an N5 zip cut from a continuous roll)


Step 2: Making the zip tabs

Attach the interfacing to the wrong sides of the zip tabs.

Fold them in half so that the shorter sides meet, wrong sides together and press.  Fold each short end under by ¼" (6 mm) and press.  Place a tab over each end of the zip so that it is sandwiched between the folded over tab - the end of the zip should touch the fold line.  Sew across the open end of each tab to secure it to the zip.  Trim the sides of the tabs so that they are the same width as the zip.


Step 3: Inserting the zip


Place the lining fabric over the PVC, right sides together so that the top edges match.  Put the zip between the fabrics with the top side of the zip (the side with the slider) facing the PVC.  Sew along the top edge of the fabric using a zip foot to attach the zip.

Do the same for the other piece of lining and PVC.


Top stitch along each zip edge for a professional finish and to keep the lining and pvc firmly away from the edges of the zip so that they won't get caught in the zip.


Step 3: Assembling the bag


Spread out the fabric so that the two PVC bag pieces are placed right sides together and the two lining pieces are right sides together.

Open the zip so that you will be able to turn the bag right side out when it is finished.

Sew along the bottom and sides, leaving the corner cut outs unsewn and a 4" (10 cm) gap in the bottom of the lining for turning through. Sew the lining with fractionally larger seams to stop the lining being too baggy.

Flatten the corners and bring the side and bottom seams together so that the seams meet.  Sew across each corner.


Because I was using different colour thread for the lining and PVC, I found it quicker to sew the PVC sides, bottom and corners and then to do the same for the lining after I had changed the thread.

Carefully turn through so that the bag is the right way out.

Sew up the gap in the lining.

Time to go shopping and buy some lovely shiny new toiletries for your mini break.


In this project I learnt:

  • I love using PVC but sometimes it can be hard to sew.  I always use cotton backed PVC but this was far better quality and much easier to sew than my normal PVC.  It shows that you really do get what you pay for.  I had no problem with it sticking or producing erratic stitch lengths as I have sometimes experienced in the past.  When I can afford it, I'm definitely going to buy the best PVC/oilcloth I can afford.
  • I have never used waterproof lining before.  I bought some over a year ago and then completely forgot about it.  PUL has a knit effect on one side and a waterproof laminate on the other.  This makes it slightly stretchy.  I worried that it would snag when I used a machine needle for woven fabrics, but was fine.  Apparently you can seal the seams to make them waterproof but I'm not sure how.  The end result is really professional.  I can't wait to try it out and see how it performs in use.


Monday, 4 April 2016

Bag #14: Small tote bag


I was shopping at a local garden centre with a friend when she spotted a small PVC tote bag which was a handy size for a sandwich, a drink and a book.  Of course, my response was to offer to make one.  The fabric I used was a remnant from my stash, so it cost very little and I had so much fun making this bag. 

I love working with PVC.  I think it is my favourite fabric but it can be tricky.  I think that’s what I like about it – the fact that it will be a challenge but will look good even if it goes wrong.

My lining was the same on both sides which always makes life easier.

I used ¼" seams throughout and my usual stitch length (2.5) for seams but 3.5 for top stitching.  I didn’t use a special foot but I did use a leather needle.  I couldn’t use pins because they would leave permanent marks, but my Clover wonder clips held everything in place.


Skills used in this project:
  • Creating structure using stitches
  • Working with PVC


Step 1: Cutting out

Cut out the following pieces

13 ½” x 12 ¼” PVC bag body (cut 2)
13 ½” x 2” PVC for inside bag (cut 2)
4” x 15” PVC handles (cut 2)
13” x 11 ¼” bag lining (cut 2)
7” x 8” lining for pocket (cut 2)
7” x 8” iron-on light interfacing for pocket (cut 2)
3” x 8” iron-on light interfacing for lining around zip (cut 1)
7” zip (I used an N3 zip cut from a continuous roll)


Step 2: Making the PVC bag body


Cut  a 1 ¼” square out of the 2 bottom corners for both pieces of the PVC bag body (the bottom will be one of the longer sides).  If using a directional fabric, make sure the fabric will be the right way up before cutting these out.

Right sides together, sew both side seams.


Wrong sides together, Measure 1 ½” from the side seam and fold as shown in the photo.  Top stitch close to the edge down this fold.  This will create the bag’s shape. Do this at each side for both the front and back of the bag to create 4 of these ‘fake seams’.

Right sides together, sew the bottom seam.


Right sides still together, flatten the corner squares cut outs and sew along the straight line this creates just inside the fake seams.

Turn right side out.


Step 3: Making the pocket

Iron the interfacing to the wrong side of both pocket linings.  Attach the 3” strip of interfacing to the wrong side of one of the bag lining pieces.  This should be centred with one long side of the interfacing against the edge of one long side of the bag lining.

Pin one pocket piece and the lining to which you have just added the interfacing, right sides together, with the long side of the pocket along the top edge of the lining, to match the position of the interfacing on the bag lining.   


Draw a ½” x 6” rectangle along the centre of the interfacing which is attached to the bag lining.  Sew around this rectangle through all the layers that you have just pinned together..  

Cut a slit in this rectangle (as shown in the photo) making sure not to cut the stitches. Push the pocket through this ‘letterbox’, shape in the lining so that it sits flat and press. You will now have a neat opening to attach the zip.

Pin the zip to the pocket so that the right side shows through the aperture in the bag lining.

Sew all round.


Pin the remaining pocket piece to this one, right sides together and sew around the sides and bottom, keeping the bag lining out of the way as you do not want to sew through this. 


Sew along the top of the pocket and the bag lining to hold the pocket firmly in place.


Step 4: Making the bag lining

Cut 1 ¼” square out of the 2 bottom corners for both lining pieces.

Sew each PVC inner strip to the top of a lining piece, right sides together, making sure that the fabric will be the right way up if it has a directional pattern (the lining will be below the PVC strip when the bag is assembled).


Pin the bag lining pieces together, right sides together and sew down the two side seams.  Sew along the bottom seam, leaving a gap of about 5” for turning. Press the lining seams open being careful not to iron the PVC (which will melt if ironed!).  Sew the bottom corners of the lining as you did for the PVC part of the bag in step 2.


Step 5: Making the handles


Fold the handles in half lengthways to find the centre.  Fold each side in so that the edge is against the fold line.  It will now look like bias binding.  Fold in half and top stitch close to the edge along each long side of the handle.  This will hold it together and make it look professional.


Step 6: Assembling the bag


Each end of the handles is 3” from the side seam (they don't look it in the photo because the side seam curves round!).  The handles need to hang down.  Ensure that they are not twisted and sew them in place. 

Design tip: I matched the raw edges of the handles to the edge of the bag, but if you wanted to use the bag for heavier items, I would place the handles so that they are sticking out about ½” above the raw edge of the bag, then after finishing the bag, do a second row of top stitching around the top of the bag about ¼" below the previous row to give them added strength. 


With the right side of the PVC bag facing outwards, place the lining over the PVC with the handles tucked inside.  The PVC and lining will be right sides together (the fake seams should face towards the side seams.  Sew all round the top.  Turn through the gap at the bottom of the lining.  Sew up the gap.

Top stitch around the top edge of the bag.


Now you have the perfect excuse to go shopping – to try out your new bag!  It’s wipe clean so you won’t need to worry about getting it dirty.


In this project I learnt:
  • I have never used fake seams before but I certainly will in future.  They are a simple way to create structure to a bag while minimising the number of fabric pieces to be cut out. I made sure that I measured their position carefully and clipped them in place before sewing.  The only potential problem with PVC was that it means sewing on the right side of the PVC.  This can cause problems because the PVC can stick to the base of the sewing machine.  I have been advised to get a roller or teflon foot for sewing PVC on the right side but I haven't got round to it yet.  In any event, I didn't have a problem.  I find that my machine copes well if I use a longer stitch (although the machine struggles to keep the stitches at a consistent length when sewing on the shiny/right side of PVC).  I can't believe how easy this was and I shall definitely use this technique in future.
  • An alternative way of making the fake seams would have been to cut both the PVC and lining to the same width and then assemble the bag without the fake seams, adding them at the end through all layers of the PVC and lining.  This gives a pleasing finish as the lining is held tightly in place, but I wasn't sure whether I would catch the lining all the way down the fake seams and if I didn't, it might look amateurish.  I might try this method at some time in the future, and if I do, I'll let you know how I get on.  Or if you have tried it, let me know your thoughts.
  • PVC is always a challenge (see above), but the more I use it, the easier it becomes. when sewing on the right side, using a longer stitch length and being more accepting of inconsistent stitch length are the two most important things I have learnt.  No one else has even noticed the stitching - they just look at the appearance of the bag. I've definitely learnt to be less of a perfectionist with PVC.