About this blog

I make bags and post tutorials on how to make them. I'll tell you what went well and warn you about any disasters.
Showing posts with label small bag. Show all posts

Sunday, 8 May 2016

Bag #19: Quick and Easy Make-Up Bag


This is a really easy small bag that looks amazing.  I made the one with the mannequin fabric and I've been using it to keep my mini patchwork essentials - fabric, card, scissors, thread and completed patchwork hexagons. It would also work as a lovely make up bag. I fell in love with the button fabric and made another bag using that but it looks a bit plain.  I think it needs some embellishments.  Any suggestions?  Then I saw the giraffe fabric and couldn't resist making another bag, this time for my mother, who loves giraffes.  She hasn't seen it yet, but I guess she will now.

Using 2 sliders on the zip makes it look really professional and it means that you don't have to open the zip all the way to get something out. 

To make this bag, you would only need a small amount of fabric.  I used fat quarters and used less than ⅓  of the fabric. 

The finished size of the bag is approximately 6½" x 4½".

I used my normal stitch length of 2.5 throughout but increased to 3 for the topstitching.


Skills used in this project:
  • Using a zip with 2 sliders
  • Inserting a zip on a curve
  • Keeping it simple


Step 1: Cutting out

Cut out the following pieces:

6” x 8” outer fabric (cut 2)

6” x 8” lining (cut 2)

6” x 8” medium weight interfacing - iron-on or sew-in (cut 2)

For all of these pieces, form the shape by cutting out a 1” square from each bottom corner (the bottom will be one of the longer sides) and shaping the top by drawing round a tea plate on each upper corner.  Fold in half to make sure that it is symmetrical.  Alternatively get the PDF pattern here. 


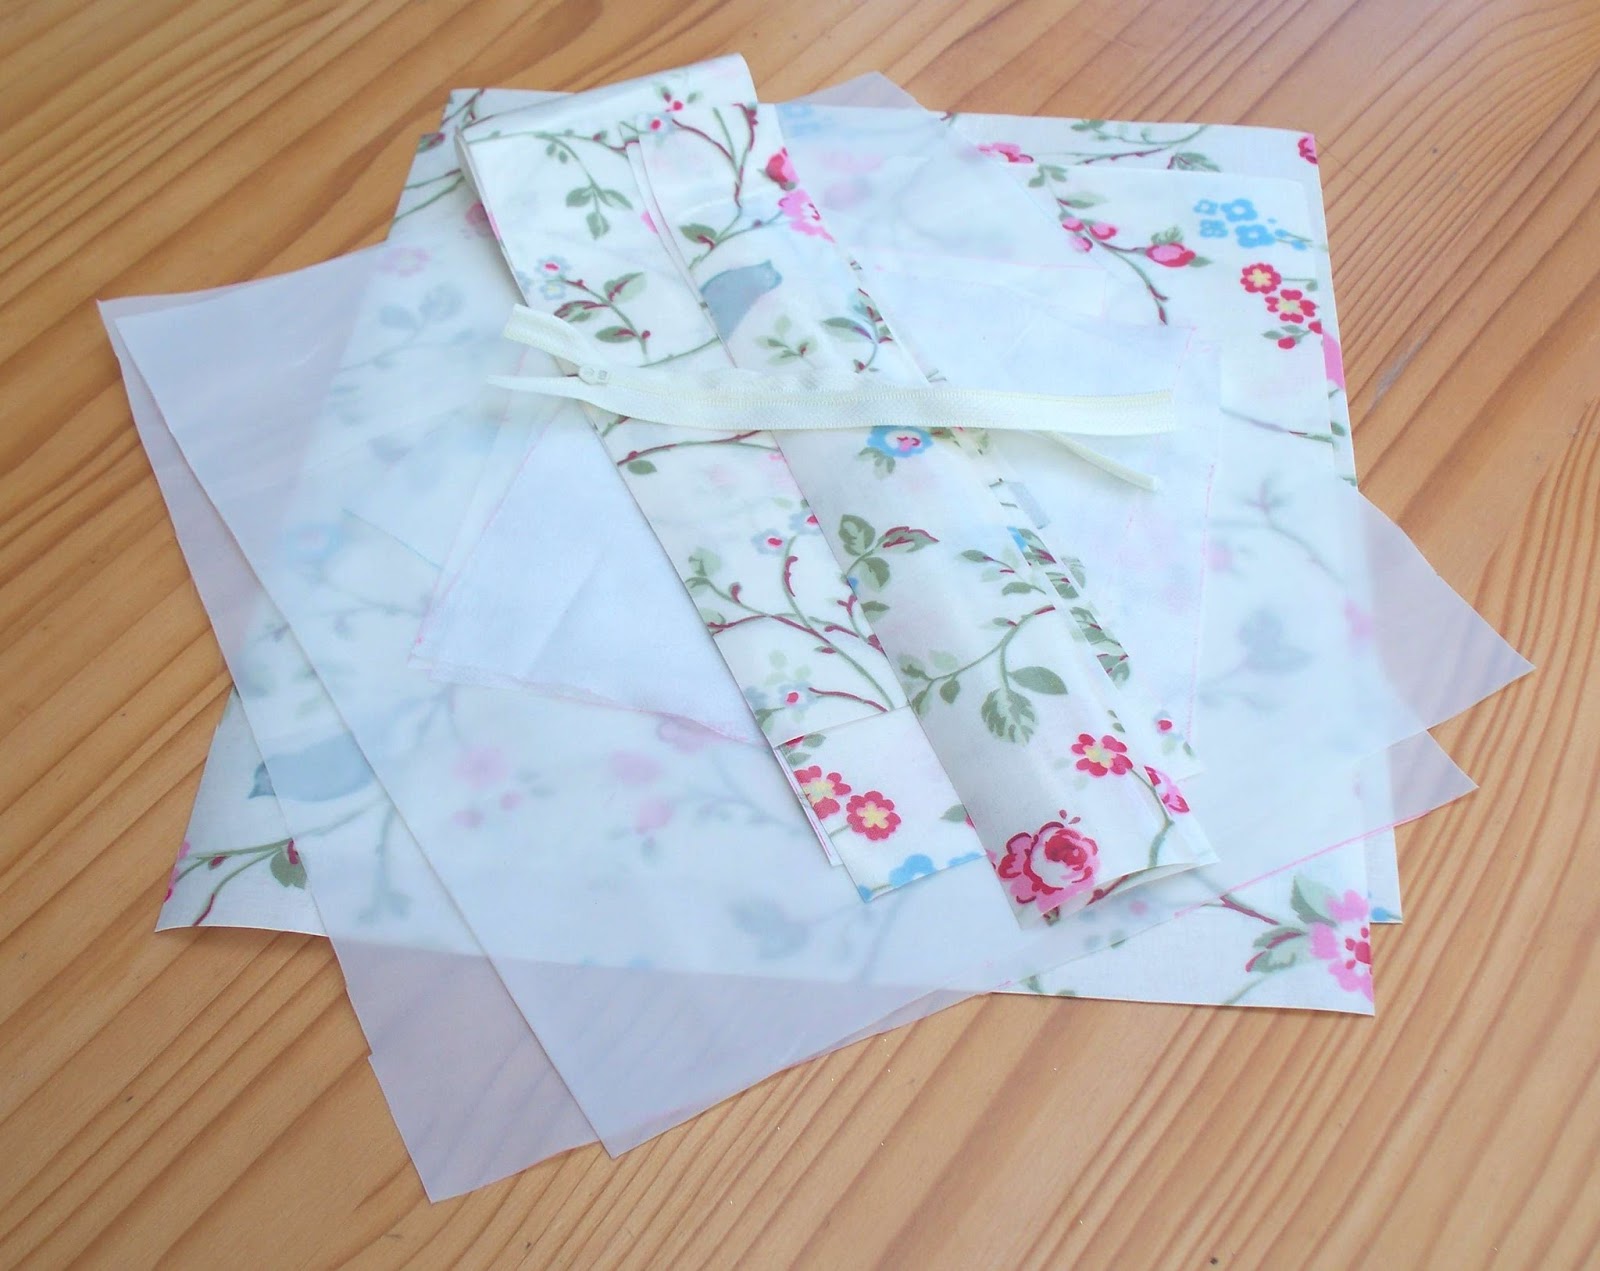
You will also need:

2“ x 6” plain co-ordinating fabric for the zip tabs (cut 2)

2” x 6” lightweight iron-on interfacing (cut 2)

12” zip with 2 sliders (I used an N3 continuous zip on a roll and cut it to size)


Step 2: Making the zip tabs

I find it easier to make the zip tabs a bit wider and longer than is needed and trim to size.  In the photo, I made the zip tabs much too long but I have amended the pattern accordingly.

Iron the interfacing to the wrong side to both zip tab fabric pieces.

Fold in half so that the short edges meet, ensuring that the wrong sides are together.

Fold each short edge under by ¼" and press.


Before attaching the zip tabs, make sure the sliders are both attached so that they face in different directions, both towards the centre, so that the opening will be in the middle of the bag and not at each end!

Place at tab at each end of the zip so that they overlap the zip by about ½".  Sew across to secure. 

Trim the sides so that they are the same width as the zip.


Step 3: Inserting the zip

Pin/Iron the interfacing to the wrong side of the outer fabric.

I usually sew the outer and lining fabrics to the zip in one go, but I have found that with curves, I get a smoother finish if I attach them separately.

Pin and sew one curved side of the outer fabric to one side of the zip. The right side of the fabric should be facing the zip sliders.The zip/tabs should reach the start of the corner cut out or be slightly longer.  Mine were far too long here so I had to trim them later. It is best to find the centre of the bag and zip by folding each in half and start by pinning at the centre, moving outwards.  This will ensure that the tabs are the same length at each end.

Pin and sew the lining to the same side of the zip but on the underside to make a zip sandwich. 

Do the same for the other lining and outer fabric when sewing them to the other side of the zip. 

Trim the fabric around the curve so that it sits neatly along the zip.


Top stitch along each side of the zip to hold all the layers firmly in place and create a professional finish.


Step 4: Sewing the bottom seam

Make sure the zip is open.

Match the bottom edge of the outer fabrics and sew, right sides together.


Do the same for the lining, but leave a gap in the centre of the bottom seam of about 4" so that you can turn the bag through. It is a good idea to make the bottom lining seam about ⅛" bigger than the outer fabric seam (⅜" instead of ¼") as the lining fits more snuggly inside if it is slightly smaller.


Step 5: Making the corners

Finger press the bottom seams open. 

Flatten each of the corner cut outs so that they form a straight line, right sides still together. 


Do the same for the lining.

Pin them together and sew across both at the same time.

Do the same for the other corner.


Step 6: Assembling the bag

Turn through the gap in the lining and sew it up either by hand or machine.


Your cute little bag is now complete.  Fill it with make up or other goodies - it is such a versatile size that you will want one for every occasion.


In this project I learnt:
  • When using a zip with 2 sliders, it is really important to check that they are both facing towards the centre before you start.  It sounds obvious, but I didn't when I made the first bag and had to stop half way through and take the zip apart to correct it.  I won't make that mistake again!
  • I use continuous zips.  I attached all the sliders to the zip but found that it caused some damage to the zip by misshaping it (just visible on the button bag).  I may have just been unlucky or attached them wrongly, but in future I shall store the zip and sliders separately and attach the sliders only when I am ready to use them.
  • Inserting a zip on a curve is harder than using a straight line so it is worth sewing the outer fabric first and then the lining.  I'm still not very good at top stitching around a curve but I'm getting better.
  • Sewing both the lining and outer fabric corners at the same time made it very easy.  There were no seam lines to match up for a change as there was no side seam to match with the bottom seam.  This method also holds the lining firmly and neatly in place so that it looks super smart inside as well as outside.
  • This is one of my favourite makes so far this year.  It is simple, pretty and versatile.  It could be made larger to hold toiletries or how about a matching make up bag and toiletry bag?  I might give that a go when I next have some spare time. 

Monday, 4 April 2016

Bag #14: Small tote bag


I was shopping at a local garden centre with a friend when she spotted a small PVC tote bag which was a handy size for a sandwich, a drink and a book.  Of course, my response was to offer to make one.  The fabric I used was a remnant from my stash, so it cost very little and I had so much fun making this bag. 

I love working with PVC.  I think it is my favourite fabric but it can be tricky.  I think that’s what I like about it – the fact that it will be a challenge but will look good even if it goes wrong.

My lining was the same on both sides which always makes life easier.

I used ¼" seams throughout and my usual stitch length (2.5) for seams but 3.5 for top stitching.  I didn’t use a special foot but I did use a leather needle.  I couldn’t use pins because they would leave permanent marks, but my Clover wonder clips held everything in place.


Skills used in this project:
  • Creating structure using stitches
  • Working with PVC


Step 1: Cutting out

Cut out the following pieces

13 ½” x 12 ¼” PVC bag body (cut 2)
13 ½” x 2” PVC for inside bag (cut 2)
4” x 15” PVC handles (cut 2)
13” x 11 ¼” bag lining (cut 2)
7” x 8” lining for pocket (cut 2)
7” x 8” iron-on light interfacing for pocket (cut 2)
3” x 8” iron-on light interfacing for lining around zip (cut 1)
7” zip (I used an N3 zip cut from a continuous roll)


Step 2: Making the PVC bag body


Cut  a 1 ¼” square out of the 2 bottom corners for both pieces of the PVC bag body (the bottom will be one of the longer sides).  If using a directional fabric, make sure the fabric will be the right way up before cutting these out.

Right sides together, sew both side seams.


Wrong sides together, Measure 1 ½” from the side seam and fold as shown in the photo.  Top stitch close to the edge down this fold.  This will create the bag’s shape. Do this at each side for both the front and back of the bag to create 4 of these ‘fake seams’.

Right sides together, sew the bottom seam.


Right sides still together, flatten the corner squares cut outs and sew along the straight line this creates just inside the fake seams.

Turn right side out.


Step 3: Making the pocket

Iron the interfacing to the wrong side of both pocket linings.  Attach the 3” strip of interfacing to the wrong side of one of the bag lining pieces.  This should be centred with one long side of the interfacing against the edge of one long side of the bag lining.

Pin one pocket piece and the lining to which you have just added the interfacing, right sides together, with the long side of the pocket along the top edge of the lining, to match the position of the interfacing on the bag lining.   


Draw a ½” x 6” rectangle along the centre of the interfacing which is attached to the bag lining.  Sew around this rectangle through all the layers that you have just pinned together..  

Cut a slit in this rectangle (as shown in the photo) making sure not to cut the stitches. Push the pocket through this ‘letterbox’, shape in the lining so that it sits flat and press. You will now have a neat opening to attach the zip.

Pin the zip to the pocket so that the right side shows through the aperture in the bag lining.

Sew all round.


Pin the remaining pocket piece to this one, right sides together and sew around the sides and bottom, keeping the bag lining out of the way as you do not want to sew through this. 


Sew along the top of the pocket and the bag lining to hold the pocket firmly in place.


Step 4: Making the bag lining

Cut 1 ¼” square out of the 2 bottom corners for both lining pieces.

Sew each PVC inner strip to the top of a lining piece, right sides together, making sure that the fabric will be the right way up if it has a directional pattern (the lining will be below the PVC strip when the bag is assembled).


Pin the bag lining pieces together, right sides together and sew down the two side seams.  Sew along the bottom seam, leaving a gap of about 5” for turning. Press the lining seams open being careful not to iron the PVC (which will melt if ironed!).  Sew the bottom corners of the lining as you did for the PVC part of the bag in step 2.


Step 5: Making the handles


Fold the handles in half lengthways to find the centre.  Fold each side in so that the edge is against the fold line.  It will now look like bias binding.  Fold in half and top stitch close to the edge along each long side of the handle.  This will hold it together and make it look professional.


Step 6: Assembling the bag


Each end of the handles is 3” from the side seam (they don't look it in the photo because the side seam curves round!).  The handles need to hang down.  Ensure that they are not twisted and sew them in place. 

Design tip: I matched the raw edges of the handles to the edge of the bag, but if you wanted to use the bag for heavier items, I would place the handles so that they are sticking out about ½” above the raw edge of the bag, then after finishing the bag, do a second row of top stitching around the top of the bag about ¼" below the previous row to give them added strength. 


With the right side of the PVC bag facing outwards, place the lining over the PVC with the handles tucked inside.  The PVC and lining will be right sides together (the fake seams should face towards the side seams.  Sew all round the top.  Turn through the gap at the bottom of the lining.  Sew up the gap.

Top stitch around the top edge of the bag.


Now you have the perfect excuse to go shopping – to try out your new bag!  It’s wipe clean so you won’t need to worry about getting it dirty.


In this project I learnt:
  • I have never used fake seams before but I certainly will in future.  They are a simple way to create structure to a bag while minimising the number of fabric pieces to be cut out. I made sure that I measured their position carefully and clipped them in place before sewing.  The only potential problem with PVC was that it means sewing on the right side of the PVC.  This can cause problems because the PVC can stick to the base of the sewing machine.  I have been advised to get a roller or teflon foot for sewing PVC on the right side but I haven't got round to it yet.  In any event, I didn't have a problem.  I find that my machine copes well if I use a longer stitch (although the machine struggles to keep the stitches at a consistent length when sewing on the shiny/right side of PVC).  I can't believe how easy this was and I shall definitely use this technique in future.
  • An alternative way of making the fake seams would have been to cut both the PVC and lining to the same width and then assemble the bag without the fake seams, adding them at the end through all layers of the PVC and lining.  This gives a pleasing finish as the lining is held tightly in place, but I wasn't sure whether I would catch the lining all the way down the fake seams and if I didn't, it might look amateurish.  I might try this method at some time in the future, and if I do, I'll let you know how I get on.  Or if you have tried it, let me know your thoughts.
  • PVC is always a challenge (see above), but the more I use it, the easier it becomes. when sewing on the right side, using a longer stitch length and being more accepting of inconsistent stitch length are the two most important things I have learnt.  No one else has even noticed the stitching - they just look at the appearance of the bag. I've definitely learnt to be less of a perfectionist with PVC.

Monday, 21 March 2016

Bag #12: Child's Easter Bag


It's Easter at the end of the week and I'm looking forward to some time off work for some serious bag making. There were several suggestions for what I should make with this gorgeous 100% cotton Easter fabric.  I chose to go with this child’s bag for an Easter egg hunt and here it is, just in time for Easter. The finished size is 9” (at the widest point) x 7” (excluding the handles). Although, with longer handles, this would be a great size for a handbag, or make it larger and it would be a good shape for a tote bag. You could add pockets inside and maybe a magnetic fastener.  I used a cotton lining which was very easy to work with.

I lined it with foam so that it holds its shape, but it would work just as well with fleece or wadding. As fleece and wadding are thinner than foam, you would need to cut the handle fleece/wadding the same size as the outer fabric handle pieces, attach it to the wrong side and sew through it, turning through and then follow the rest of the instructions.  To give the handle more shape you could wrap the handle around thick piping cord or rubber tubing when folding it in half lengthways and use a zip foot to sew along the edge.  This would give the handle more shape.  It wasn’t necessary with the foam which is already quite bulky.

I wondered whether to make the handles of a contrasting fabric to make it more interesting but decided to stick to the Easter fabric in the end. Was that the right choice?

I used ¼” seams and my machine’s usual stitch length on the seams but lengthened it from 2.5 to 3 for the top stitching.

This project could be made from a fat quarter of the outer and lining fabric and a 7 ½” strip of stabiliser (either foam, wadding or fleece).

This would be a good bag for a sewist who is new to bag making as the stages are fairly straightforward.


Skills used in this project:

  • Making bag handles
  • Using bag foam


Step 1: Cutting out

Cut out the following pieces:

For the bag body, cut 10 ½” x 7 ½” Outer fabric, lining and foam (cut 2 of each).

For the base, cut 6 ½” x 2 ½” outer fabric, lining and foam (cut 1 of each).

For the handles, cut 12” x 2” outer fabric (cut 4) and cut 11 ½” x 1 ¼” foam (cut 2).


Step 2: Making the bag body


Attach the foam body to the wrong side of the outer body fabric by ironing (if using iron-on) or pinning.  Sew outer bag body pieces together along side seams, right sides together.  

Pin and sew body lining pieces together along sides seams, right sides together.


Step 3: Attaching the base


Draw round a curved object to create the rounded corners on the base outer fabric, lining and foam, then cut along these lines.  I used a coin to give an even shape in each corner.


Attach the foam base to the wrong side of the outer fabric base (as above).  Pin right side of base to right side of body, using lots of pins to ease the parts together.  Sew. 

Pin and sew lining base to lining body, right sides together.

 
Step 4: Making the handles

Round the corners of the foam handle as you did for the bag base.

Place the fabric, right sides together with the foam sandwiched between them.  Using a zip foot, sew all round the foam (but do not sew the foam – you are just creating the shape to ensure that they are a tight fit), leaving a gap to turn through.  Pull out the foam through the gap.  Trim the ends with pinking shears.  Pull the fabric through so that the right sides are facing out and push the foam back into the handle casing.  Hand sew the gap.


Fold the handles in half lengthways, matching the side seams and pin.  Leaving 2” at each end, top stitch along the edge, just inside the side seams.


Step 5: Attaching the handles


The handles will be attached to the right side of the body with the seam facing inwards.  Pin one end of a handle with the end 1 ½” below the top of the body and the centre 3” from one side seam. Do this for all the ends.  Sew.


Step 6: Attaching the lining

Pin the top of the lining to the top of the outer fabric/foam, right sides together, matching the side seams and ensuring that the handles are tucked between the fabric as you do not want to sew over them.  Sew round the top leaving a gap for turning of about 4”.  Pull the fabric through the gap and sew it up by hand. 

Top stitch around the top seam, making sure not to sew over the handles, to create a professional finish.  This also ensures that the lining stays in place.

Wait until Easter, hide Easter eggs around your house or garden, give an Easter bag to each child and send them off to find the eggs while you put your feet up and have a well earned rest.


In this project I learnt:

  • I was a big scared of making fabric bag handles and have always avoided them before, but as with most fears, they were completely unfounded.  I took it slowly and used a profusion of pins to ensure that everything stayed where I wanted it and sewed slowly and carefully. I was conscious that the stitches at the ends of the handles would be very visible, so rather than backstitching at the beginning and end, I left long threads  which I pulled through to the wrong side and knotted together. They were then hidden by the lining.
  • I’m fairly new to using foam in bag making.  It’s very bulky and sometimes my sewing machine objects to the thickness but I like the fact that it gives bags a really nice shape and enables them to stand up by themselves. It’s more expensive than fleece or wadding, so I wouldn’t use it unless it made a visible difference. I found it easier to use lots of pins to make it do what I wanted and it worked a treat. Being able to use pins in this fabric made it much easier, unlike in the sewing of faux leather when pins can't really be used because they leave long term holes.