About this blog

I make bags and post tutorials on how to make them. I'll tell you what went well and warn you about any disasters.
Showing posts with label free motion embroidery. Show all posts

Sunday, 18 December 2016

Bag #50: Easy Quilted Envelope Bag


Last week I made a pattern for an envelope bag, but this is a much easier version.  I made mine out of quilting cotton and used a magnetic clasp to close it.  However, it could be made of any fabric and doesn’t need to be quilted.  Instead of a magnetic clasp, it could be closed with two pieces of ribbon or a loop of elastic on the flap and a button on the bag front. I put some knitting needles and yarn in the bag but it could be used for anything.  All you need is one fabric for the inside and one for the outside plus wadding/interfacing. I might make another one out of faux leather, adding a shoulder strap and without the quilting.

It is best to use non-directional fabric or either the bag or the flap will have an upside down pattern. 

This method could be used for any size envelope bag and takes hardly any time to make, especially if it is not quilted.  The finished size is 11½”/29 cm wide, 10”/25.5 cm high and ½”/12 mm deep.

You would need a fat quarter of each fabric to make this bag, as well as wadding (I used quilt batting which is nice and soft) and a medium weight interfacing. I used the mannequin fabric for the outside of the bag and the tape measure fabric for the lining.

Skill level: Easy, especially if the bag is not quilted and a button/elastic closure is used.

I used my normal stitch length (2.5) throughout but increased it to 3 for top stitching and I used ¼”/6 mm seams.  However when sewing the final 2 seams to make the front of the envelope, I found that the seams were really thick, so I changed to a jeans needle and used a stitch length of 4, taking it very slowly.

I have included metric and imperial measurements but they are not exactly interchangeable, so you should stick to either one or the other.


Skills used in this project:
  • Free motion embroidery
  • Keeping it simple


Step 1: Cutting out

Cut out the following:

18” x 18”/46 cm x 46 cm (cut 1 outer fabric, 1 lining, 1 medium weight interfacing, 1 wadding)

1 magnetic clasp (or other closure e.g. elastic and button)


Step 2: Attaching the magnetic clasp / other closure

Attach the interfacing to the wrong side of the lining. 


The thinner side of the magnetic fastener needs to be attached to the right side of the lining where it will end up on the inside of the flap. I placed it centrally with the middle of the fastener about 2”/5 cm from one of the corners.  

Here is a photo from a previous bag to show how the magnetic clasp
should look on the reverse side of the fabric -
I find that turning the legs out makes the clasp more stable

I used a small off cut of bag foam on the wrong side of the lining to give it extra stability.   Make 2 holes in the lining/interfacing and foam, push the ‘legs’ through from the right side of the lining, through the foam and the washer and open them outwards to secure.

Attach the wadding to the wrong side of the outer fabric. I pinned mine.

Attach the thicker side of the fastener to the right side of the outer fabric.   I positioned mine about 2½”/6 cm from one of the corners.

Alternatively, for an easier option, attach a loop of elastic to one corner which will be the flap.  Make sure the loop faces inwards when you sew all the pieces together (below).  You can then sew a button onto the lower front when the bag is complete.


Step 3: Joining all the pieces

Place the lining and outer fabric, right sides together, and the two parts of the magnetic clasp at opposite corners. Sew all round, leaving a gap for turning near to the magnetic clasp which is on the outer fabric.


Trim the corners and cut the wadding back as close to the stitching as you can.

Turn through, pin the gap closed and press.  There is no need to sew up the gap at this stage.


Step 4: Quilting (optional)


The two parts of the clasp are on opposite corners.

Machine quilt through all layers of the fabric. You could sew horizontal and vertical rows using the general purpose foot and the feed dogs up, or you could put the feed dogs down, use an embroidery foot and do free motion embroidery.  I sewed random curves using free motion embroidery.


Step 5: Assembling the bag

The lining side is facing out.
The magnetic clasp on the outer fabric is on the inside in the top right hand corner.
With right sides (outer fabric) together, fold one of the sides so that the corner meet.  You need to match the corner with the magnetic clasp on the outer fabric with one of the corners with no clasp. The photos should make this clearer. Sew along this seam.


Do the same with the other corner which doesn’t have a clasp.  

Turn the bag right sides out.  Hey presto, it's finished!  Wasn't that easy?


In this project I learnt:
  • I used free motion embroidery to quilt the bag. I’m getting better at it but my stitch length is still all over the place.  I really enjoy it and every time I do it, I have good intentions to practise more, but finding the time is so difficult.  When this year’s challenge is up and I stop making so many bags, it’s one of the things on my ‘to do’ list.
  • It was fun to do an easy bag this week.  I couldn’t decide whether to quilt the outer fabric and then add the lining, but in the end I decided to join all the layers and then quilt it as that was simpler.  I was tempted to join some fabrics so that the front and back were different colours but I forced myself to keep it as simple as I could.  I’m glad I did because it still looks good.

Sunday, 16 October 2016

Bag #41: Christmas Sack


As all crafters know, Christmas makes begin in July when the shops start to fill with festive supplies.  So, by now, most sewists will have completed many of their projects and gifts.  After all, who has the time in December?

I had most of the hessian left over from last week’s bag and wanted to make a Christmas gift sack.  This is a small one just big enough for a pet or adult; it would leave a child very disappointed.

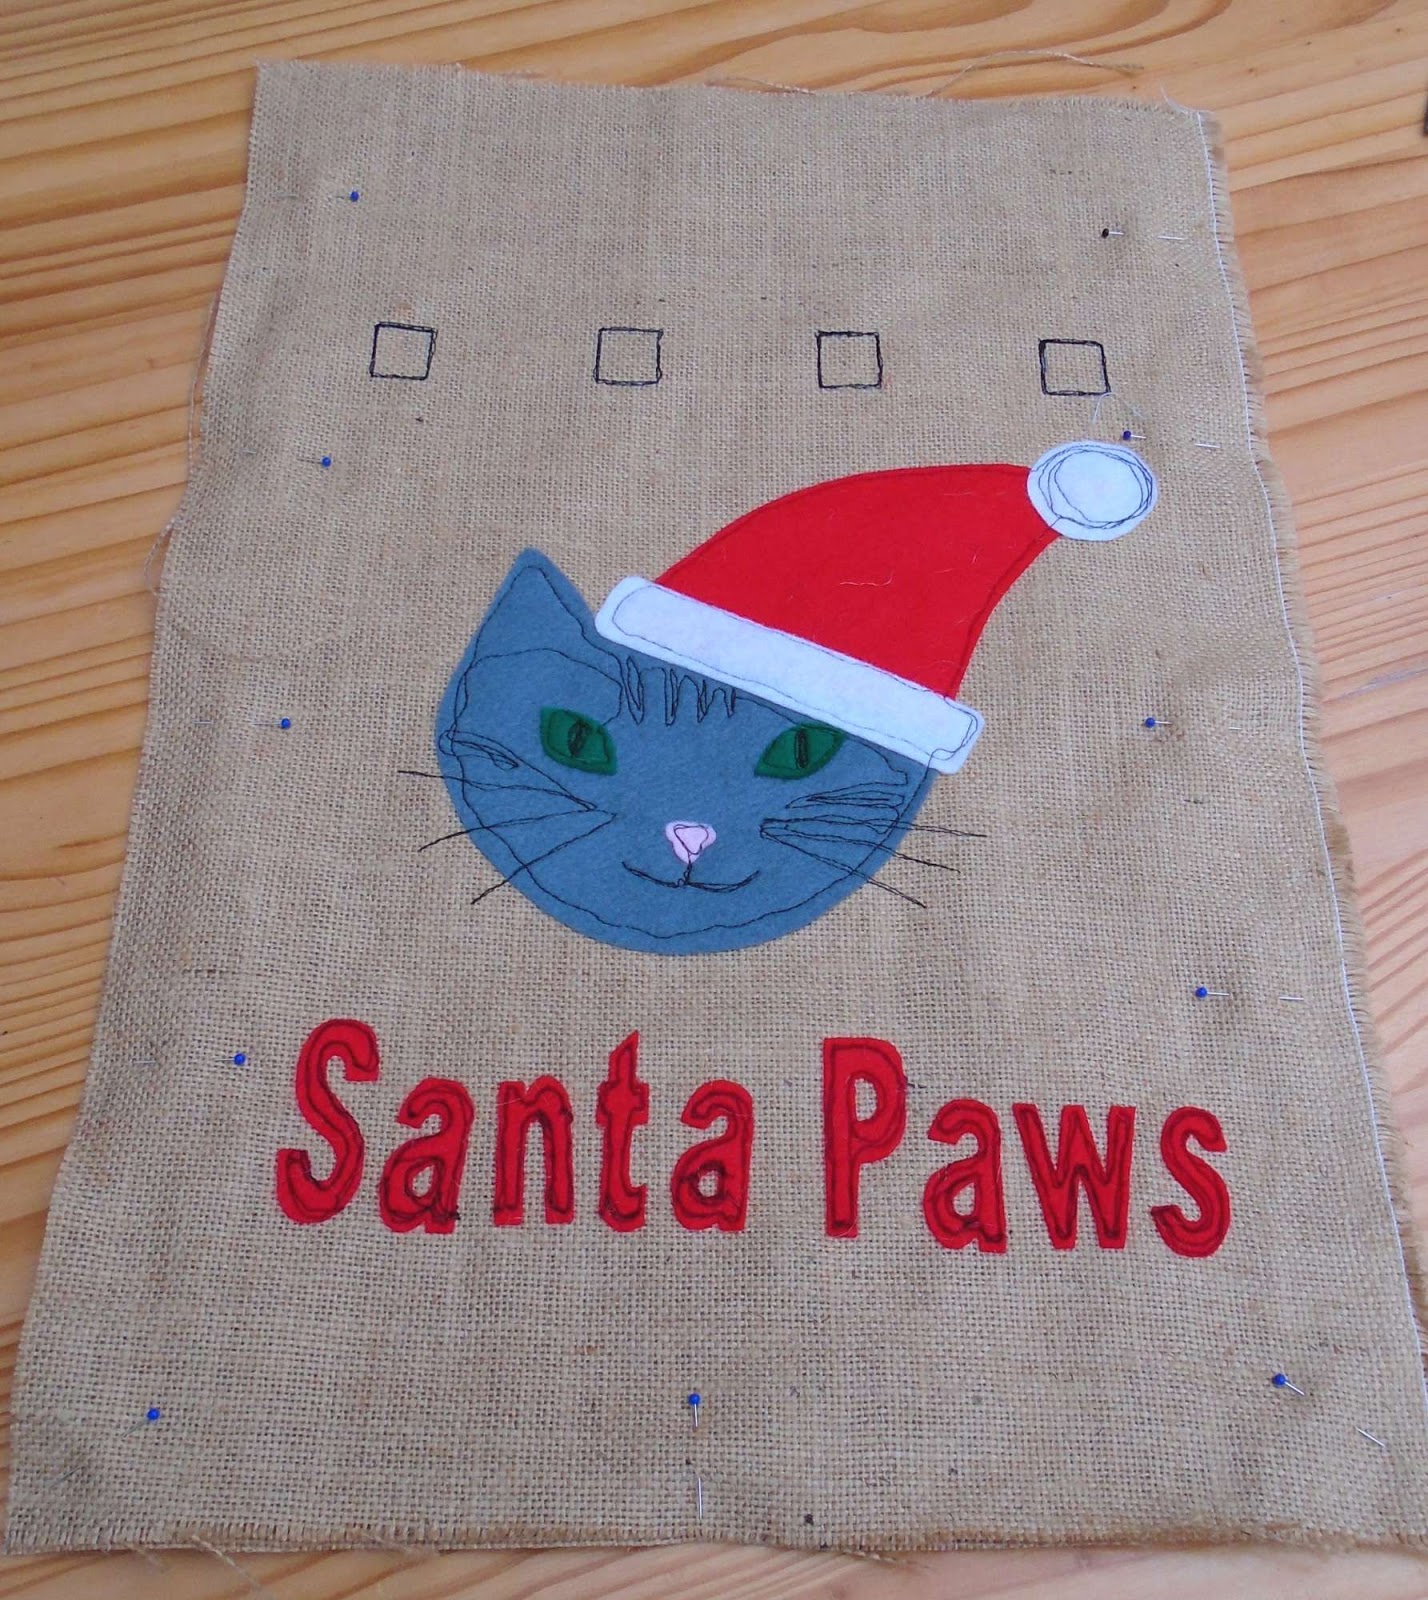
You could keep it completely plain or add an appropriate appliqué design for the recipient including personalising it with their name. Mine is for my cat, so I added a cat face and the words 'Santa Paws'.  I used acrylic felt which I bonded to the hessian and then sewed, but if you were short of time and didn’t want to sew, you could buy self-adhesive felt which would save on the sewing time.  I haven’t tried it myself so I don’t know if it would stick to hessian.  I wouldn’t sew through it because I don’t think the adhesive is safe for sewing machines, but if anyone knows otherwise, please let me know.

I used French seams to avoid raw edges inside.  This was really good quality, sturdy hessian, but the edges began to unravel while I worked on the free motion embroidery, so I would recommend sewing a straight line of stitches all round, close to the edge, just to hold it together while working on it.  They will then be hidden in the seam allowance.

Thanks to Tilly Rose for the helpful tips she kindly gave me on free motion embroidery when I spoke to her at the Knitting and Stitching Show at Ally Pally, London last weekend. It may not look it, but it’s a vast improvement on my previous attempts!

Usually I would make a channel for the drawstring to go through but I thought the hessian would look more interesting if I made eyelets from it.  If you don’t like this look, you could make the top hem longer so that it includes a channel on the inside or add a colourful sew-on channel on the outside.

You will need 20”/half a metre of hessian and that will leave you with enough to spare to make last week’s bottle gift bag out of the leftovers.

The finished size is 16”/40.5 cm high x 10”/25 cm wide x 4”/10 cm deep when loosely filled with goodies.

Skill level: Easy if you buy self adhesive felt.

I used a stitch length of 3 throughout as the hessian was slightly bulkier than my usual cotton and ½”/12mm seams for the same reason.  . Hessian doesn’t have a right or wrong side, so where I refer to the right side, it’s just whatever side you have chosen as the outside of the bag.

I have included metric and imperial measurements but they are not exactly interchangeable, so you should stick to either one or the other.


Skills used in this project:
  • Machine appliqué
  • Free motion embroidery
  • Sewing eyelets
  • French seams


Step 1: Cutting out

Cut out the following:

14” x 21”/35.5 cm x 53 cm Sack front and back (cut 2 hessian)

39½”/ 1 m Drawstring  (mine was ½”/12 mm wide)

Felt for appliqué 

Heat n bond (or other similar product e.g. bondaweb) unless using self-adhesive felt

Embellishments (I also used a ribbon for the bow)


Step 2: Applying the image

If using self-adhesive felt, draw your image, cut it out and stick it onto the hessian.

If using plain felt, follow these instructions:


Decide on the image you want on your sack. I drew a basic outline, but you could print an image from your computer (subject to any copyright restrictions). As you will be attaching it to the back of your appliqué pieces, the image would normally need to be reversed.  However, as felt doesn’t have a right or wrong side, it isn’t necessary here. (I didn't work this out until afterwards and painstakingly reversed my images!!)

Trace the image onto the paper side of heat n bond and cut out roughly (no need to cut out exactly at this stage).

Iron onto felt (with other fabrics, iron onto wrong side).

Cut out accurately following the traced line.

Peel off backing and arrange the image so that you are happy with it.  Iron the sticky side of the felt (it has a slight sheen) onto the hessian.


Sew round using free motion embroidery. I used a contrasting thread as a feature but I wasn’t very good at it and all my mistakes show! Using a co-ordinating thread is more subtle and mistakes don’t show as much but it means you have to keep changing the thread if you have a multi-coloured design.

Add any embellishments. Delicate embellishments are best added once the bag has been finished. I added a ribbon which I sewed on after the bag was finished as I didn’t want it damaged during the assembly process.


Step 3: Making the eyelets


Make 4 eyelets on each side of the bag, starting 5”/12.5 cm from the top.

Measure the tape and make them twice the width of the drawstring.  My drawstring was ½”/12mm wide, so I made them 1”/2.5 cm square.  This can be done using free motion embroidery or normal stitching.  I used free motion embroidery on the front and normal stitching on the back.  They don’t look much different but the free motion embroidery was much quicker and easier.  I used a dark thread to make a feature of the stitches.

 
Cut out the inside of the eyelets just inside the stitching line.


Step 4: Assembling the bag

As you can see, I forgot to cut out the eyelets,
but remembered before the bag was fully assembled.
To make the French seams, with wrong sides together, sew a ½”/12 mm seam around the sides and bottom, leaving a gap next to the eyelets on each side (same size gap as the eyelets). Press.


Turn inside out so that the right sides are now together.  Sew a slightly wider seam around the sides and bottom to completely encase the raw edges, again leaving a gap next to the eyelets.  I trimmed the raw edges slightly to make sure that they would fall within the seam allowance.  Press.


Now for the top hem.  This is quite a deep hem so that it won’t be visible when the bag is in use. Turn the end under by ½/12mm (so that the raw edge is hidden) and then fold over again so that you have a 2”/5 cm hem.  Sew all round close to the bottom of the hem. Press.

Turn right side out.  Press.

Thread drawstring through eyelets and tie a knot at each end.


Fill with presents for that extra special person/pet.  It will look great under the Christmas tree when December arrives.


In this project I learnt:
  • This bag would be really dull without the appliqué. I wasn’t sure whether the felt could cope with a hot iron, so I started off using a medium iron but the heat n bond didn’t stick.  I put a piece of plain cotton fabric over the felt when ironing on hot and it was fine.  I read afterwards that you should iron from the wrong side of the main fabric when using thicker appliqué.  It pays to read the instructions!  I drew my own images and printed the letters using Word Art.  My drawing wasn’t very good so I probably should have printed an image too!
  • I’m not very good at free motion embroidery, but there’s only one way to get better and that’s practise. I took on board the advice Tilly gave me and I could definitely see an improvement by the end, so my next attempt should be better.  The problem is that I leave long gaps between my attempts and forget everything I’ve learnt.  I’m going to try to do a little every day in future to improve my confidence and skill.
  • I really like this style of eyelet.  It goes well with the rustic feel and look of the hessian.  I wasn’t sure if they would be strong enough, so I tried it out first on a scrap of fabric and was really impressed with how sturdy it was.  I used free motion embroidery for the eyelets on the front of the bag and a normal stitch on the back.  The free motion embroidery actually looked slightly neater and was much quicker.
  • I tried out French seams at the start of this year and have used them several times since.  It is such an easy way of creating a neat, professional looking seam in an unlined bag. They also give the bag extra strength for heavier gifts.  I wasn’t sure whether they would be too bulky when using hessian, but no, they were fine when pressed.

Sunday, 2 October 2016

Bag #39: Craft Caddy


I always have lots of projects on the go, so this craft caddy is a must.  I made it just the right size and shape for my needs but it could easily be adapted to be bigger or smaller.  Or it could be taller with more pockets.  That’s the joy of making it yourself – it’s just right for you. As soon as I have time, I'm going to make one half the size for smaller bits and pieces. The pockets would look good made from a contrast fabric. As usual, I used cotton fabric throughout, including a calico lining.

I made the main body with foam because I wanted it to be quite firm and upright, but it could be made with wadding for a floppier, less structured bag.  I used wadding for the pockets so that they would have a softer shape.  I allowed an extra inch (2.5 cm) of fabric for each pocket (two on each side) to make room to put things in it.  If you want pockets that hold more, you could increase that.  You might want one large pocket or several smaller ones for pens, tools, etc. I didn’t add any internal pockets because I had plenty on the outside, but they could easily be added to the lining using the same technique.

I cut straight strips from a plain cotton fabric for the binding.  As the edges are all straight, there is no need for bias binding.  When adding the binding for the pockets, I did it all by machine because the inside of the pockets if barely visible.  However, when sewing the binding around the top I decided to sew it to the outer fabric and fold it over onto the lining and hand sew it in place along the stitch line.  This is how I would normally sew binding on a quilt as it needs to look great on both sides.  This suited me because I enjoy hand sewing and had the time to do it, but it’s not essential.  It’s up to you!

The finished size is 16”/41 cm wide and 7”/18 cm deep at the top, 10”/25 cm high and it has a 10”/25 cm square base.

For the main bag, you will need 10” x 50” of outer fabric, lining, and foam and for the pockets  12” x 28” of outer fabric, lining and wadding.

Skill level – intermediate, but easy for a quilter who would be familiar with quilting and binding.

I used my normal stitch length (2.5) throughout but increased it to 3 for top stitching.  I used ½”/12 mm seams for the outer bag (due to the thickness of the foam) and slighter wider seams for the lining.


I have included metric and imperial measurements but they are not exactly interchangeable, so you should stick to either one or the other.


Skills used in this project:
  • Making bag handles
  • Free motion embroidery


Step 1: Cutting out

I ended up using a different cord as this
was too floppy.
Cut out the following:

10” x 10” (25 cm x 25 cm) Bag sides and base (Cut 5 outer fabric, 5 bag foam, 5 lining)

12” x 7” (30.5 cm x 18 cm) Pockets (Cut 4 outer fabric, 4 wadding, 4 lining)

2½” x 85” (6 cm x 216 cm) Binding

2” x 44” (5 cm x 112 cm) Herringbone tape cut into two 22”/56 cm lengths

28” (71 cm) length of ½”/12mm Cord or tubing for the handles cut into two 14”/35.5 cm lengths


Step 2: Quilting

I cut my wadding a little bigger and trimmed it to size after quilting.
Assemble the quilt sandwich for the pockets.  Place the lining right side down, put the wadding on top of the lining and then add the outer fabric right side up.  Do this for all 4 pocket bundles. Pin the sandwich together at regular intervals.

Lower the feed dogs and, using the free motion embroidery foot, sew a random design to hold the quilt sandwich together.  Alternatively, sew straight lines up and down using a walking foot.

The side panels will need partial quilting.  Place the foam behind each layer of outer fabric and quilt the top 4” (this is all that will be visible when the pockets are sewn on.  Do not add the lining to the quilt sandwich, this will be added later.

The base will need quilting all over but again it will only be the foam and the outer fabric.


Quilting tends to make the edges uneven, so it is a good idea to trim to straighten them.


Step 3: Binding the top of the pockets

Fold the binding in half lengthways and press. 


Keeping it folded in half, pin the raw edges of the binding to the top of the lining side of one of the pocket pieces so that the raw edges of both fabrics meet.  Sew.  Fold the binding over the top edge and down onto the right side of the quilt sandwich so that it covers the stitch line.  Sew just above the folded edge.

Do this for all 4 pocket pieces. 


Step 4: Sewing the pockets to the side panels


Take one pocket piece and one side panel.  Place the side panel right side up and lay the pocket on top, also right side up.  The bottom of the pocket needs to match the bottom of the side panel.  Sew close to the edge down each side to hold them together.  This line of stitching should be within the seam allowance so that it is not visible when the bag is assembled.

Find the centre of the side panel and the pocket and sew a vertical line of stitching to create 2 pockets on each side.  Alternatively, sew as many vertical lines as you want to create appropriate size pockets for your needs.

Sew along the bottom edge, close to the edge, gently gathering the pocket.

Do this for all 4 pocket pieces.


Step 5: Assembling the outer bag


Pin the 4 side panels together at the side edges, right sides together and sew.


Pin the base to the side panels, right sides together and sew.


Turn the bag right side out.


Step 6: Making the handles

Fold the herringbone tape in half lengthways and sew the open side together as close to the edge as possible, starting and stopping approx 2½”/6 cm from each end.

This photo shows the cord I originally used.  I wanted a firmer handle
so I changed it after the bag was finished.

I was much happier with this style of cord.
It's the same diameter but firmer.

Thread the cord or tubing through the tape to create the handle shape and trim so that it is completely enclosed by the tape.


Step 7: Attaching the handles


Turn the raw edge under and pin the handles to opposite sides of the bag.  I placed mine approximately 1”/2.5 cm from the side seam and the end of the handle was about 2½"/6 cm from the top edge.

Sew a box or ‘X’ on the handle to attach it to the bag. 

Do this for each end of the handles, making sure that they are not twisted.


Step 8: Making the lining


With right sides together, sew the side seams of all 4 lining pieces and then, still with right sides together, sew them to the base.


Step 9: Assembling the bag


Place the lining inside the outer bag so that the wrong sides of the fabric are together.
Sew them together around the top edge, making sure that the handles are kept out of the way.


Sew binding all around the top edge, trimming back the edges where necessary so that the binding can be folded over the raw edge and sewn to hide the other stitch lines.


I’m really pleased with this bag.  The fabric is so appropriate. It’s just what I need to keep my forthcoming projects organised. Now I have no excuse for untidiness!


In this project I learnt:
  • I have wanted to make ‘stuffed’ bag handles for ages but I was waiting for the right bag.  I originally used a soft plaited rope which made the handle really floppy.  After finishing the bag, I decided I didn’t like the look and changed the ‘stuffing’ for a firmer braided cotton cord.  I was much happier with the effect as the handles were able to stand up by themselves. Next time, I might try plastic tubing and sew how that compares.
  • I have done free motion embroidery before but I’m very out of practice.  I was aiming for random swirls but it took a while to find my rhythm.  The first pocket wasn’t very good – varied stitch lengths, jerky movements and angular rather than curving shapes.  After a short while it began to get easier.  I increased the speed and moved the fabric more slowly which resulted in more regular stitches. I used a thread which matched the fabric so that quilting isn’t that visible – it’s more of an impression of quilting so I doubt if anyone would notice the flaws.  Overall I’m quite happy with it despite its imperfections!

Monday, 11 April 2016

Bag #15 : Personalised Bag


My aunt is incredibly generous and I wanted to make this bag to thank her for some lovely gifts.  She is a keen paper crafter who regularly attends classes and workshops, so I thought this bag would be the ideal size to take her pens, scissors, etc. to classes.

She loves animals so I chose an easy cat appliqué which complemented the cat fabric on the other side.  I also added her name in free motion embroidery to personalise it and make it totally unique.  I like the fact that the techniques used in this bag could be used on almost any bag to make it stand out.

I used a ¼” seam allowance throughout and my normal stitch length for the seams (2.5) and increased it (to 3) for the top stitching.  I prefer to use iron-on interfacing but I didn’t have any in my stash so I used a medium sew-in interfacing. 


Skills used in this project:
  • Machine appliqué
  • Learning a new machine stitch
  • Free motion embroidery

Step 1: Cutting out

Cut out the following:

12” x 8” patterned cotton fabric (I used Lucky Neco by Moda) (cut 1) and medium interfacing (cut 1)

7 ¾” x 8” cream cotton fabric (cut 1) and medium interfacing (cut 1)

4 ¾” x 8” red cotton fabric (I used red) and medium interfacing (cut 1)

12” x 8” lining fabric (cut  2)

Small amount of cream fabric and heat n bond (or bondaweb) for the appliqué

2" x 3" Zip tabs from the plain coloured fabric (cut 2)

2" x 4" D ring tabs from the plain coloured fabric (cut 1)

12" zip

1" D ring


Step 2: Free motion embroidery


On the right side of the cream cotton fabric, write your chosen words using a suitable marker such as an air drying, wash off or friction pen (test the fabric first to make sure that it can be removed).

I wanted to embroider the words ‘Dorothy’s Bag’ onto the side of the bag to show that it was made especially for my aunt Dorothy  I chose a font and size I like on the computer and printed it, then traced it onto the cream fabric using an air drying pen.  I found that the best way of tracing was to hold the printout and fabric against a window.  This made it really easy to see through the fabric to the writing.

Attach the interfacing to the wrong side of the cream fabric and either hand or machine embroider over your chosen words in a thread colour which complements your other fabrics (I did free motion embroidery after a few practises on some spare fabric).


Step 3: Appliqué


Attach the interfacing to the wrong side of your red cotton fabric

Draw your chosen shape onto the matt side of the heat n bond and cut the heat n bond slightly larger than this shape. It would be fine to cut a rectangle from the heat n bond with the shape inside it.

Place the shiny side of the heat n bond against the wrong side of the cream fabric and iron to attach. 

Now cut accurately around the shape, through the cream cotton fabric and the heat n bond.

Decide where you want to position your appliqué shape on the red cotton fabric, remove the paper backing from the heat n bond, place the sticky side of the appliqué shape against the right side of the red fabric and iron it in place.

Stitch around the shape by hand or machine.  I used my machine’s blanket stitch after experimenting on a spare piece of fabric to find the stitch size that I was happiest with. I chose to use a threat that would blend in but you might prefer to go for a thread which would really stand out. I hand embroidered the cat’s features using 2 strands of embroidery floss.


Step 4: Join the decorated side panels


Sew the cream and red panels you have just embroidered and appliquéd, right sides together, along the 8” side and press the seam open.  Trim the edges to ensure that this piece now measures 12" x 8".

 
Step 5: Make the zip tabs


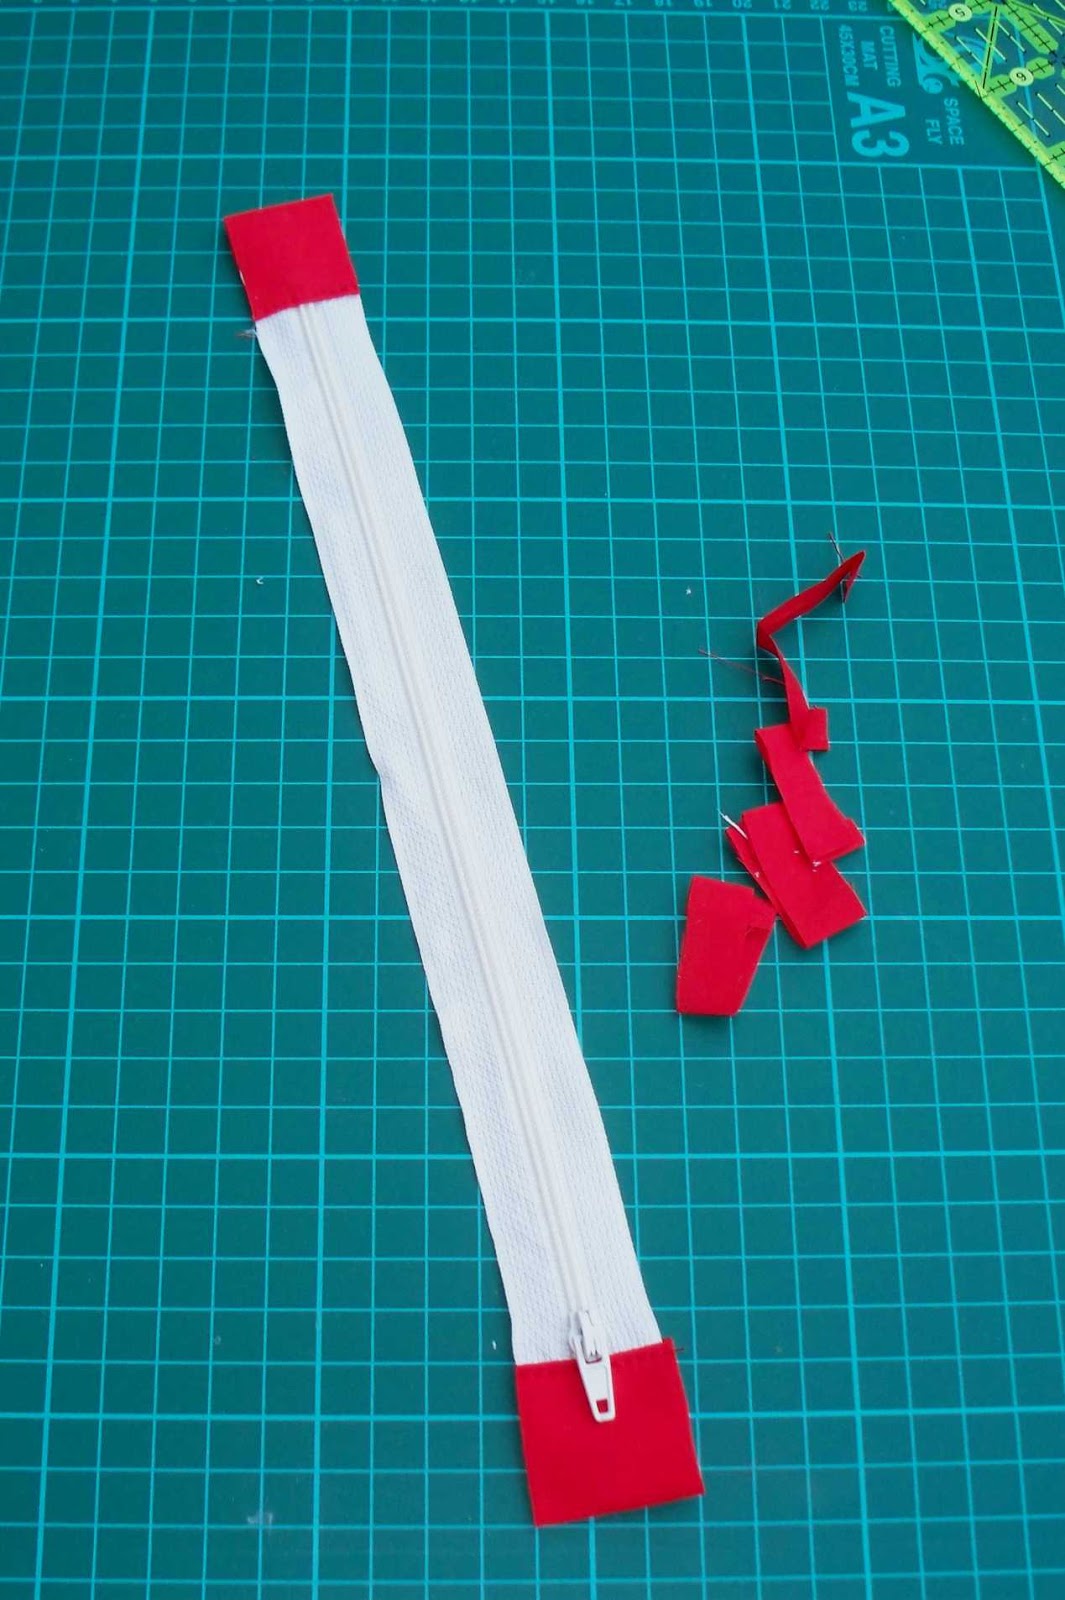
Fold the zip tabs in half so that the 2” ends meet and press.  Turn the raw edges parallel to the fold under by ¼” and press.  Fold them over each end of the zip and sew across the zip to attach them.  Trim the sides so that they are the same width as the zip.


Step 6: Insert the zip


Pin and sew one side of the bag to one side of the zip to make a zip sandwich.  The right side of the decorated side panel will go on the right side of the zip and the lining will be attached to the wrong side of the zip, right side of the fabric facing the zip.

   
Do the same for the other lining piece and the Lucky Neco fabric when sewing them to the other side of the zip. 

Top stitch along each side of the zip.


Step 7: Make and attach the D ring tab


Fold the fabric in half lengthways and press.  Then fold the sides in so that the raw edges meet the fold and it looks like bias binding.  Press. Fold the tab in half so that the short ends meet, insert the D ring tab and sew it to one edge of the bag, raw edges together so that the D ring is facing into the bag.  It doesn’t matter which side or whether you attach it to the front or the back.


Step 8: Assemble the bag

Cut out a 1 ½” square from each of the 4 bottom corners of the outer fabric and the lining.


Partly open the zip so that you can turn the bag through to the right side after sewing.

Pin the bag so that the right sides of the outer fabric meet and the right sides of the lining meet.  Sew along the side and bottom seams, leaving at gap of about 4” along the bottom seam of the lining for turning.  Leave the corner cut outs. Press the seams open.


With the right sides still together, flatten the corners so that each side seam meets the bottom seam to form a straight line. Do this for the outer fabric and lining corners.  Sew. 
Turn the bag through and sew up the gap in the lining.


Your bag is finished and you now have somewhere to keep your small craft items, pens, etc.
No one is going to pick up your bag by mistake because it is completely unique. Of course, they will pick it up to admire it!


In this project I learnt:

  • Machine appliqué is really easy if you take it slowly.  I had never used the blanket stitch on my sewing machine and wanted to try it out.  I had a practice fiddling with the stitch length and width so that I was happy with the stitch.  Then I practised sewing round a heart using scraps of fabric.  I had read somewhere that a heart is a good shape to practise on because it has curves and a point.  As long as I went slowly the stitch looked good. It made me want to try some of the other stitches on my machine as I have only used the straight stitch so far.
  • I wanted to appliqué a cat shape onto the bag as the patterned fabric has a cat theme.  I wasn’t confident with my drawing (I’m not much of an artist!), so I had several attempts drawing a cat shape on printer paper.  When I was eventually satisfied with my design, I cut it out and drew round it onto the heat n bond. I used cream thread – the same colour as the cat – so that it wouldn’t show if it went wrong, but I needn’t have worried because I was pleased with the end result.  Next time, I’m going to try to be bolder and use a bright contrasting thread as I build up my confidence with different stitches.
  • I have done a little bit of free motion embroidery on a quilt.  It was just random patterns in the same colour thread as the quilt, so it didn’t really show that much.  As this was writing and a contrasting thread, it needed to be more accurate. I practised on some scrap fabric first of all and once I’d got the hang of it, I moved on to the bag. I pinned the interfacing to the cream fabric and machine embroidered through both layers as the interfacing stabilises the stitching and prevents the fabric from puckering.  I put the embroidery foot on the machine, lowered the feed dogs and followed the words I had traced, going round each letter several times.  Some of the letters looked a bit ropey the first time I went round them, but most of them looked better after several rounds.  
  • I was quite slow and found that the air dry pen which I usually love had begun to fade before I had finished sewing – something to bear in mind for future projects. Next time, I’m going to use a friction pen which disappears when ironed.  That way it will be visible for as long as it’s needed.  I’ll have to use sew-in interfacing because attaching iron-on interfacing would cause the writing to disappear!