


As all
crafters know, Christmas makes begin in July when the shops start to fill with
festive supplies. So, by now, most
sewists will have completed many of their projects and gifts. After all, who has the time in December?
I had most of
the hessian left over from last week’s bag and wanted to make a Christmas gift
sack. This is a small one just big
enough for a pet or adult; it would leave a child very disappointed.
You could
keep it completely plain or add an appropriate appliqué design for the
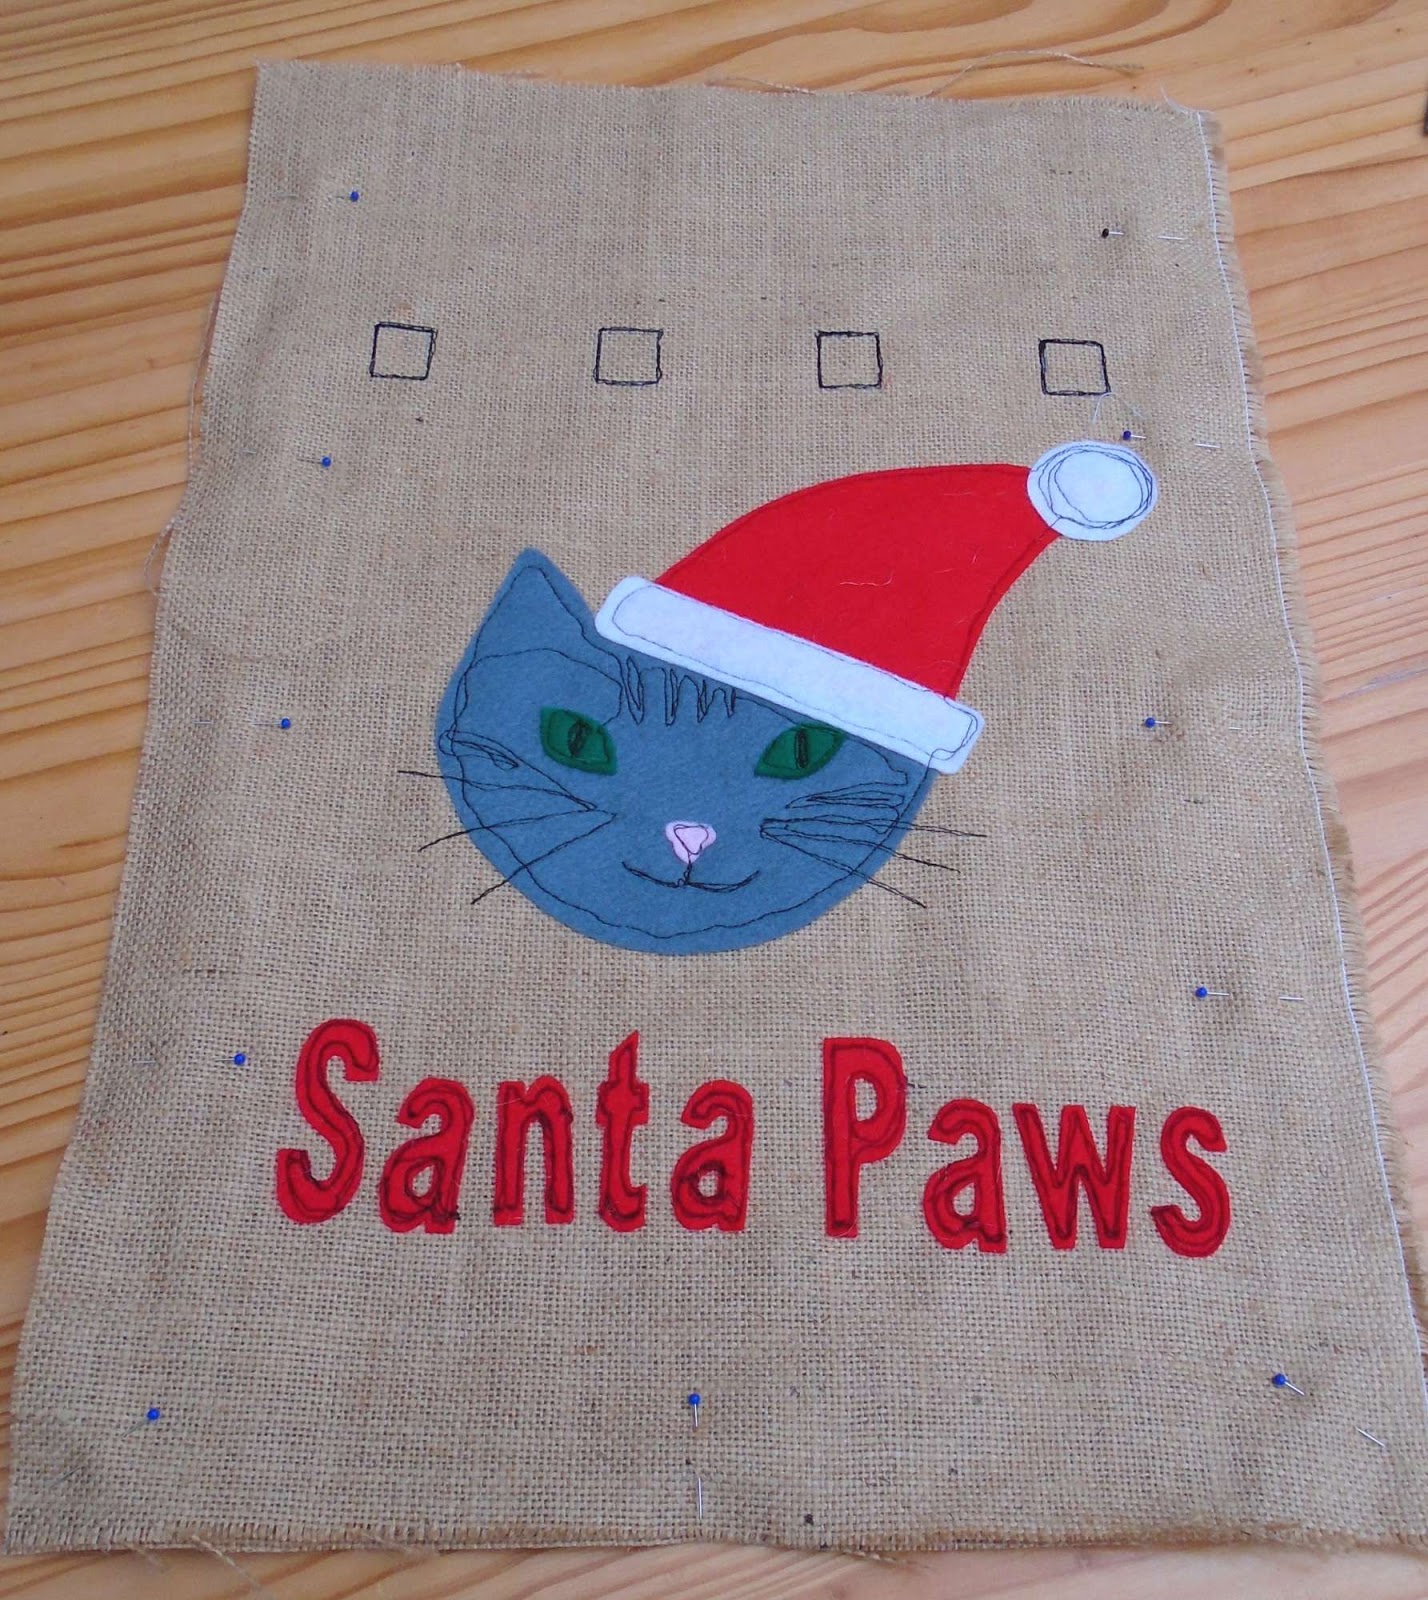
recipient including personalising it with their name. Mine is for my cat, so I
added a cat face and the words 'Santa Paws'. I used acrylic felt
which I bonded to the hessian and then sewed, but if you were short of time and
didn’t want to sew, you could buy self-adhesive felt which would save on the
sewing time. I haven’t tried it myself
so I don’t know if it would stick to hessian.
I wouldn’t sew through it because I don’t think the adhesive is safe for
sewing machines, but if anyone knows otherwise, please let me know.
I used French
seams to avoid raw edges inside. This
was really good quality, sturdy hessian, but the edges began to unravel while I
worked on the free motion embroidery, so I would recommend sewing a straight
line of stitches all round, close to the edge, just to hold it together while
working on it. They will then be hidden
in the seam allowance.
Thanks to
Tilly Rose for the helpful tips she kindly gave me on free motion embroidery
when I spoke to her at the Knitting and Stitching Show at Ally Pally, London last
weekend. It may not look it, but it’s a vast improvement on my previous
attempts!
Usually I
would make a channel for the drawstring to go through but I thought the hessian
would look more interesting if I made eyelets from it. If you don’t like this look, you could make
the top hem longer so that it includes a channel on the inside or add a
colourful sew-on channel on the outside.
You will need
20”/half a metre of hessian and that will leave you with enough to spare to
make last week’s bottle gift bag out of the leftovers.
The finished
size is 16”/40.5 cm high x 10”/25 cm wide x 4”/10 cm deep when loosely filled
with goodies.
Skill level: Easy
if you buy self adhesive felt.
I used a
stitch length of 3 throughout as the hessian was slightly bulkier than my usual
cotton and ½”/12mm seams for the same reason.
I have
included metric and imperial measurements but they are not exactly
interchangeable, so you should stick to either one or the other.
Skills used in this project:
- Machine appliqué
- Free motion embroidery
- Sewing eyelets
- French seams
Step 1: Cutting out

Cut out the
following:
14” x 21”/35.5
cm x 53 cm Sack front and back (cut 2 hessian)
39½”/ 1 m Drawstring
(mine was ½”/12 mm wide)
Felt for
appliqué
Heat n bond
(or other similar product e.g. bondaweb) unless using self-adhesive felt
Embellishments (I also used a
ribbon for the bow)
Step 2: Applying the image
If using
self-adhesive felt, draw your image, cut it out and stick it onto the hessian.
If using
plain felt, follow these instructions:

Decide on the
image you want on your sack. I drew a basic outline, but you could print an
image from your computer (subject to any copyright restrictions). As you will
be attaching it to the back of your appliqué pieces, the image would normally
need to be reversed. However, as felt
doesn’t have a right or wrong side, it isn’t necessary here. (I didn't work this out until afterwards and painstakingly reversed my images!!)
Trace the
image onto the paper side of heat n bond and cut out roughly (no need to cut
out exactly at this stage).
Iron onto
felt (with other fabrics, iron onto wrong side).
Cut out
accurately following the traced line.
Peel off
backing and arrange the image so that you are happy with it. Iron the sticky side of the felt (it has a
slight sheen) onto the hessian.

Sew round
using free motion embroidery. I used a contrasting thread as a feature but I
wasn’t very good at it and all my mistakes show! Using a co-ordinating thread
is more subtle and mistakes don’t show as much but it means you have to keep
changing the thread if you have a multi-coloured design.
Add any
embellishments. Delicate embellishments are best added once the bag has been
finished. I added a ribbon which I sewed on after the bag was finished as I
didn’t want it damaged during the assembly process.
Step 3: Making the eyelets

Make 4 eyelets on each side of the bag, starting 5”/12.5 cm from the top.
Measure the tape and make them twice the width of the drawstring. My drawstring was ½”/12mm wide, so I made them 1”/2.5 cm square. This can be done using free motion embroidery or normal stitching. I used free motion embroidery on the front and normal stitching on the back. They don’t look much different but the free motion embroidery was much quicker and easier. I used a dark thread to make a feature of the stitches.
 |
Step 4: Assembling the bag
To make the
French seams, with wrong sides together, sew a ½”/12 mm seam around the sides
and bottom, leaving a gap next to the eyelets on each side (same size gap as
the eyelets). Press.
 |
| As you can see, I forgot to cut out the eyelets, but remembered before the bag was fully assembled. |

Turn inside
out so that the right sides are now together.
Sew a slightly wider seam around the sides and bottom to completely
encase the raw edges, again leaving a gap next to the eyelets. I trimmed the raw edges slightly to make sure
that they would fall within the seam allowance.
Press.

Now for the
top hem. This is quite a deep hem so
that it won’t be visible when the bag is in use. Turn the end under by ½/12mm
(so that the raw edge is hidden) and then fold over again so that you have a
2”/5 cm hem. Sew all round close to the
bottom of the hem. Press.
Turn right side out. Press.
Thread drawstring through eyelets and tie a knot at each end.

Fill with
presents for that extra special person/pet.
It will look great under the Christmas tree when December arrives.
In this project I learnt:
- This bag would be really dull without the appliqué. I wasn’t sure whether the felt could cope with a hot iron, so I started off using a medium iron but the heat n bond didn’t stick. I put a piece of plain cotton fabric over the felt when ironing on hot and it was fine. I read afterwards that you should iron from the wrong side of the main fabric when using thicker appliqué. It pays to read the instructions! I drew my own images and printed the letters using Word Art. My drawing wasn’t very good so I probably should have printed an image too!
- I’m not very good at free motion embroidery, but there’s only one way to get better and that’s practise. I took on board the advice Tilly gave me and I could definitely see an improvement by the end, so my next attempt should be better. The problem is that I leave long gaps between my attempts and forget everything I’ve learnt. I’m going to try to do a little every day in future to improve my confidence and skill.
- I really like this style of eyelet. It goes well with the rustic feel and look of the hessian. I wasn’t sure if they would be strong enough, so I tried it out first on a scrap of fabric and was really impressed with how sturdy it was. I used free motion embroidery for the eyelets on the front of the bag and a normal stitch on the back. The free motion embroidery actually looked slightly neater and was much quicker.
- I tried out French seams at the start of this year and have used them several times since. It is such an easy way of creating a neat, professional looking seam in an unlined bag. They also give the bag extra strength for heavier gifts. I wasn’t sure whether they would be too bulky when using hessian, but no, they were fine when pressed.


