

I needed a
craft bag but they were so expensive in the shops. I saw several with dowelling handles which I
really liked. I have never used wooden
handles so this was the perfect project for me.
Be warned,
this isn't a beginner's project but would be better suited for an intermediate sewist. It has taken me over a week to make as each
stage took longer than expected and at one point I wondered if I would ever
complete it. And there were soooooo many stages!
I really
enjoy doing patchwork (English paper piecing) by hand but it is very time
consuming. This is a quick way of
getting the look of patchwork without actually doing it.
I bought this patchwork design fabric online. I usually use quilting cottons but, at the
time of purchase, I was only able to get a patchwork design in polyester
cotton. It was really cheap but not
particularly good quality and the weave was a bit wobbly, so it was hard to
match up the design.
This bag will
be great for holding my craft supplies.
I'm using it for knitting yarns, needles and patterns at
the moment but it would be great for storing each week's bag project. I don't have a sewing room so I have bits of half-finished projects scattered around the house. I cut out in the conservatory, sew in the bedroom, iron in the hall... With this bag I can keep everything in one place and carry it round with me.
I used my
normal stitch length of 2.5 on the seams and sewing in the zip but increased it
to 3 for top stitching and quilting.
This fabric was 44" wide and I used 29", so you would need about a yard or metre of fabric for this project as long as it was wide enough.
Skills used in this project:
- Using wooden handles
- Making bias binding
- Quilting
- Matching the patchwork rows and columns
Step 1: Cutting out

14½"
x 40½" Bag body (cut 1) from
lining, outer fabric and wadding
4½" x 10¼"
Bag sides (cut 2) from lining, outer fabric and iron-on wadding
14½" x 7½"
External pocket (cut 1) from outer
fabric, lining, wadding
26½" x
7½" Internal pocket (cut 1) from medium weight
iron-on interfacing
26½" x 15" Internal pocket (cut 1) from lining
2½" x
3" Zip tab (cut 1) from bias binding fabric and 1 iron on interfacing
9" strip
of ¾" velcro
Fabric for
bias binding 38 “ x 2” wide (You will also need a bias binding tool)
Fabric for
straight cut binding
44" x 2" for sides of bag
14½"
x 2" for external pocket
20” zip (I used an N5 zip from a continuous roll)
2 lengths of
12mm wooden dowelling 13½ “ long
Step 1: Making the zip tab


Iron the
interfacing to the wrong side of the zip tab fabric.
To shape the
zip tab, fold the fabric in half so that the shorter sides meet. Trim the sides so that the raw edge end
measures 1½" across.
With the tab
still folded in half, right sides together, sew along the sides. Turn, right side out, fold the remaining raw
edges under, press and sew to one end of the zip. This will be the end that
hangs down the side of the bag.
Step 2: Attaching the zip
Iron the
fusible wadding to the wrong side of the outer bag body fabric.

Pin the right side of the outer fabric to the
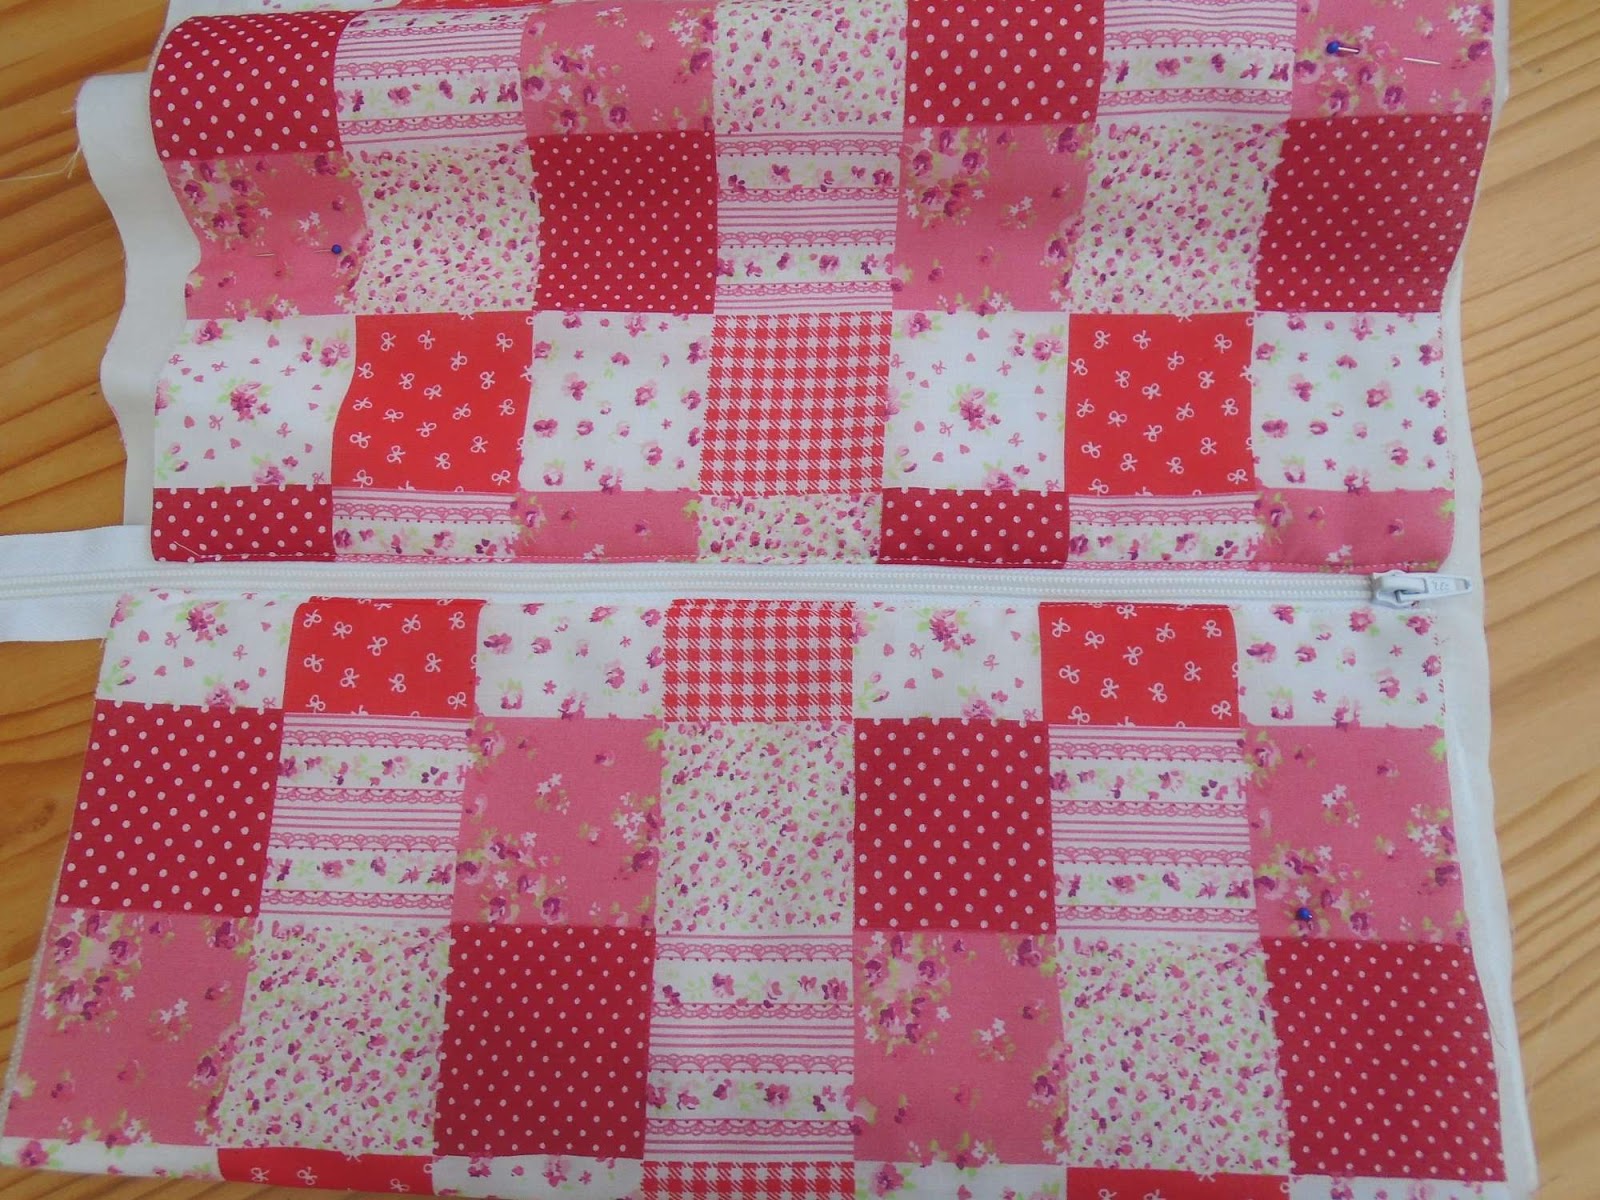
right side of the zip along one short side, matching the raw edge of the fabric with the edge of the zip. Sewing using a zip foot. Leave a ½” gap at the tab end (this is where the bias binding will go).

Sandwich the zip in the middle and pin the lining to the wrong side of
the zip. Sew.
Attach the
other end of the fabric/lining to the other side of the zip in the same way, then top
stitch along the edges.

Step 3: Quilting the bag
Using a
walking foot, sew horizontal and vertical lines at regular intervals up and
down all layers of the bag body, starting with a central horizontal and
vertical line to hold the fabric in place. I quilted along the lines of the 'patchwork' to make it look as though they were sewn together.
For the side
panels, iron the fusible wadding to the wrong side of the outer fabric, pin
this to the lining and quilt as above.
Step 4: Making the binding/bias
binding
Make bias
binding for the circle cut out (cut at a 45○ angle from the selvage) and plain
binding (cut straight across or up for the pocket, side panels and edges of the
bag.
The binding needs to be ¾"
- 1" bias binding (I used 1" bias binding).

To make
1" binding, cut a 2" strip of fabric the desired length. Pull each strip through a bias binding
tool and iron as you pull it out.
Step 5: Making the external pocket
Iron the
wadding to the wrong side of the external pocket outer fabric. Pin, then sew
the lining to the outer fabric/wadding, right sides together along one long
edge. Turn right sides out and
press. Quilt through all layers as
above.
Attach
binding to hide the raw edge which will form the top of the pocket. It needs to be attached to one of the long edges.
To attach
binding, sew it first to the lining side, matching the raw edges. Sew along the fold in the binding with the
right side of the binding against the lining.
Fold the binding over the raw edge and sew in place over the right side
of the outer fabric (see images under step 7).

Sew the
Velcro on the lining side of the pocket, centrally, just below the binding.
Measure 10½”
from the centre of the zip at the top of one side of the bag and attach the
other strip of Velcro centrally to the right side of the bag.
Sew the external
pocket to outside of bag along the sides and bottom.
Step 6: Making the internal pocket
Iron the
interfacing to the wrong side along the bottom of the internal pocket lining.
Fold the
pocket in half lengthways, right sides together and sew along the bottom
seam. Turn the pocket right sides out
and press.

Form the 3
individual pockets by making pleats in the pocket. Each pocket will have a 1” pleat on each side (see image above). Pin and sew the bottom 2" of each
pleat in place.
Attach the
pocket to the lining side (inside) of the bag through all layers on the
opposite side to the outer pocket by sewing along the bottom and sides. Also
sew a vertical line between each pleat to attach the pockets to the bag. The
bottom of the pocket will be 18” from the top edge of the bag.

Step 7: Creating the handle cut outs

Cut out a 6”
diameter circle centrally where the centre of the circle is 4½” from the top
edge. Do this on both sides of the bag.
Sew around close to the edge of the circle to hold all the fabric
together.
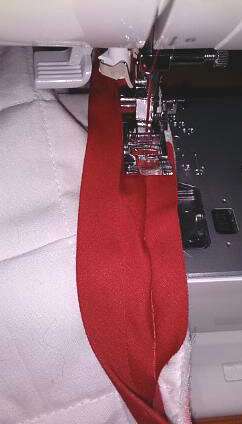

You will need two 19" strips of bias binding - one for each side of the bag. Attach the
binding in the same was as you attached the binding for the external
pocket. Do not sew the first ½",
but sew the rest of the way round. So that the join is less visible, start at
the top of the circle, nearest to the zip (this will be folded inwards and so won't be as visible
when the bag is finished). When you get
near to the end, fold the end in to hide the raw edge, overlap the raw edge
where you started and sew.
Step 8: Attaching the sides

Pin and sew the
side panels in place ¼" from the edge with lining sides together. The easiest way to do this is to fold the bag
in half to find the mid-point. This will
be at the bottom centre of each side panel.
Pin all round the side panel. It
is easiest to sew with the side panel uppermost. Sew from the bias binding down to the first
bottom corner. Stop ¼" from the end
of the side, swivel and sew along the bottom.
Stop ¼" from the end and swivel, then sew up the other side of the
panel to the bias binding.
Do this for
both side panels.
Step 9: Attaching the binding
Pin the right
side of the binding to the lining side of the fabric all the way round one end
of the bag. Make sure the binding
overhangs by about ½" at each end.


Fold the ends
under before sewing the other side of the binding.
Do the same
for the other side of the bag.
At the
overhanging end of the zip, the binding needs to hug the outer fabric and the
raw edge of the lining can be neatly folded under for about ½" and hand
sewn.
Step 10: Finishing off the bag
Fold the
fabric so that the cut out circle is folded in half. Sew 2" down from this
fold along the binding on each side to hold the sides together. Insert
the dowelling and sew across the bag to secure the dowelling. Do this on both
the back and front of the bag.

Sew a
horizontal line across the bag body from one side panel to the other just above
the binding on the side panel to hold the sides of the bag in place. Do this on both sides.


Your bag is
now finished and ready for you to enjoy.
Fill it with tempting craft goodies and get crafting. You deserve it after all these steps!
In this project I learnt:
- The dowelling was an easy introduction to using wooden handles. I bought a 900mm length at my local DIY store and sawed it down to size, making sure to sand the ends so that there weren't any rough parts to damage the fabric.

- I am getting to grips with the bias binding tool. I made bias binding once before using a better tool. For this width I only had a cheap tool and it was hard to get the binding to come out of the other end. I eventually found that stapling a strip of paper to the end of the binding enabled me to pull it through quickly and easily. I am getting more organised so that I have fabric for the binding before I start a project.
- I remembered to use the walking foot when I started the quilting and it was very easy and enjoyable to do. I like the way quilting gives a bag texture. With this fabric it was the quilting that made the patchwork effect stand out and look real.
- I was pleased with the way I was able to match the columns of squares in the pocket with the pattern on the bag, especially as this was cheap fabric where the pattern wasn't quite straight on the weave. However, I got it totally wrong when I attached the zip and the pattern is off by about ⅛". I thought I had pinned it correctly but I think the zip shifted along a little as I sewed. Next time, if I have to match at pattern along the zip I shall baste it first so that it stays firm.
- I found this pattern quite demanding to make. I worked out the measurements at least a week before I made it and spent the week tweaking them. Then I made a pattern. As I was really busy at work this week, I ended up spending over a week making the bag, a little at a time. It feels as though I have been making it for ages, so I'm very pleased that it is finally finished. I think this really stretched me but I feel a sense of satisfaction that it turned out OK. It's not perfect - it's handmade!


