

This week’s
bag is a pouch to hold all those calico bags we need to carry around to avoid
having to pay 5p for a plastic bag. It
is made entirely from heavy calico with no interfacing or lining but has French
seams as I hate seeing raw edges. The strap could be attached to the pouch, but
I chose to make a detachable strap. The
strap could be any width of your choosing to match your hardware. I chose to make mine ½”/12 mm wide.
I attended
the Crafting at Ally Pally event in London last weekend and was lucky enough to see a
demonstration and do a ‘make and take’ at Pink Ink Designs. I was shown how to use fabric paints like
water colours so that the colours merge into each other. You can see them teaching this technique from time to time on Hochanda, a UK TV craft channel. Coincidentally, I also recently found out that
rubber stamps can be used for stamping on fabric if using a suitable ink. I decided to put the two together and make a
bag which could have an image stamped on it and then coloured in with fabric
paint. This also taps into the current
trend of adult colouring in, but is a little more sophisticated. I chose a selection of my existing rubber
stamps. I used Deco Art So Soft matt
fabric paints and a Tulip pearl pink which I already had. Pink Ink introduced me to Cosmic Shimmer lustre fabric paints which contain mica and are super sparkly. I bought the
turquoise (actually called 'sea green') at Ally Pally and the silver glitter which I brushed liberally over
the matt paints.
I chose to
paint both sides of the pouch, but if you were short of time you could just
paint one side.
I love the
look of the image on this bag. For the
first 24 hours after making it, I wouldn’t let it out of my sight, I was so
proud of it.
The finished
size is 9”x 7½” (23 cm x 19 cm).
You need a 9”/23
cm strip of calico for this project.
I used my
normal stitch length (2.5) throughout but increased it to 3 for topstitching and used ¼”/6mm seams.
I have
included metric and imperial measurements but they are not exactly
interchangeable, so you should stick to either one or the other.
Skills used in this project:
- Using rubber stamps on fabric
- Painting on fabric
- Using rivets
Step 1: Cutting out

Cut out the
following from the calico:
11” x 9” (28
cm x 23 cm) Bag sides (cut 2)
3” x 2“ (7.5 cm x 5 cm) Zip Tabs and D ring tab (cut
3)
12” x 2” (30
cm x 5 cm) Strap (cut 1)
9” /23 cm zip
½”/12 mm D
ring
Swivel clasp
(same size as D ring)
Rivet
(optional)
Rubber Stamps
Ink Pad suitable
for stamping on fabric (I used Versacraft)
Fabric Paint
Step 2: Painting the bag
Wash the
calico first as fabric paints adhere better to fabric which has been washed.

Stamp the
design onto the calico and heat seal by ironing with a cloth between the iron and fabric to protect the design (I use a man's handkerchief).

Paint using
fabric paints. Follow instructions on
paint bottles to make permanent.
Assemble the
bag when the paint is dry.
Step 3: Making the zip tabs and
inserting the zip


Fold the tabs in half so that the shorter edges meet. Press.
Fold the shorter edges under by ¼”/ 6 mm and press. Wrap a tab around each end of the zip overlapping the zip by about ¼”/ 6 mm and sew
across the open end of the tab to secure.
Trim the tabs so that they are the same width as the zip.
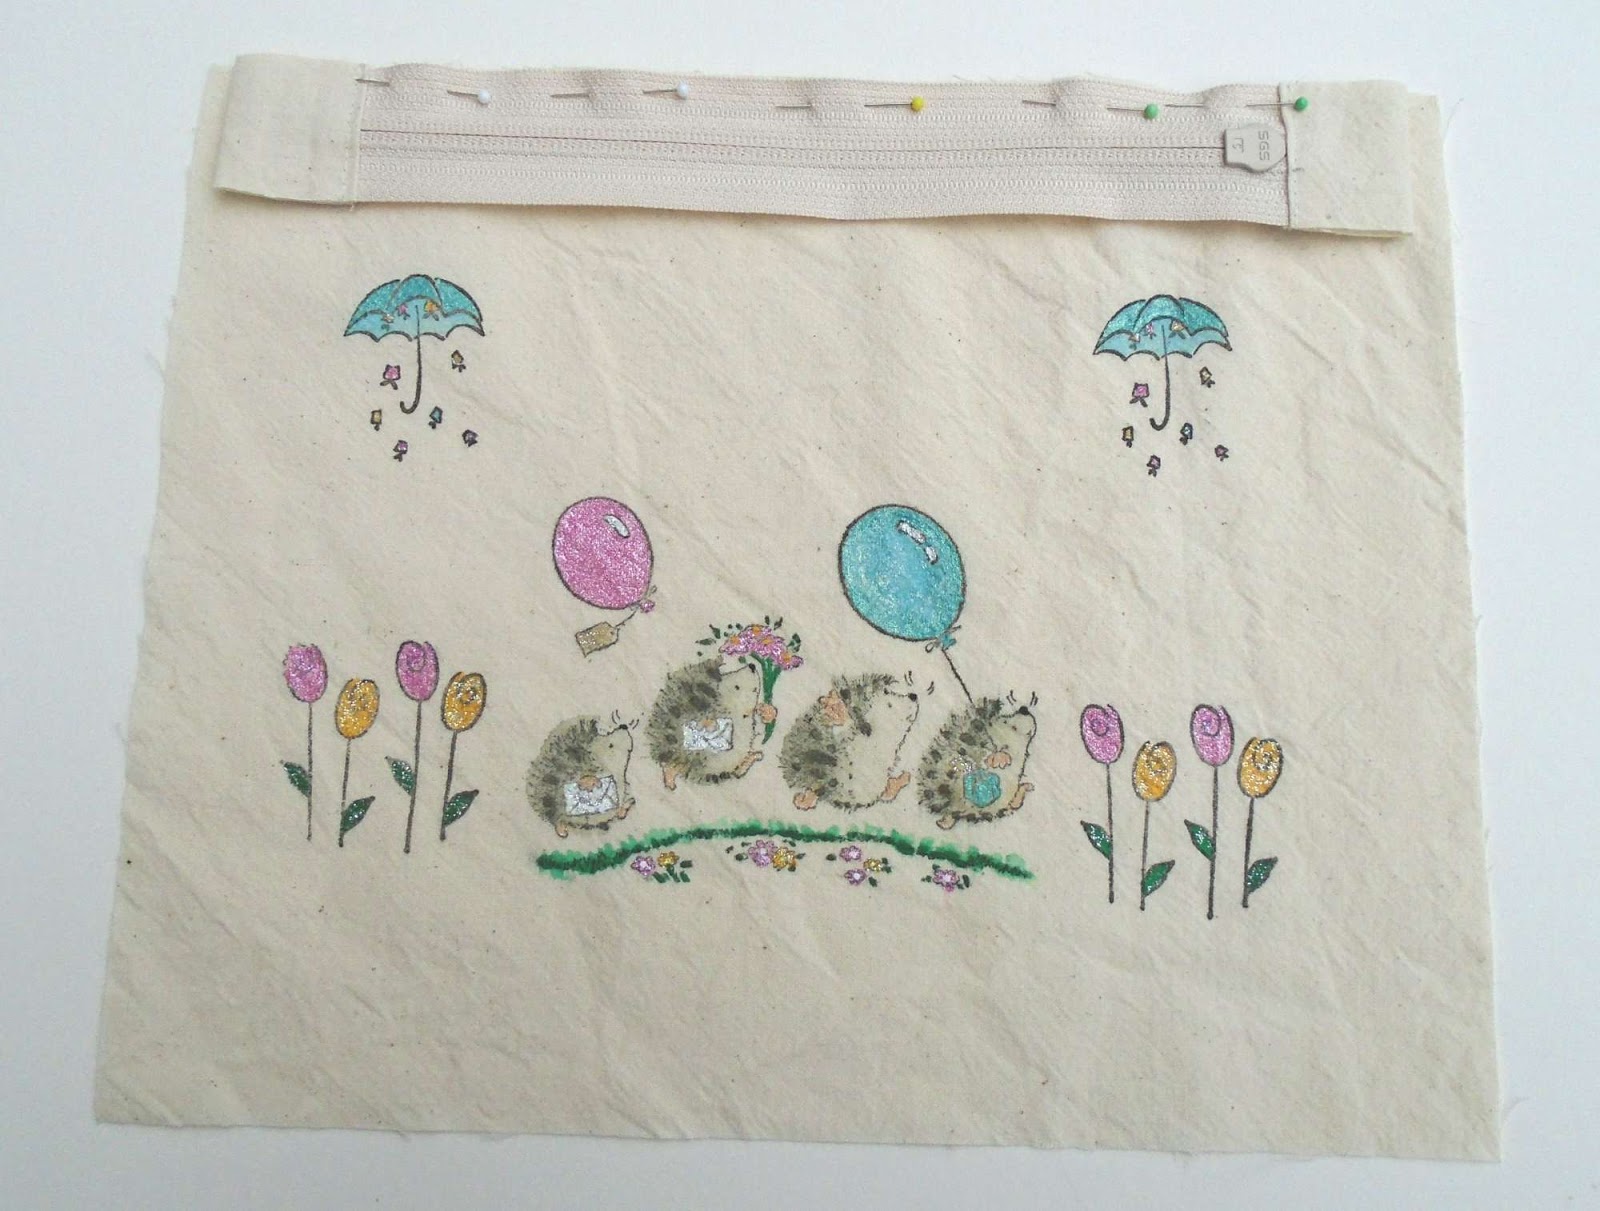
Place the top
edge of one bag side against one edge of the zip, right
sides together as shown in the photo. The
zip and tabs will be slightly shorter than the width of the bag. Make sure the zip is positioned centrally. Sew
using a zip foot.
Sew the other
bag side to the other edge of the zip.

Top stitch along each side of the zip for a professional appearance
and to prevent the fabric getting caught in the zip.
Step 4: Make and attach the D ring tab
(I made the D ring tab and strap at the same time because they use the same technique although the finishing is slightly different).

Fold the fabric
in half lengthways to find the centre and press.
Fold each side in so that the edge is against the fold line and press. It will now look like bias binding. Fold in half along the original fold, press again and top stitch close to the edge
along each long side. This will hold it together and make it look
professional.
Fold in half over
a D ring so that raw edges meet.

Sew to right
side of the fabric at one edge as shown in photo.
The tab should be quite long at this stage because the bag will be sewn
using French seams which means that they will be double their normal width.
Step 5: Assembling the bag


With the zip
open and the 2 bag sides wrong sides together, sew all round. Start at the zip and sew down one side,
across the bottom and up the other side, ending at the zip. You need to keep
these seams quite narrow.

Now turn the
bag wrong side out and sew the same seams, this time encasing the raw
edges. If necessary trim the edges and D
ring tab to make sure that they will be within the seam allowance (you don’t
want any raw edges showing).
Turn right side out and press.
Step 6: Making the strap
Make the
strap in the same way you made the D ring tab, but make sure the raw edges at the
ends are folded inside the strap before sewing it.
The end of the strap needs to be secured to one end of the clasp. This can be done by
sewing it or by
attaching rivets. I prefer rivets because they are super
sturdy.

To attach a rivet, first make a small hole through all the layers of the strap (see photo to see where it should be positioned). I used a tailor’s awl to do this. Push the long part of the rivet through all layers. Place the stud part of the rivet on to it and
press to temporarily secure. Use a
hammer to bang the 2 parts firmly together. I put soft cardboard between the
hammer and rivet to avoid damaging it.


Now fill your
pouch with some of those pesky shopping bags and you will never forget them
again. I feel another shopping
trip coming on!
In this project I learnt:
- It was surprisingly easy to use rubber stamps on fabric. I used a scrap of calico to practise on first of all. It was the first time I had used Versacraft ink which gave a lovely bold outline. I heat set it by ironing it and the colour didn’t run when I added paints, even when I added lots of water.
- It was fun trying out the different paints. I love the Cosmic Shimmer paint; it was so sparkly that it really lifted the image. I didn’t have a brown paint for the hedgehogs, so I just mixed all the matt colours until I got something resembling a dirty brown. I used the watercolour technique for the hedgehogs and grass by painting part of it and then pulling the colour with water onto neighbouring parts of the image for a much paler version of the colour. It took a long time to paint both sides of the bag but it was a lot of fun and I can’t stop admiring the end result. Definitely worth all the time spent on it. Now I keep wondering what to paint next.
- I find rivets easier to fix each time I use them. I like knowing that the strap is really firmly fixed and won’t come undone. It also gives a professional finish to the bag.


