About this blog
I make bags and post tutorials on how to make them. I'll tell you what went well and warn you about any disasters.
Tuesday, 2 January 2018
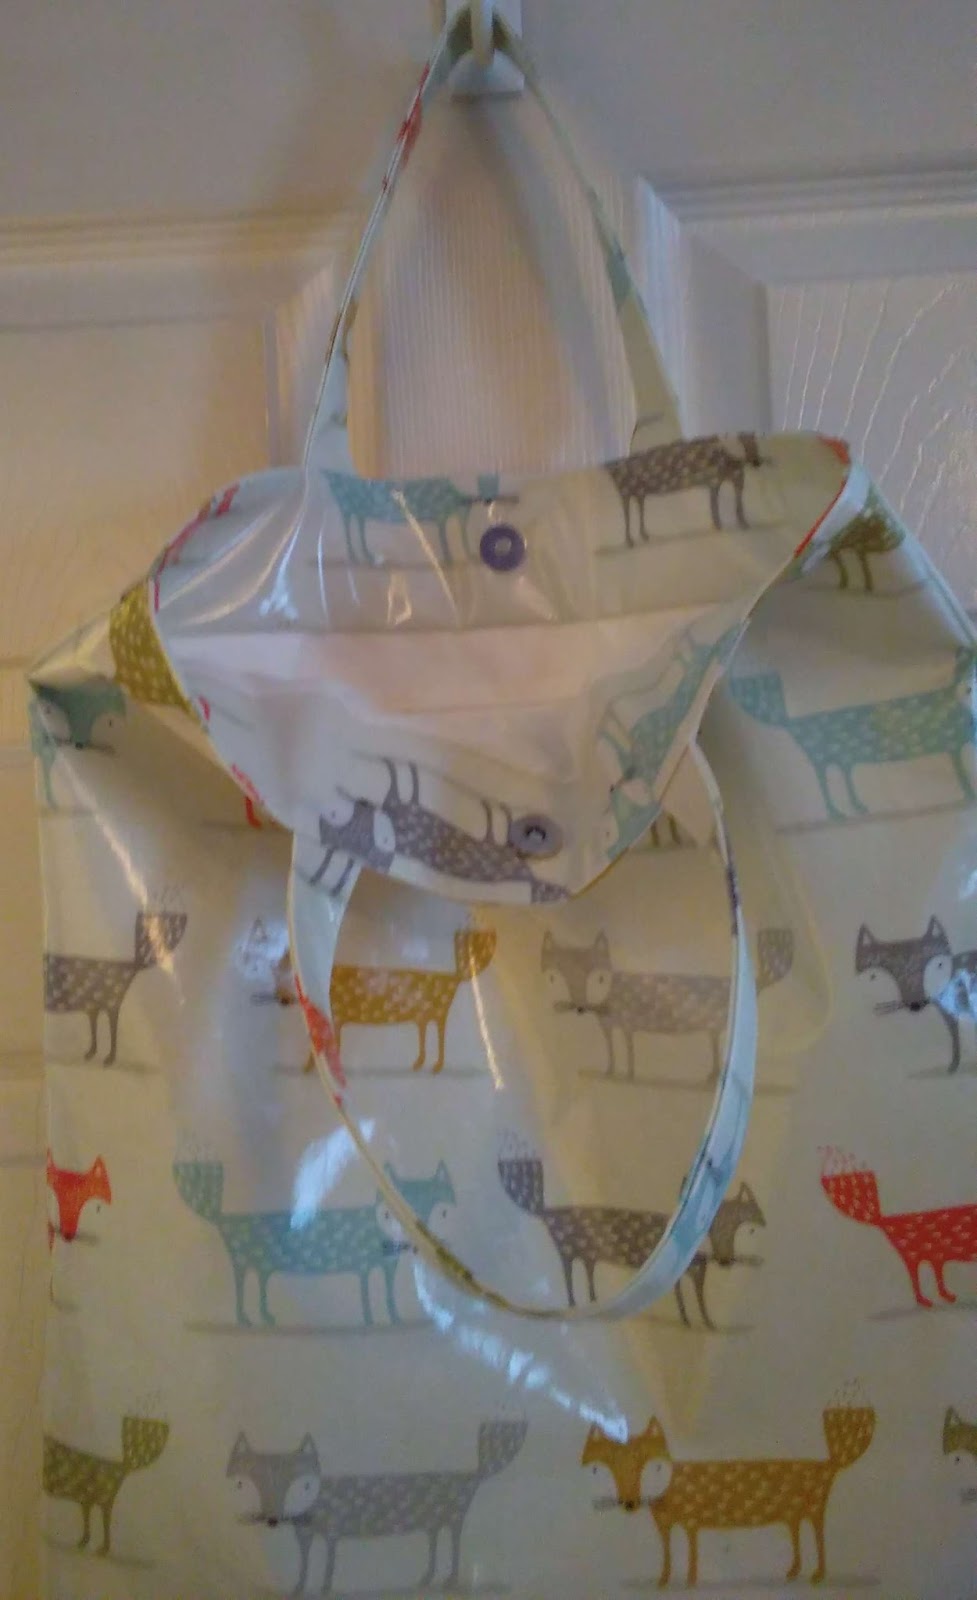
Waterproof Wash Bag
I made this bag as a Christmas present for my Dad. He wanted a 9" x 6" bag to store miniature toiletries when travelling. I chose this cotton backed PVC fabric as it seemed quite masculine and fitted in with the travel theme. I lined it with a waterproof fabric which I already had in my stash (PUL - polyurethane laminate). It has a flat base, so it stands up by itself and has a zip closure. I wanted it to have a rectangular shape once completed which meant making the bottom edge wider than the top edge to allow for the extra depth at the base.
I made the zip tabs differently this time. Usually I make them so that they join up with the side seam, but I've noticed that commercially made bags have a shorter zip and a slight gap between the side seam and where the zip starts to avoid the bulk you can get in the corners. I didn't know how much shorter to make the zip so I guessed at ½" shorter than the width of the bag and covered each end of it with very narrow zip tabs, as shown in the photo.
Then I sewed up the side seams, ensuring that I didn't sew into the tabs. I really like the result. Not only is it easier to make, but it also looks better. If I was doing it again, I would probably make the zip even shorter to keep the top corners more square.
I wasn't sure how deep to make the bag, so I waited until I had sewn all the edge seams before sewing across the corners to create the flat base. It was harder to do, but enabled me to put off the decision until I had a better idea of what the bag looked like.
I was very happy with the end result. More importantly, so was my Dad.
Labels:
man's washbag,
pvc bag,
waterproof lining,
zip pouch
Sunday, 3 September 2017
Kraft-tex Wallet
I have wanted to try out this revolutionary 'fabric' for ages. Kraft-tex is a paper product that behaves like a fabric. It sounds intriguing, doesn't it? Well, when I opened the packet it felt just like cardboard. I had heard that it softens with soaking in hot water, so I soaked it for about 10 minutes and then let it air dry. It had a bit more texture and was a bit more 'leathery' but probably would have benefitted from a few more washes to make it softer. When dry, I stamped it using a rubber stamp and versacraft ink and then heat sealed it to make the ink permanent.
I used the wallet pattern that came with the fabric. It was quite easy to follow. To be honest, it felt like sewing a piece of cardboard. You can't use pins because they will leave permanent marks, so I used Clover wonder clips. For the same reason, if you make any mistakes in your sewing, the needle holes will be there for all eternity.
So, what do I think of Kraft-tex? Well, I've not yet been won over. The wallet feels as though it's made of cardboard which will tear at any moment, but only time will tell. I think the real advantage is that it can be printed on, painted and embellished, so it's ideal for making something really original. Definitely something to play with to test its possibilities. I have seen it used to good effect making bag corners and handles.
If you have tried it, let me know how you got on and any tips for using it.
Labels:
kraft tex wallet,
kraft-tex,
sewing with kraft tex
Sunday, 13 August 2017
Lynette Anderson Friends Hand Bag
I saw this bag pattern in Lynette Anderson's book 'Quilting Cats and Dogs' and decided to make it to take to the fabulous Festival of Quilts in Birmingham, UK (Europe's biggest quilt show). The front flap is made using needle turn appliqué (including suffolk puffs/yoyos) and embroidery, while the front and back are made from crazy patchwork on a lightweight calico foundation. I used fabrics I already had in my stash/scrap bag and Bosal In-R-Form bag foam to give it structure. The side panel, handle and lining are all made from a lightweight cotton denim. I used a magnetic clasp rather than the loop and button suggested as I did't have a suitable button.
Lots of people approached me to admire the bag and I was lucky enough to meet Lynette Anderson there who gave it her seal of approval. How exciting is that?!
As usual, I saw lots of new products which I scooped up to try in future bags. Lots of stands were selling Decovil and I sought advice on the Vlieseline stand on how to use it. It is an adhesive stiffener which feels like leather and can be used with fabric or by itself with paint and embellishment in bag making to give that leather feel to a bag. I bought some and can't wait to try it.
I also bought a jar of Odicoat which is applied to fabric to make it water resistant - a bit like oilcloth but without the plasticky feel. That's another thing I'm looking forward to trying.
If any of you have any tips on using these products, I'd love to hear them.
Labels:
appliqué bag,
bag foam,
Bosal In-R-Form,
crazy patchwork,
embroidered bag,
foam stabilizer,
Friends hand bag,
Lynette Anderson,
needle turn appliqué,
patchwork bag,
Quilting cats and dogs,
suffolk puff,
yoyo
Monday, 31 July 2017
Bag #53: Sat Nav Pouch
Well it’s
been a while since I last made a bag. I
hadn’t intended to leave it this long but I’ve been having a break from bag
making. Now I’m itching to get back to
it.
This is a
small bag for my sat nav. My car doesn’t
have a built-in device so I take my trusty TomTom with me wherever I go. It has always been stored in its hard case,
but it was a really tight fit and I struggled to get the zip done up. Eventually the zip broke and so it was time
for a new bag.
I made this slightly
bigger so that it would be a more comfortable fit and used bag foam to protect
it. It has a simple Velcro closure so it
was super easy to make. The Festival of
Quilts is on in a couple of weeks’ time and quilting was on my mind, so I
decided to quilt it to make it a bit more interesting. I’m not good at adding piping so I included
it because I like a challenge.
The
dimensions can be altered to fit any ‘fat’ device such as a camera, charger,
etc. (a bag for a flattish device like a laptop, phone or tablet wouldn’t need
the gusset/side). As all devices vary, you should tailor it to your own
device. I probably should have made this
a bit shorter as it ended up being a little tall for my sat nav.
I thought
about adding a strap or handle but decided against it as the strap on my old hard
case always got in the way. You could
easily attach a handle to the flap or to the top of the side panel if you
wanted to.
You will need
2 fat quarters – 1 for the outer fabric and one for the lining as well as the
same amount of wadding or bag foam. The fabric needs to be non-directional
otherwise the print will be upside down when you fold the flap over.
I used bag foam for the front and back, but
wadding for the sides as this made the bag a bit more flexible. Truth be told,
I ran out of bag foam! If you want a
very firm bag, use bag foam and if you want a soft bag, use
wadding/fleece. If you prefer something
in the middle, as I did, use a combination of the 2.
The finished
size is approximately 5½”/14 cm wide, 5½"/14 cm high and 2”/5 cm deep.
Skill level: Intermediate
– it is quite tricky to manoeuvre around such a small bag when adding piping,
and sewing curves.
I used a
longer stitch length as I was using foam which is fairly thick. I used 3.5 for the quilting and most of the
seams and 4.5 for top stitching. I used
¼”/6 mm seams for the outer bag and slighter wider seams for the lining.
I have
included metric and imperial measurements but they are not exactly
interchangeable, so you should stick to either one or the other.
Skills used in this project:
- Quilting
- Piping
Step 1: Cutting out
Cut out the
following (but note the changes I suggest at the end):
6”/15 cm x 9½”/24
cm Bag back and flap (cut 1 outer fabric, one lining and one wadding/bag foam).
Cut a gentle curve into two corners of one of the 6”/15 cm sides – see images
below. The curved end will be the bottom of the bag.
6”/15 cm x
5½”/14 cm Bag front (cut 1 outer fabric, one lining and one wadding/bag foam).
Cut a gentle curve into two corners of one of the 6”/15 cm sides – see images
below.
2½”/ 6.5 cm x
17”/ 43 cm Bag side
46”/ 117 cm narrow
piping cord
47”/120 cm Bias
binding
5”/12.5 cm
strip of Velcro
Step 2: Quilting the outer bag
Temporarily
attach the outer fabric pieces to the corresponding foam/wadding using
pins/fabric glue.
Decide on
your quilting pattern. I usually choose
freeform free motion embroidery squiggles, but for this bag I chose diagonal
lines. I drew the first line onto the
fabric with my Clover air dry pen and sewed over it, using the spacing bar on
my machine to keep all the lines the same width apart. This pen is great
because it gradually fades but if you want to remove immediately e.g. because
you’ve made a mistake, it also has an eraser. I didn't realise until half way through that I could have just followed the pattern on the fabric!!
Quilt all
parts of the outer bag.
Step 3: Making the piping
I cut the
piping into two lengths – 16”/41 cm for the front and the rest for the
back/flap. I cut the bias binding the same
length for the front but there was an extra inch to overlap it for the back.
The binding can be bought or cut on the bias from a piece of fabric. It needs to be bias-cut as it needs some
flexibility/stretch when going round the curves; straight cut binding just goes
lumpy and looks ugly around curves.
Fold the
binding around the piping and sew close to the piping using a zip foot.
Step 4: Attaching the piping to the
bag
Trim the
binding so that the flat part of the binding measures the same as your seam
allowance. I used ¼”/6 mm seams and
trimmed the binding so that it measured ¼”/6 mm from the line I stitched in
step 3 to the edge.
Pin the
piping to the right side of the bag front starting at one top side and going
round the bottom and up to the other top side.
There is no piping along the front top.
Match the edge of the binding with the edge of the fabric. Sew it in place using a zip foot.
Do the same for the
back/flap but this time the piping will go all round so you will need to make a
neat join somewhere. I chose to have my
join at the bottom. Leave the first half
inch/12mm unsewn. Sew all round and stop
about an inch/2.5 cm before you get back to where you started. Trim the cord so that the start and end meet
seamlessly. Fold one end of the binding
over to hide the raw edge, overlap it over the bias binding where you started
and wrap it round. This will make a neat
join. Sew the end/beginning of the
binding in place.
Step 5: Assembling the outer bag
Pin then sew
the side to the front, right sides together, close to the piping, using a zip
foot. I made the side a bit longer than
needed and trimmed it afterwards so that it matched the top of the front.
Now pin the
side to the back, right sides together close to the piping. To find the centre,
fold the side in half and mark the centre point at the bottom of the bag. Do the same for the back. Match up these points and pin, then sew the
side to the front.
Make a few
snips in the seam allowance at the corners so that the seams lay nice and flat or trim with pinking shears close to the seam.
Cut the edge
of the bag foam back as close to the seam as you can. I forgot to do this but it makes a much
neater finish if you do it, especially around the flap.
Step 6: Assembling the lining
Using your general purpose foot, sew the side lining to the front lining, right sides together and trim it to size. Then sew the side to the back lining, as above, leaving a gap at the bottom for turning through. Snip the corners as above.
Step 7: Attaching the lining
With right
sides together, place the lining over the outer bag and sew around the opening
and flap. Turn through. Sew up the gap
in the lining.
Top stitch
around the top of the sides and front to create a neat finish and keep the
lining/outer fabrics firmly in place.
You will be sewing through several layers here, so a longer stitch
length will be needed. I used 4.5.
Step 8: Attaching the velcro
Usually I
would attach the closure before joining the lining, but I decided with this bag
that it would be better to add it afterwards and make a feature of it.
Place your
device in the bag and pull the flap over to work out where the Velcro needs to
go. Trim it to size. Pin it and sew in
place through all the layers. This would
be the time to add any embellishments to the front if you wanted to.
I made a
feature of it by using red thread on white Velcro which would have looked good
if I had sewn in a straight line!
***
Now put your
device in its new home and give yourself a treat for all that hard work! I shall take my sat nav for a little outing
to the coast when it finally stops raining.
In this project I learnt:
- I hadn’t used the quilting space bar for a long time and I had forgotten how easy it makes straight line quilting. It was done in no time and all the stitches were the same length, unlike free motion embroidery where I struggle to keep them even.
- I still hate piping. I’ve never been any good at it and that hasn’t changed. However, I was pleased with the look of the bag. It wouldn’t have looked as good without the piping.
- I made the pouch bigger than my previous sat nav bag which broke because it was too small. However, I over-compensated and could have made it about an inch/2.5 cm shorter in height and it would still have been a comfortable fit. I might end up using it for a different device, but it serves it purpose for now and will stand out in my glove compartment.
Labels:
camera bag,
lined bag,
make up bag,
making piping,
quilted bag,
sat nav bag,
using bag foam,
using velcro
Monday, 2 January 2017
2016 New Year’s Resolution Completed
I did it!
At the start of 2016 I resolved to design and make a new bag
every week and blog about it. The aim
was to acquire new skills along the way from textile and bag-making techniques
to setting up and running a blog.
Now, a year later, I’ve achieved all I set out to do and
more. I’ve learnt how to do French
seams, sew with PVC and faux leather, attach rivets, eyelets and clasps, and so
much more. I’ve spent hours patiently
taking photos and writing instructions when really I was just impatient to get
on with the making.
Was it worth it?
Hell, yes! I’ve learnt so much over the year and it was the blog that
drove me forwards to keep trying new things.
Some I liked (PVC especially), some I didn’t (what is the point of
lamifix??) but I’m much wiser, not to mention a year older. I think the most important thing I learnt was
that there is always a solution, even if something seems impossible. I didn’t give up on any of my bags if I hit a
snag, but I learnt how to make them better.
That’s probably I good life lesson.
What next? Well I
shall still make bags and add tutorials to this blog from time to time, but
certainly not every week. I’m looking
forward to lots of new crafty projects, not just bags, but I don’t think I
could stop making them totally even if I tried.
Many thanks to all of you who looked at the blog during the
year and gave valuable feedback.
Enjoy your bag-making.
Saturday, 31 December 2016
Bag #52: Wipe Clean Shopping Bag
This is my 52nd and last bag of 2016. I started the year with a shopping bag and developed a liking for PVC right at the start, so I decided to end with a bag which combines both. This PVC bag is quite straightforward in design – just a couple of rectangles joined together with handles. For a really quick version, it could be made unlined. I added a lining, an internal zip pocket and a magnetic clasp. As it’s made of PVC, it can just be wiped clean, so there’s no excuse for a mucky bag.
The PVC was
a remnant from my local home furnishing store.
I can often get bargain remnants there because they find it hard it to
sell small quantities of PVC (this was half a metre). I think PVC is sturdy
enough not to need any wadding or interfacing, but I added a medium weight
interfacing around the zip and on the pocket to give the lining extra
stability. I used a polyester lining.
You would
need half a metre of PVC and lining and a 7”/18 cm strip of interfacing to make this bag.
The finished
size is approximately 17”/43 cm high (plus handles) and 14”/35.5 cm wide.
Skill level: Intermediate
as PVC isn’t the easiest fabric to work with.
I used my
normal stitch length (2.5) for the seams and 5 for top stitching. I used ½”/12 mm seams for the outer bag and
slighter wider seams for the lining.
I have
included metric and imperial measurements but they are not exactly
interchangeable, so you should stick to either one or the other.
Skills used in this project:
- Using PVC
Step 1: Cutting out
Cut out the
following:
15” x 18”/38 cm
x 46 cm Outer bag sides (cut 2 PVC)
16” x 4”/40.5
cm x 10 cm Handles (cut 2 PVC)
15” x 3”/38
cm x 7.5 cm Upper internal bag (cut 2 PVC)
15” x 15¾”/38
cm x 40 cm Lower internal bag (cut 2 lining)
10” x 7”/25.5
cm x 18 cm Internal pocket (cut 2 lining, 2 interfacing)
10” x 3“/25.5
cm x 7.5 cm Lining stabiliser (cut 1 interfacing)
9”/23 cm zip (I used an N3 zip from a continuous roll)
Magnetic
clasp & small off cut of bag foam/wadding for reinforcement
Step 2: Making the outer bag
Place the 2
PVC outer bag pieces right sides together and sew round the sides and
bottom. Don’t forget to check that the
pattern is the right way up.
There is no
need to turn it right side out until later.
Step 3: Making the handles

Fold the handles in half lengthways to find the centre. Fold each side in so that the edge is against
the fold line. It will now look like
bias binding. Fold in half and top
stitch close to the edge along each long side of the handle. This will hold it together and make it look
professional.
Sew each end of the handles to the top of the outer bag about 4”/10 cm
from the nearest side seam, making sure the handle isn't twisted. It should curve downwards as shown in the
photo.
Step 4: Sewing the internal pocket
![]() |
| Interfacing attached to bag lining along one of the shorter sides |
Attach the interfacing to the wrong side (if there is one) of the pocket
pieces and bag lining.
Pin one pocket piece to one of the bag linings, right sides together,
with the long side of the pocket along the top edge of the lining, to match the
position of the interfacing on the bag lining.
Draw a ½” x 8”/12 mm x 20 cm rectangle along the centre of the pocket interfacing about 1½"/4 cm from the top edge.
Sew around this rectangle through all the
layers that you have just pinned together.
Cut a slit in this rectangle (as shown in the photo) making sure not to
cut the stitches.
Push the pocket through this ‘letterbox’, shape in the lining
so that it sits flat and press. You will now have a neat opening to attach the
zip.
Pin the zip to the pocket so that the right side shows through the
aperture in the bag lining. Sew all
round the zip.
Pin the remaining pocket piece to this one, right sides together and
sew around the sides and bottom, keeping the bag lining out of the way as you
do not want to sew through this.
Sew along the top of the pocket and the bag lining to hold the pocket
firmly in place.
Step 5: Attaching the magnetic clasps
One side of the magnetic fastener needs to be attached to one of the
upper internal bag PVC strips.
Fold the
fabric in half horizontally and then vertically to find the centre and
mark. Using the washer, mark where the prongs
will go through the fabric, then carefully make a small slit along each of
these marks using a stitch unpicker.
Cut a small piece of foam to roughly the same size as the washer and
make a slit for each of the prongs.
Push the ‘legs’ through from the right side of the PVC, through the
foam and the washer and open them outwards to secure.
Do the same with the other part of the magnetic clasp and PVC strip.
Step 6: Making the inner bag
Sew one PVC
upper internal bag to one lining piece, right sides together. Make sure that any pattern will be the right
way up.
Do the same
for the other PVC strip and lining.
With right
sides together, sew the side seams. Do
not sew the bottom seam at this stage.
Step 7: Assembling the bag
With the PVC
outer bag wrong side out, place the lining inside, right side out – the inner
and outer bags will now be right sides together with only the handles between
them.
Keeping the
handles between the fabric sew around the top of both parts of the bag to join them.
Turn through
so that the lining is inside and the PVC outer bag has its right side facing
out.
Top stitch around the top edge.
Sew the
bottom edges of the lining together.
Well done,
you’ve finished the bag. Time to go sale
shopping to test it out!
In this project I learnt:
- This PVC was harder to work with than others I have used. PVC seems to vary enormously in thickness and workability. My sewing machine hated this one. I tried the general purpose foot, zip foot and roller foot and none of them worked. As a last resort, I tried the walking foot which worked brilliantly. One of the things I’ve learnt this year is that there is usually a solution – it’s trial and error until you find it. Over the year, I’ve learnt that a really long stitch works best when top stitching PVC.
- When sewing up the lining, I usually partially sew the bottom seam and then sew up the gap when the bag is almost finished. However, I have found that polyester lining often frays when I try to push the PVC through a too-small gap. I decided this time to leave the whole bottom seam open and sew it up afterwards. This was much better – no fraying and the finish was much neater than usual.
Sunday, 25 December 2016
Bag #51: Metal Frame Bag
I wanted to
use a metal frame this week and chose this metal arch frame which I bought in
the summer at the Festival of Quilts. I have seen lots of simple bags made using
these frames where a square piece of fabric is used and gathered over the
frame. However, I wanted a more fitted
appearance so I made sure that the fabric was just the right size to fit the
frame. The great thing about this frame
is that it can be unscrewed and used on another bag which makes it good value
for money.
I made this
using techniques from earlier projects.
For example, the channel which goes over the frame is the same as I
would use for a flex frame. Also,
because the frame is hinged, it is similar to making a purse-style bag where
you draw round the frame and then add some width at the hinge points so that
the bottom of the frame is partially hidden in the finished bag.
I didn’t add
any pockets inside but it would be easy to add a phone or zip pocket. The
handle has side rings for a chain or strap.
A narrow shoulder strap made of the patterned fabric/interfacing with
swivel clasps at the end would work well. I just wanted this as a handbag so I
didn’t bother.
You would
need an 11”/28 cm strip of 2 different fabrics or 2 fat quarters, as well as
interfacing and wadding. I used a firm
interfacing as I didn’t want the bag to be too floppy and a quilt batting as
wadding.
The finished
size (excluding the handles) is 9½”/24 cm wide, 8½”/21.5 cm high and 3”/7.5 cm
deep at the base
Skill level:
Intermediate. Although the sewing is
straightforward, the pattern may need to be adapted to suit the size of your
bag frame (they come in lots of different sizes).
I used my
normal stitch length (2.5) and ¼”/6 mm seams for the outer bag and slighter
wider seams for the lining.
I have included metric and imperial measurements but they are not exactly interchangeable, so you should stick to either one or the other.
Skills used in this project:
- Making darts
- Using a metal frame
Step 1: Cutting out
Cut out the
following:
11” x 3½”/28
cm x 9 cm Lower Bag Sides (cut 2 plain fabric)
11” x 9¾”/28
cm x 25 cm Bag Sides (cut 2 wadding, 2 interfacing, 2 lining)
12” x 1½”/30.5
cm x 4 cm Frame Channel (cut 2 plain fabric,
2 interfacing)
(This fits a
6”/15 cm wide metal arch frame)
Step 2: Creating the bag’s shape
Here is the 6”/15
cm metal arch frame bag pattern I made for the bag sides. It is too large to scan so I have taken a photo of it.
I marked the shape of
the frame onto the paper (the dashes) and then pivoted the frame at one top
corner so that the hinge swung out by about 1”/2.5 cm and marked where the
hinge sat, then continued the line down.
I did the same for the other top corner of the frame.
Cut the
lining, interfacing and wadding to shape – they are all the same size as the
whole pattern.
To create the
two tone outer bag, I drew a horizontal line across the pattern. When I cut out the fabric for each part of the bag, I drew round the
pattern up to the line and then added ¼”/6 mm for the seam allowance. I did
this for the upper bag and also for the lower bag.
This
technique can be used to create a pattern for any size frame.
Step 3: Making the bag sides
Sew one lower
bag to one upper bag. Do the same for
the other lower and upper bag. You now
have the 2 outer bag sides.
Attach the
wadding to the wrong side of the bag sides (I used fabric adhesive spray to
stick mine).
With right
sides together, make the darts.
Attach the
interfacing to the wrong side of the lining.
Make darts in
the lining.
Press the
darts.
Step 4: Making the frame channels
Attach the
interfacing to the wrong side of the frame channels.
With right
sides together, sew the short ends together.
Turn right sides out and press so that the seam is in the middle. Do
this for both frame channels.
Step 5: Attaching the frame channel
Fold the
frame channels so that the long raw edges meet. The seam needs to be facing away from the bag fabric so that it will not be visible when sewn up.
![]() |
| When the channel is folded up, the seam is inside and so won't be visible on the finished bag. |
Sew the frame channel to the top edge of the outer bag and the lining. I found it easier to do this in 2 stages by
sewing it first to the right side of the outer bag and then with right sides
together, sewing it to the lining so that it is sandwiched between the right
sides of the outer bag and lining.
Press.
Step 6: Assembling the bag
![]() |
| Here, one dart faces down and the other faces up to prevent too much bulk. |
Pin the right
sides of the outer bag together and do the same for the lining, matching the stitch line for the darts. Fold the darts so that one faces one way and one faces the other to reduce bulk and create a 'nesting' effect.
Make sure the
hinge marks are clearly visible (mine aren't in the photo).
Sew from the
hinge marks on one side of the outer bag, down towards the bottom of the bag
and back up the other side of the outer bag, stopping at the other hinge
mark. Do not sew above the hinge mark at
this stage.
Do the same
for the lining, leaving a gap of about 4”/10 cm for turning at the base.
Now you need
to create the purse-type opening. Pull
the channels out so that the lining/outer fabric meet, right sides still
together. Sew from the frame channel to
the hinge mark, making sure not to sew over the frame channel (or you won’t be
able to insert the bag handle). Do this at both ends of the frame channels on
both sides of the bag.
It can be a
bit tricky to get the join right between this stitching and the side seams, so
turn it through and check that you are happy with it before finishing the bag.
Turn through
and sew up the opening in the lining. Press.
Slide the bag
handles through the channels.
Your bag is
now finished just in time for the sales. It won't carry all your bargains but you'll have something unique.
In this project I learnt:
- I have used darts in a previous bag. They are easy to do and a simple way of creating that lovely curved shape at the base and sides. I planned to use them more often but then completely forgot about them. I’m so glad I finally remembered them!
- I haven’t used this style of metal frame before but it was certainly useful to have used flex and purse frames before because the top of this bag is a combination of the two. The contrasting frame channel worked really and fitted nicely. I initially forgot about the opening and sewed all round the sides. When I turned it through, I realised immediately that the only opening was between the channels at the top. Not much point having a hinged opening if you’re going to sew it closed! I had to unpick the stitches and instead of sewing outer fabric to outer fabric at the top of the bag, I sewed outer fabric to corresponding lining. When I turned it through, it fitted the frame perfectly but I had a hole at each of the hinges where I hadn’t sewn right up to the side seam. I had to turn it back and sew up the hole. Hopefully I won’t make this mistake again.
- I don’t press my fabric enough and that’s why I forget to include it in the instructions. This time I remembered! I’m sure the final bag is better for it.
Subscribe to:
Posts (Atom)